How it works ?
Learn how to apply, remove, and reuse your Roxy Nails Paris press-on nails.
Installation with Gel Pads
Video tutorial

Step details
-
Step 1: Wash your hands
Wash your hands well, paying particular attention to your nails. The goal is to remove all traces of oil and work on a clean nail base.
-
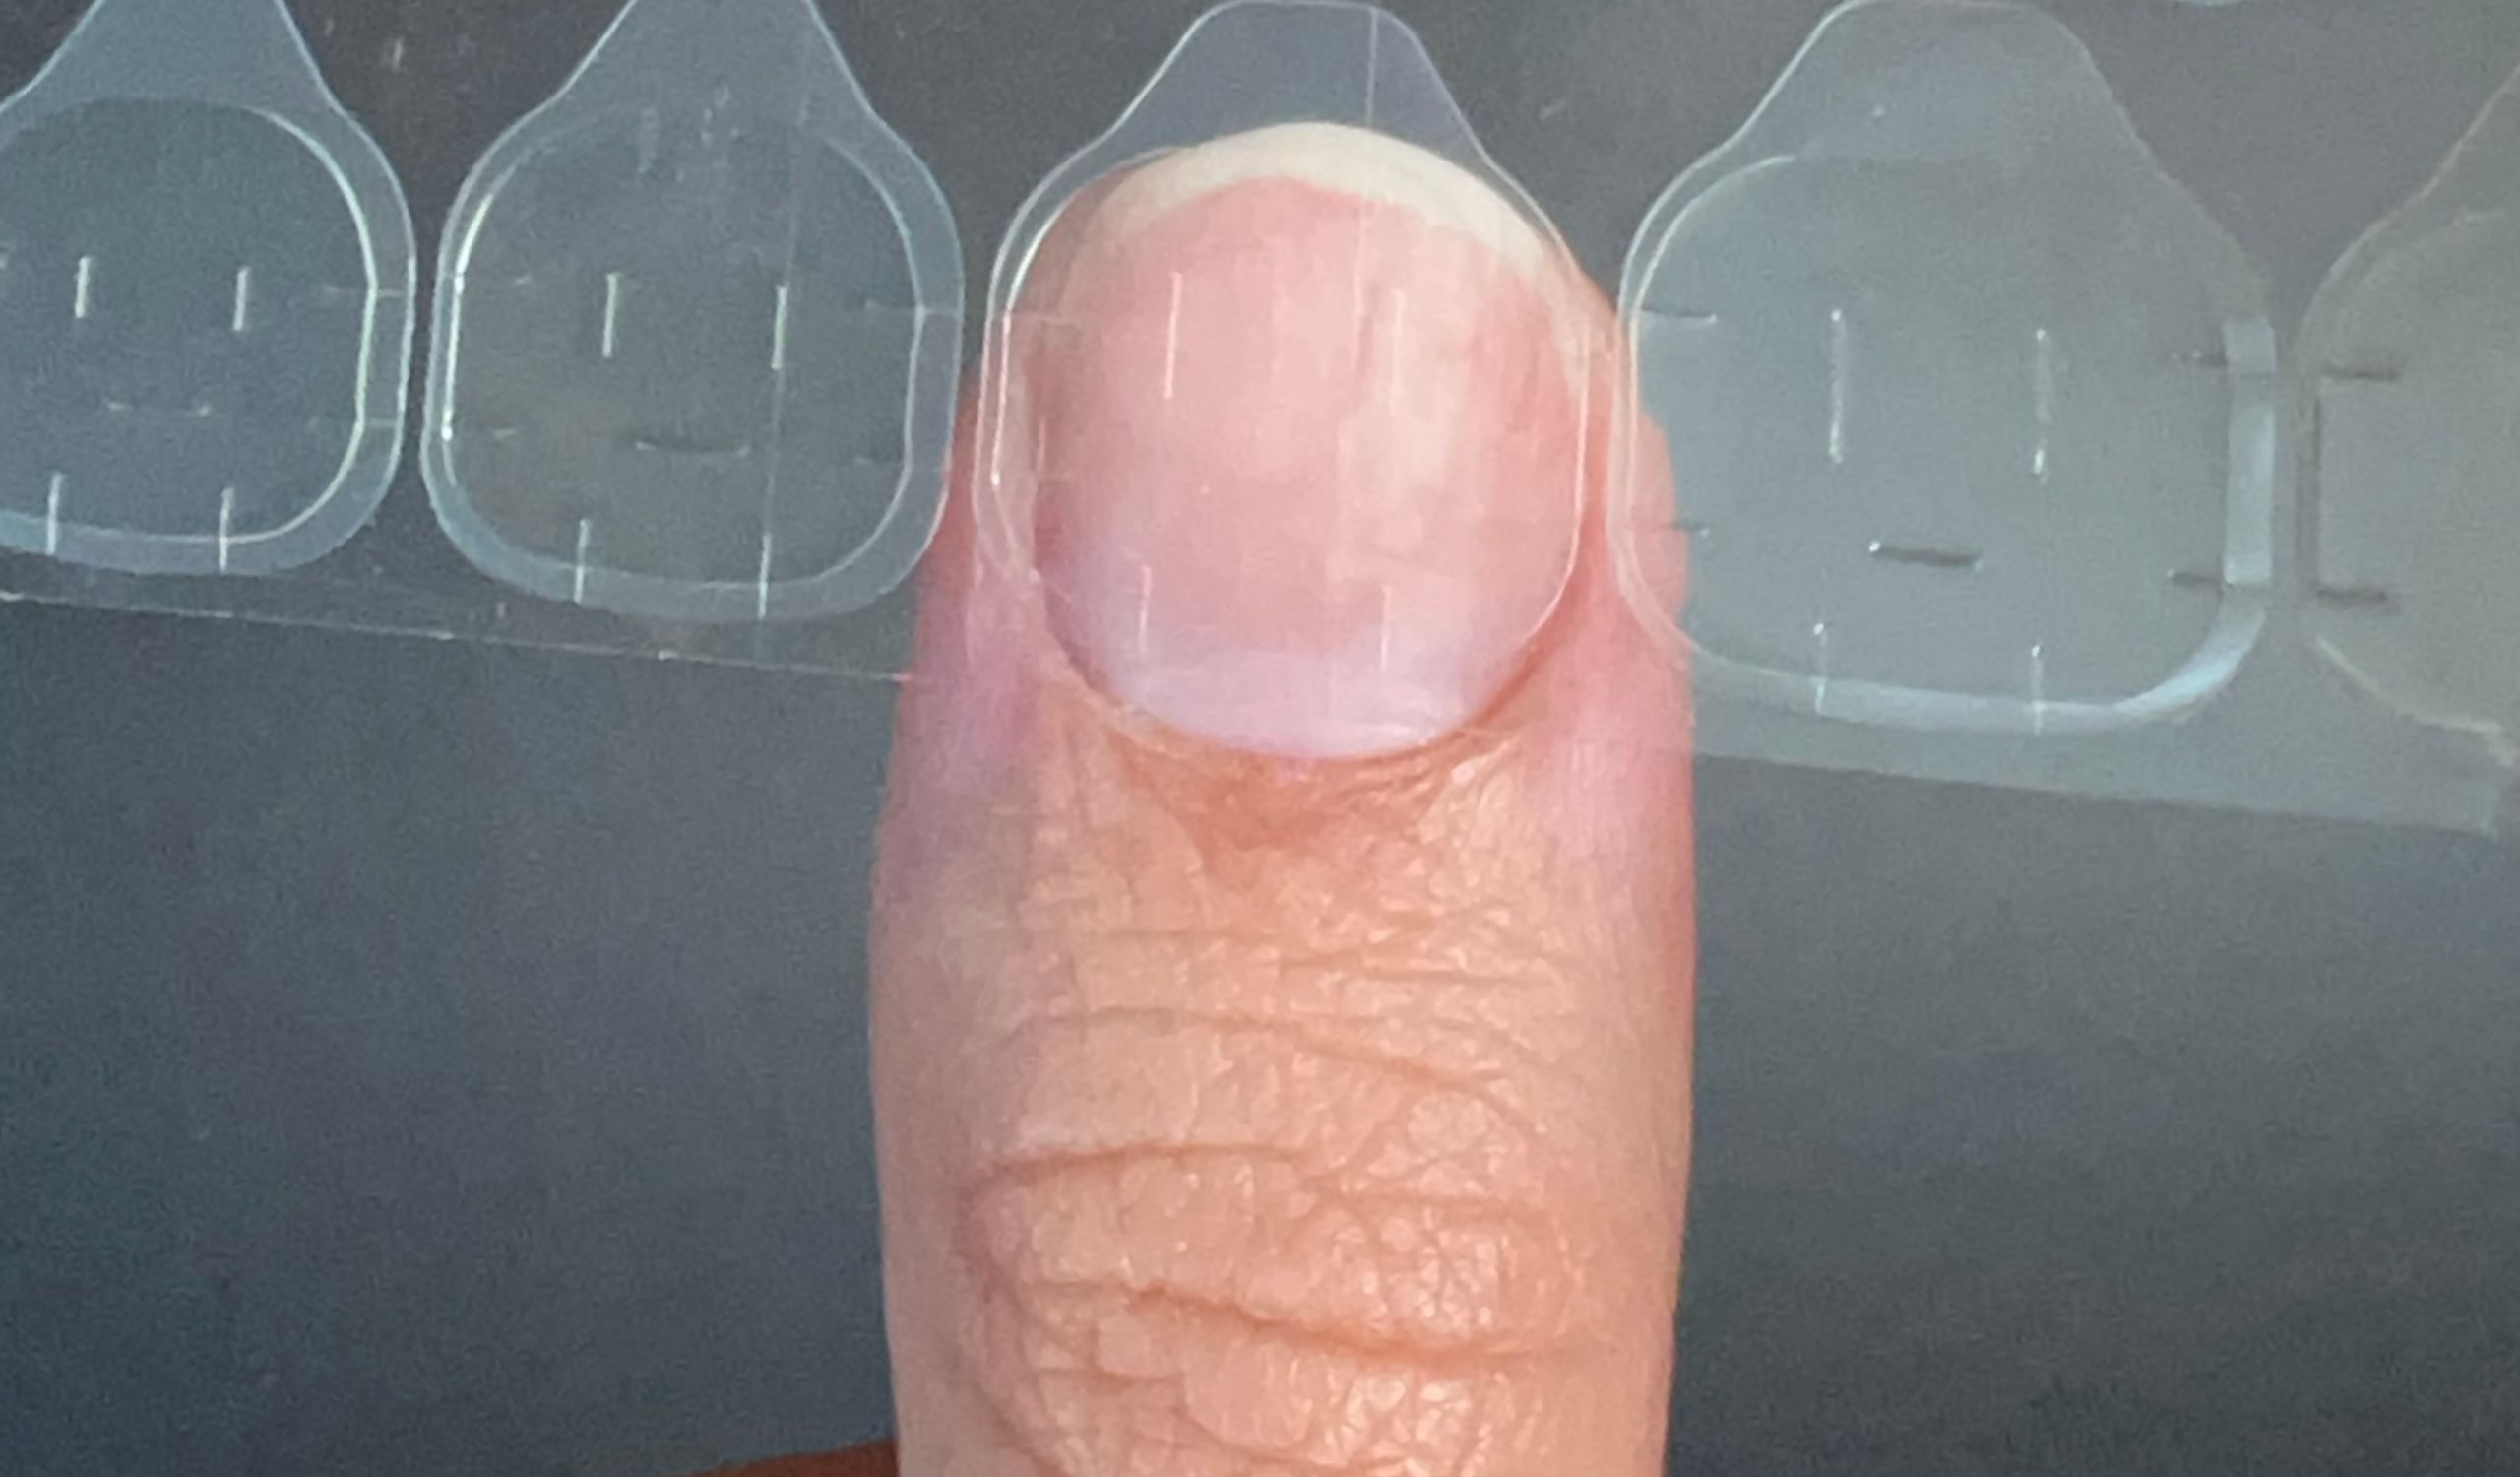
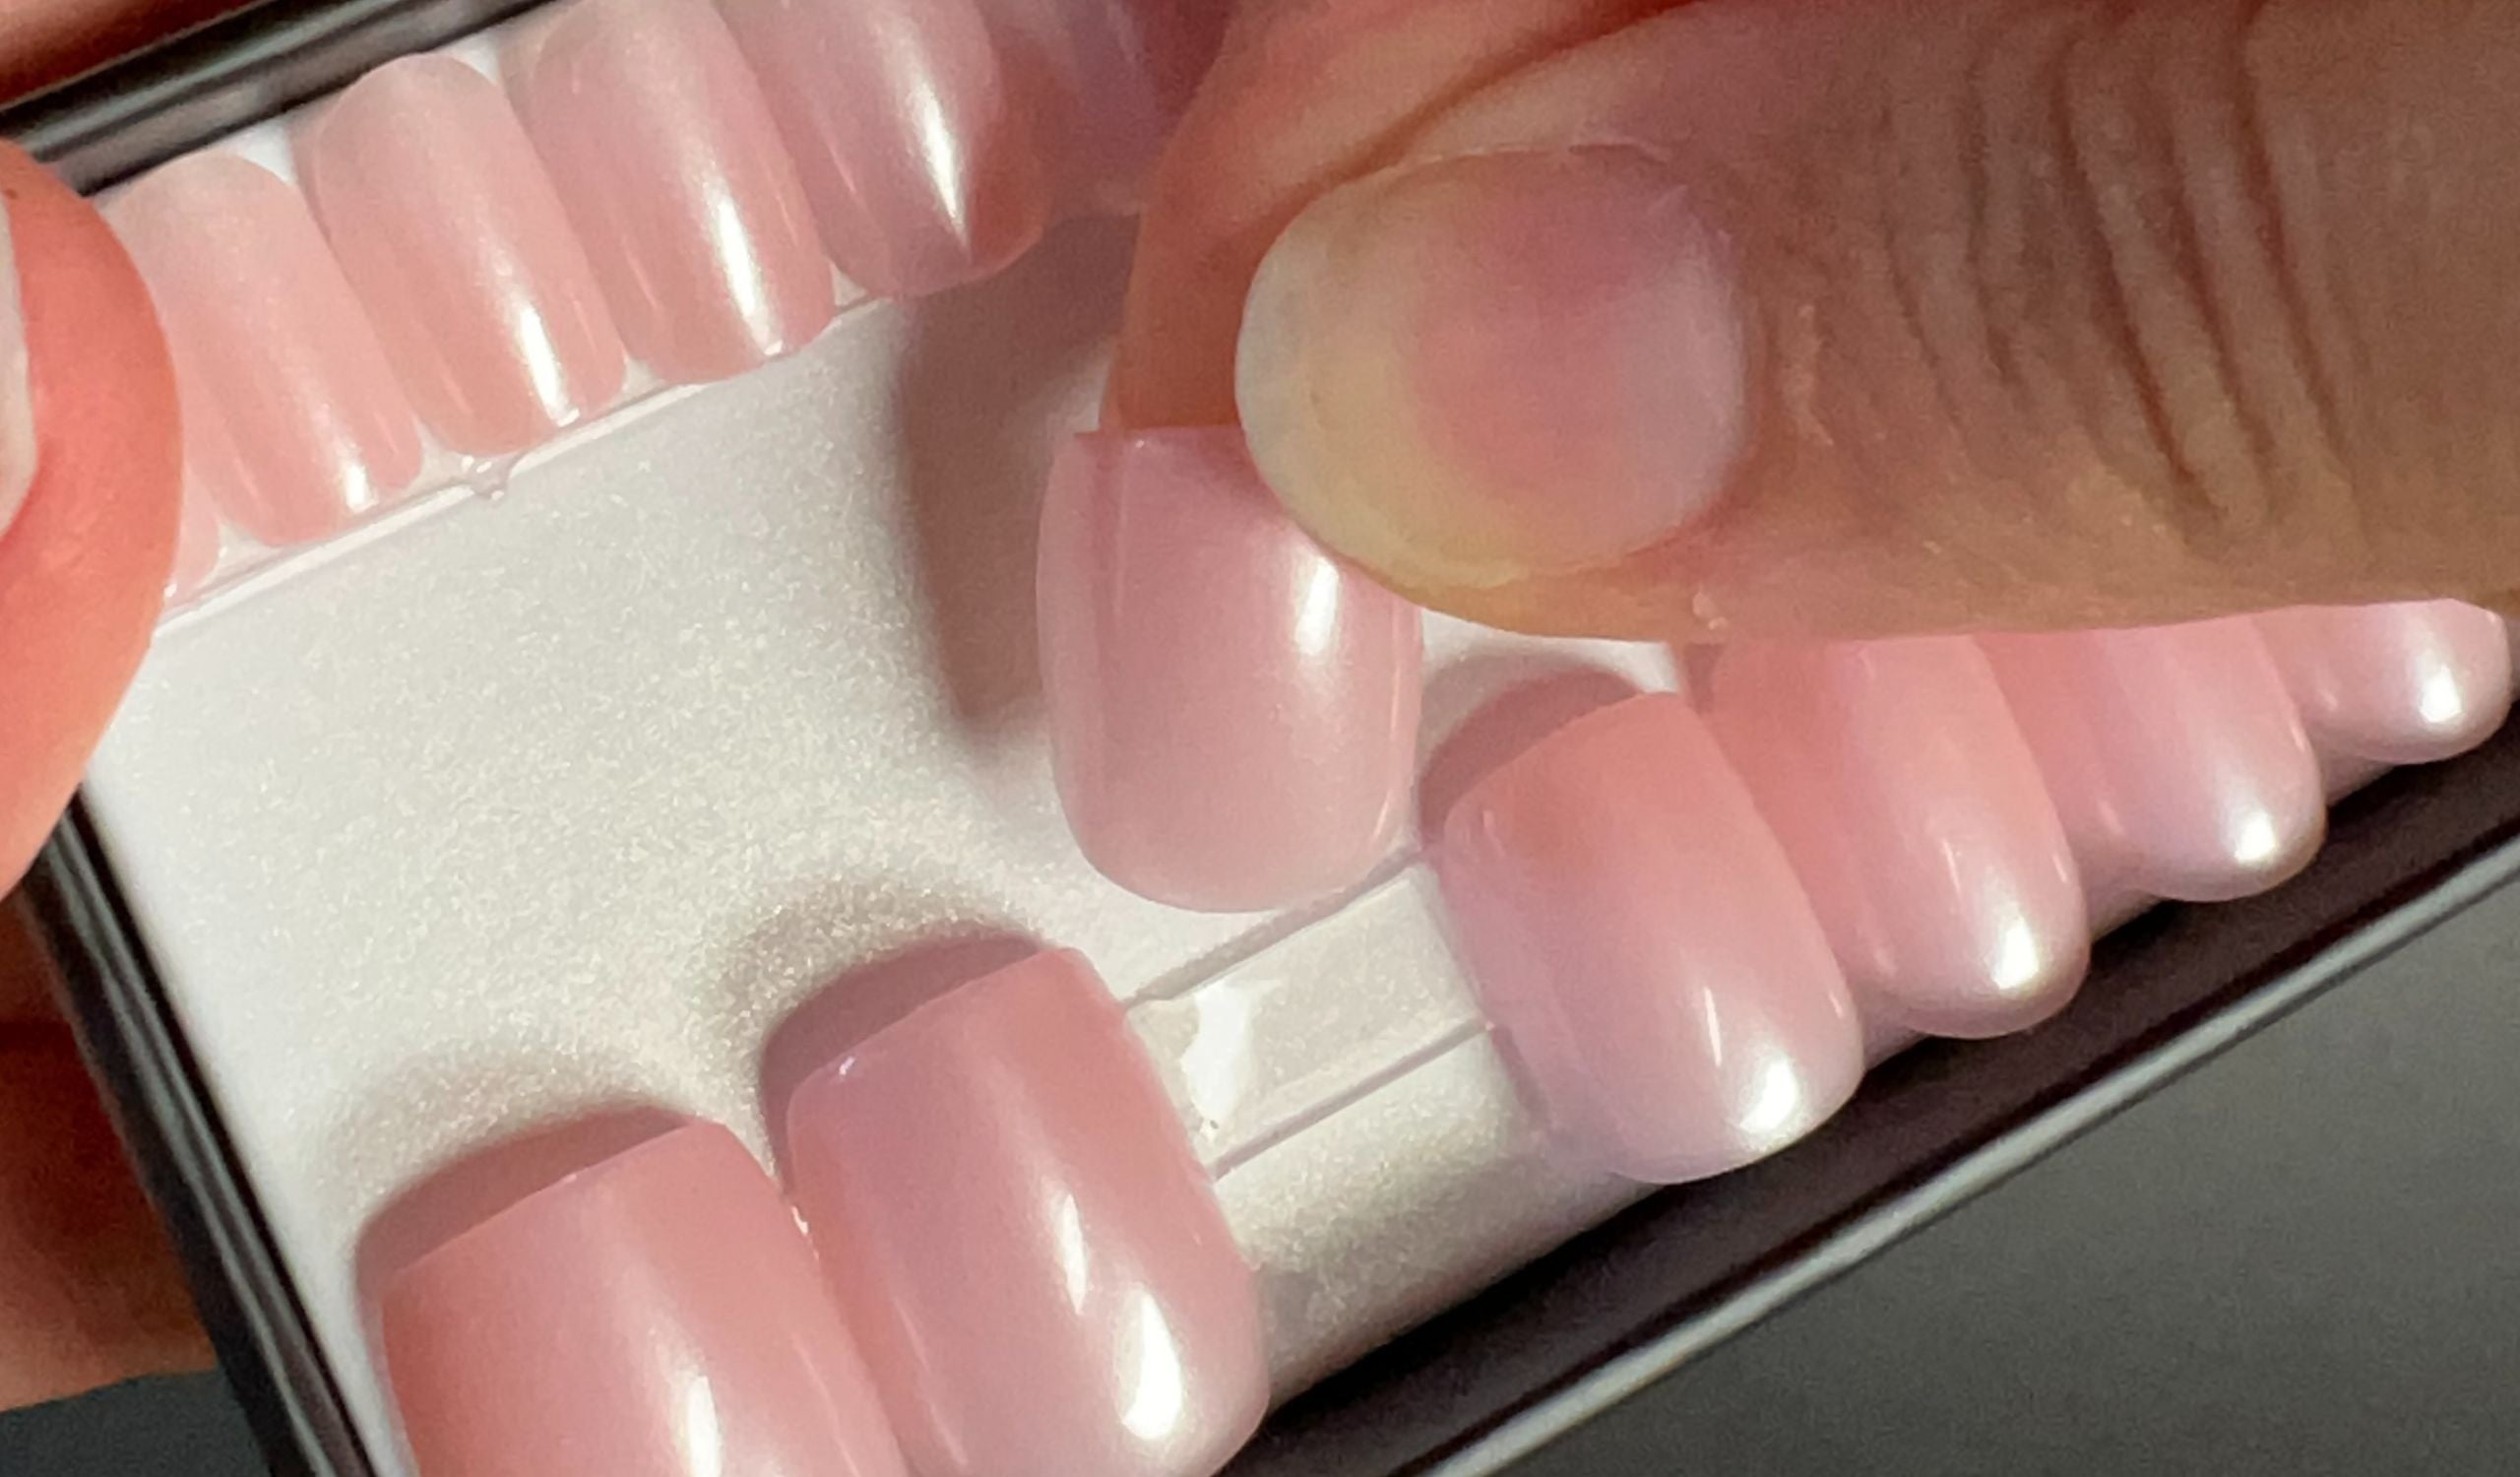
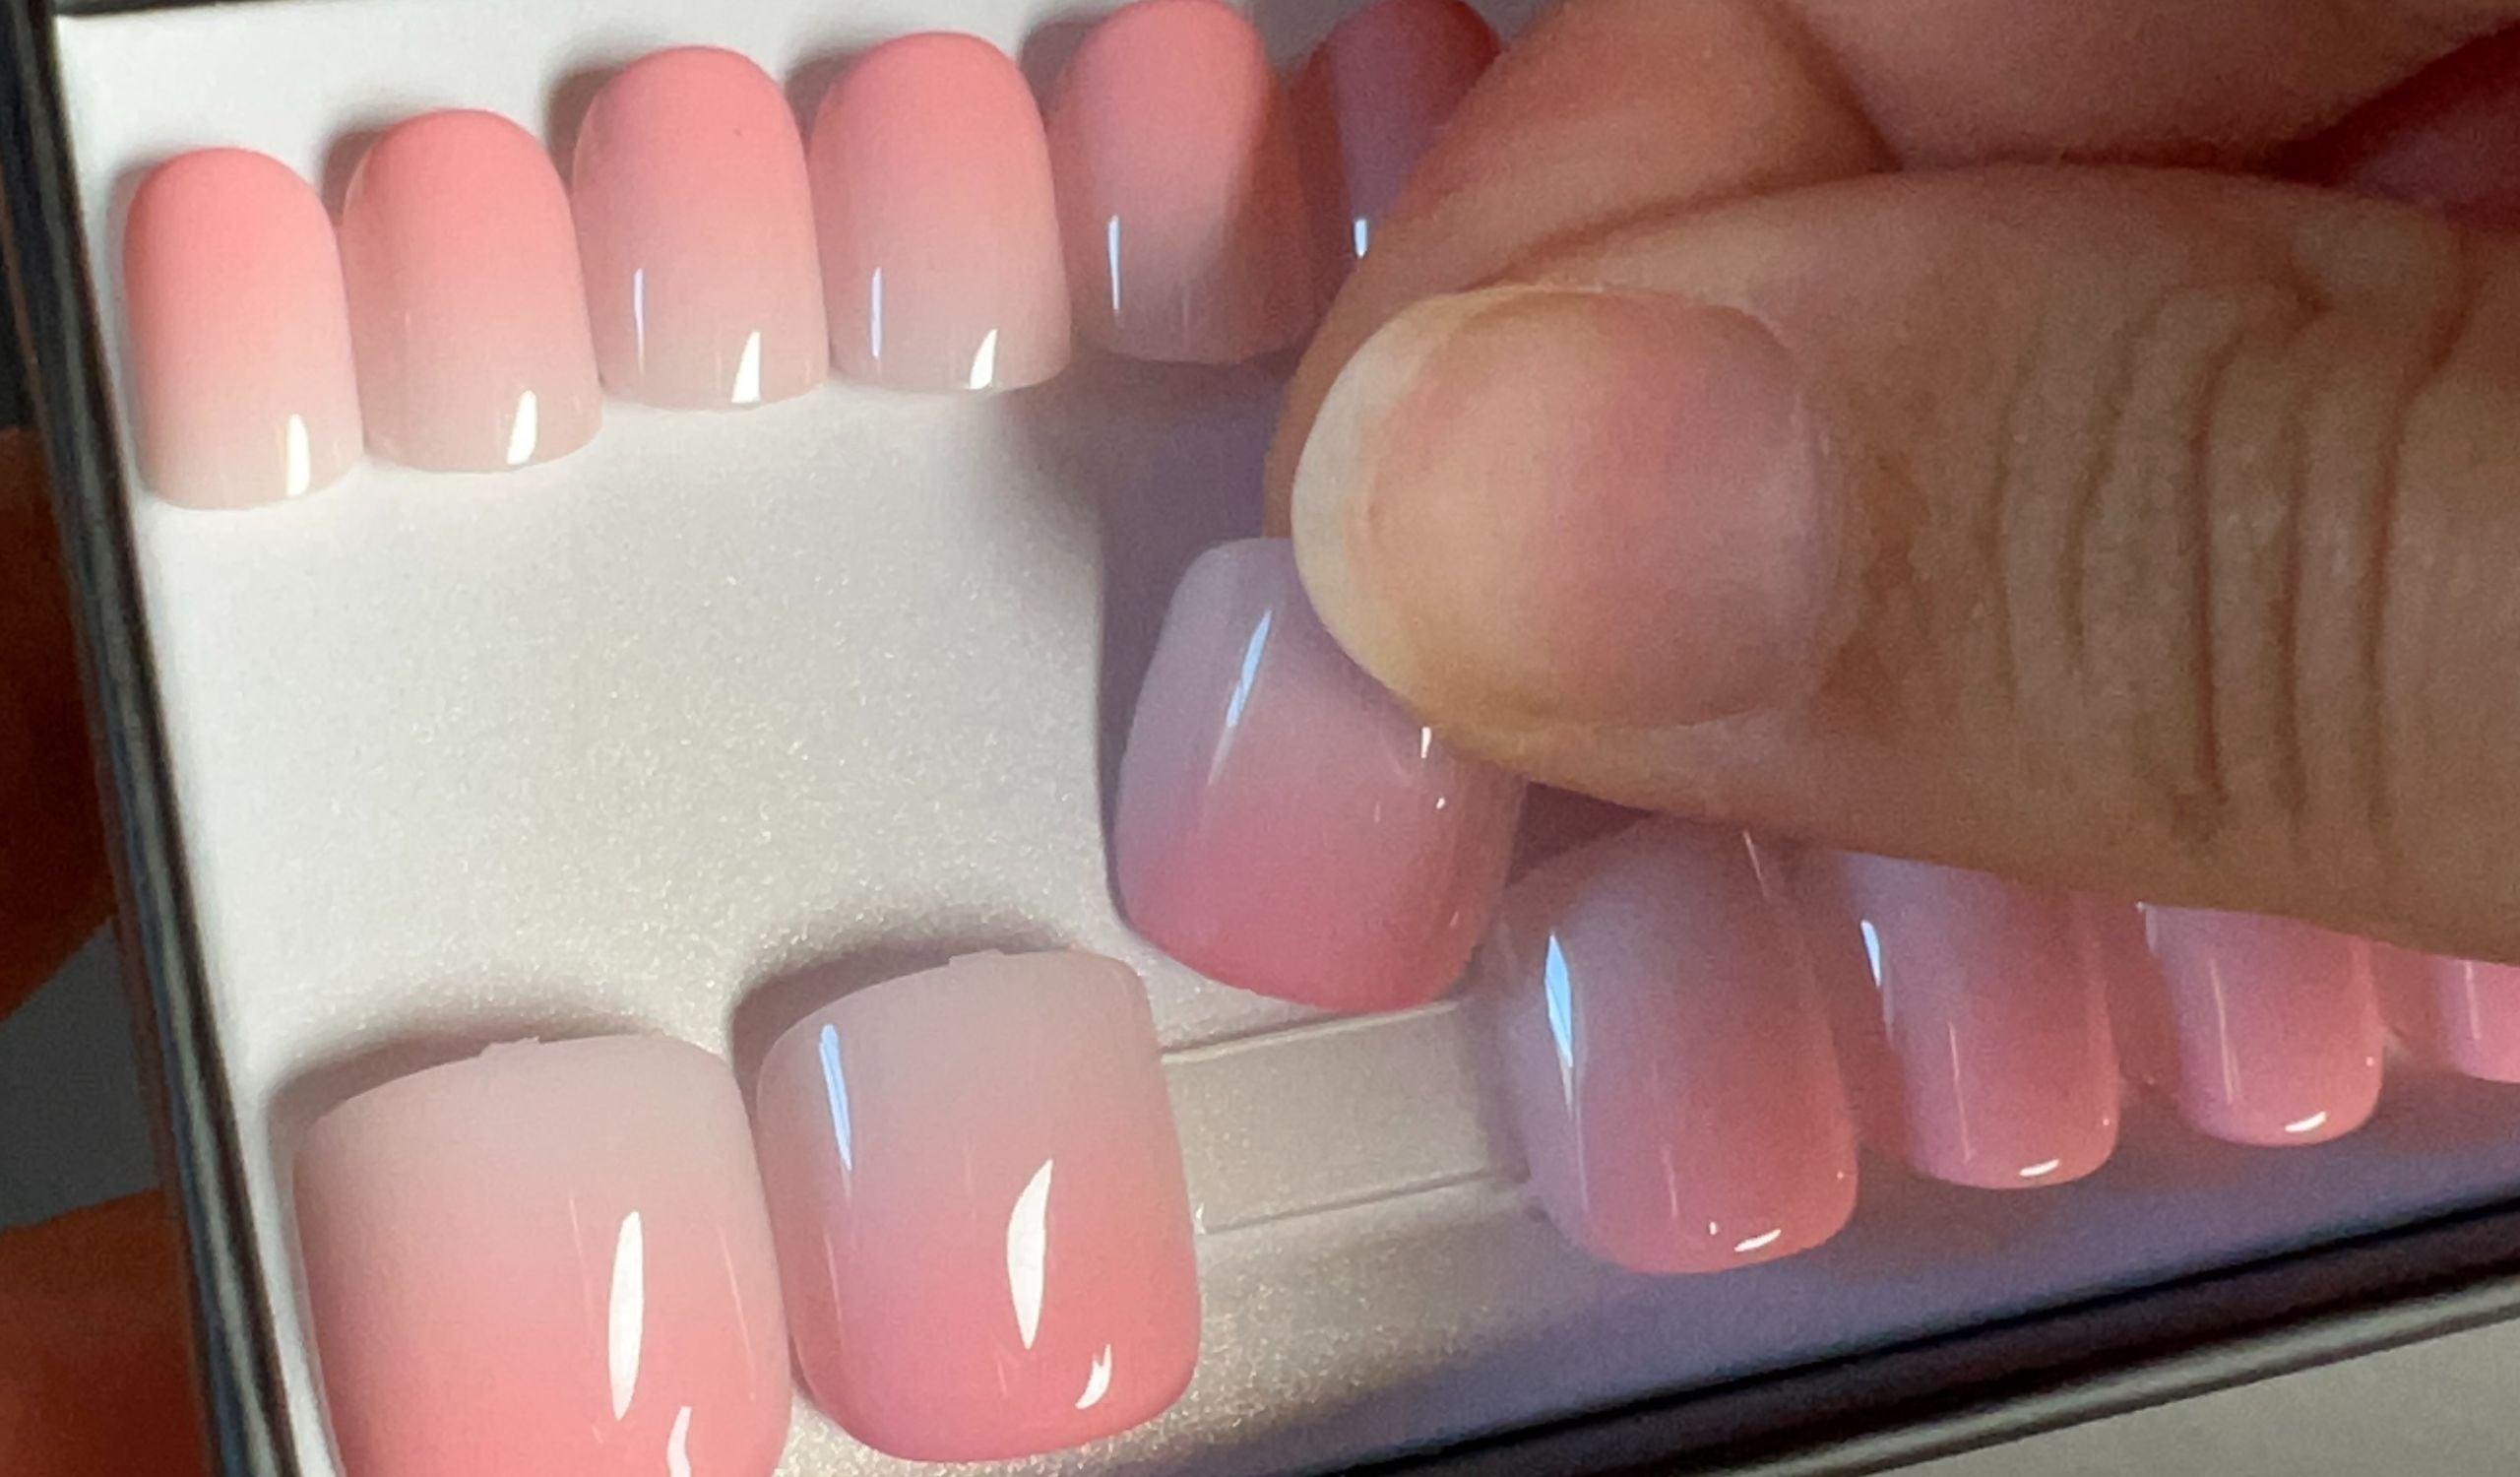
Step 2: Choose the right capsules
Select the capsules corresponding to the size of each of your fingers. Press the capsule on your nail to check that the edges of the capsule coincide with those of your nail.
-
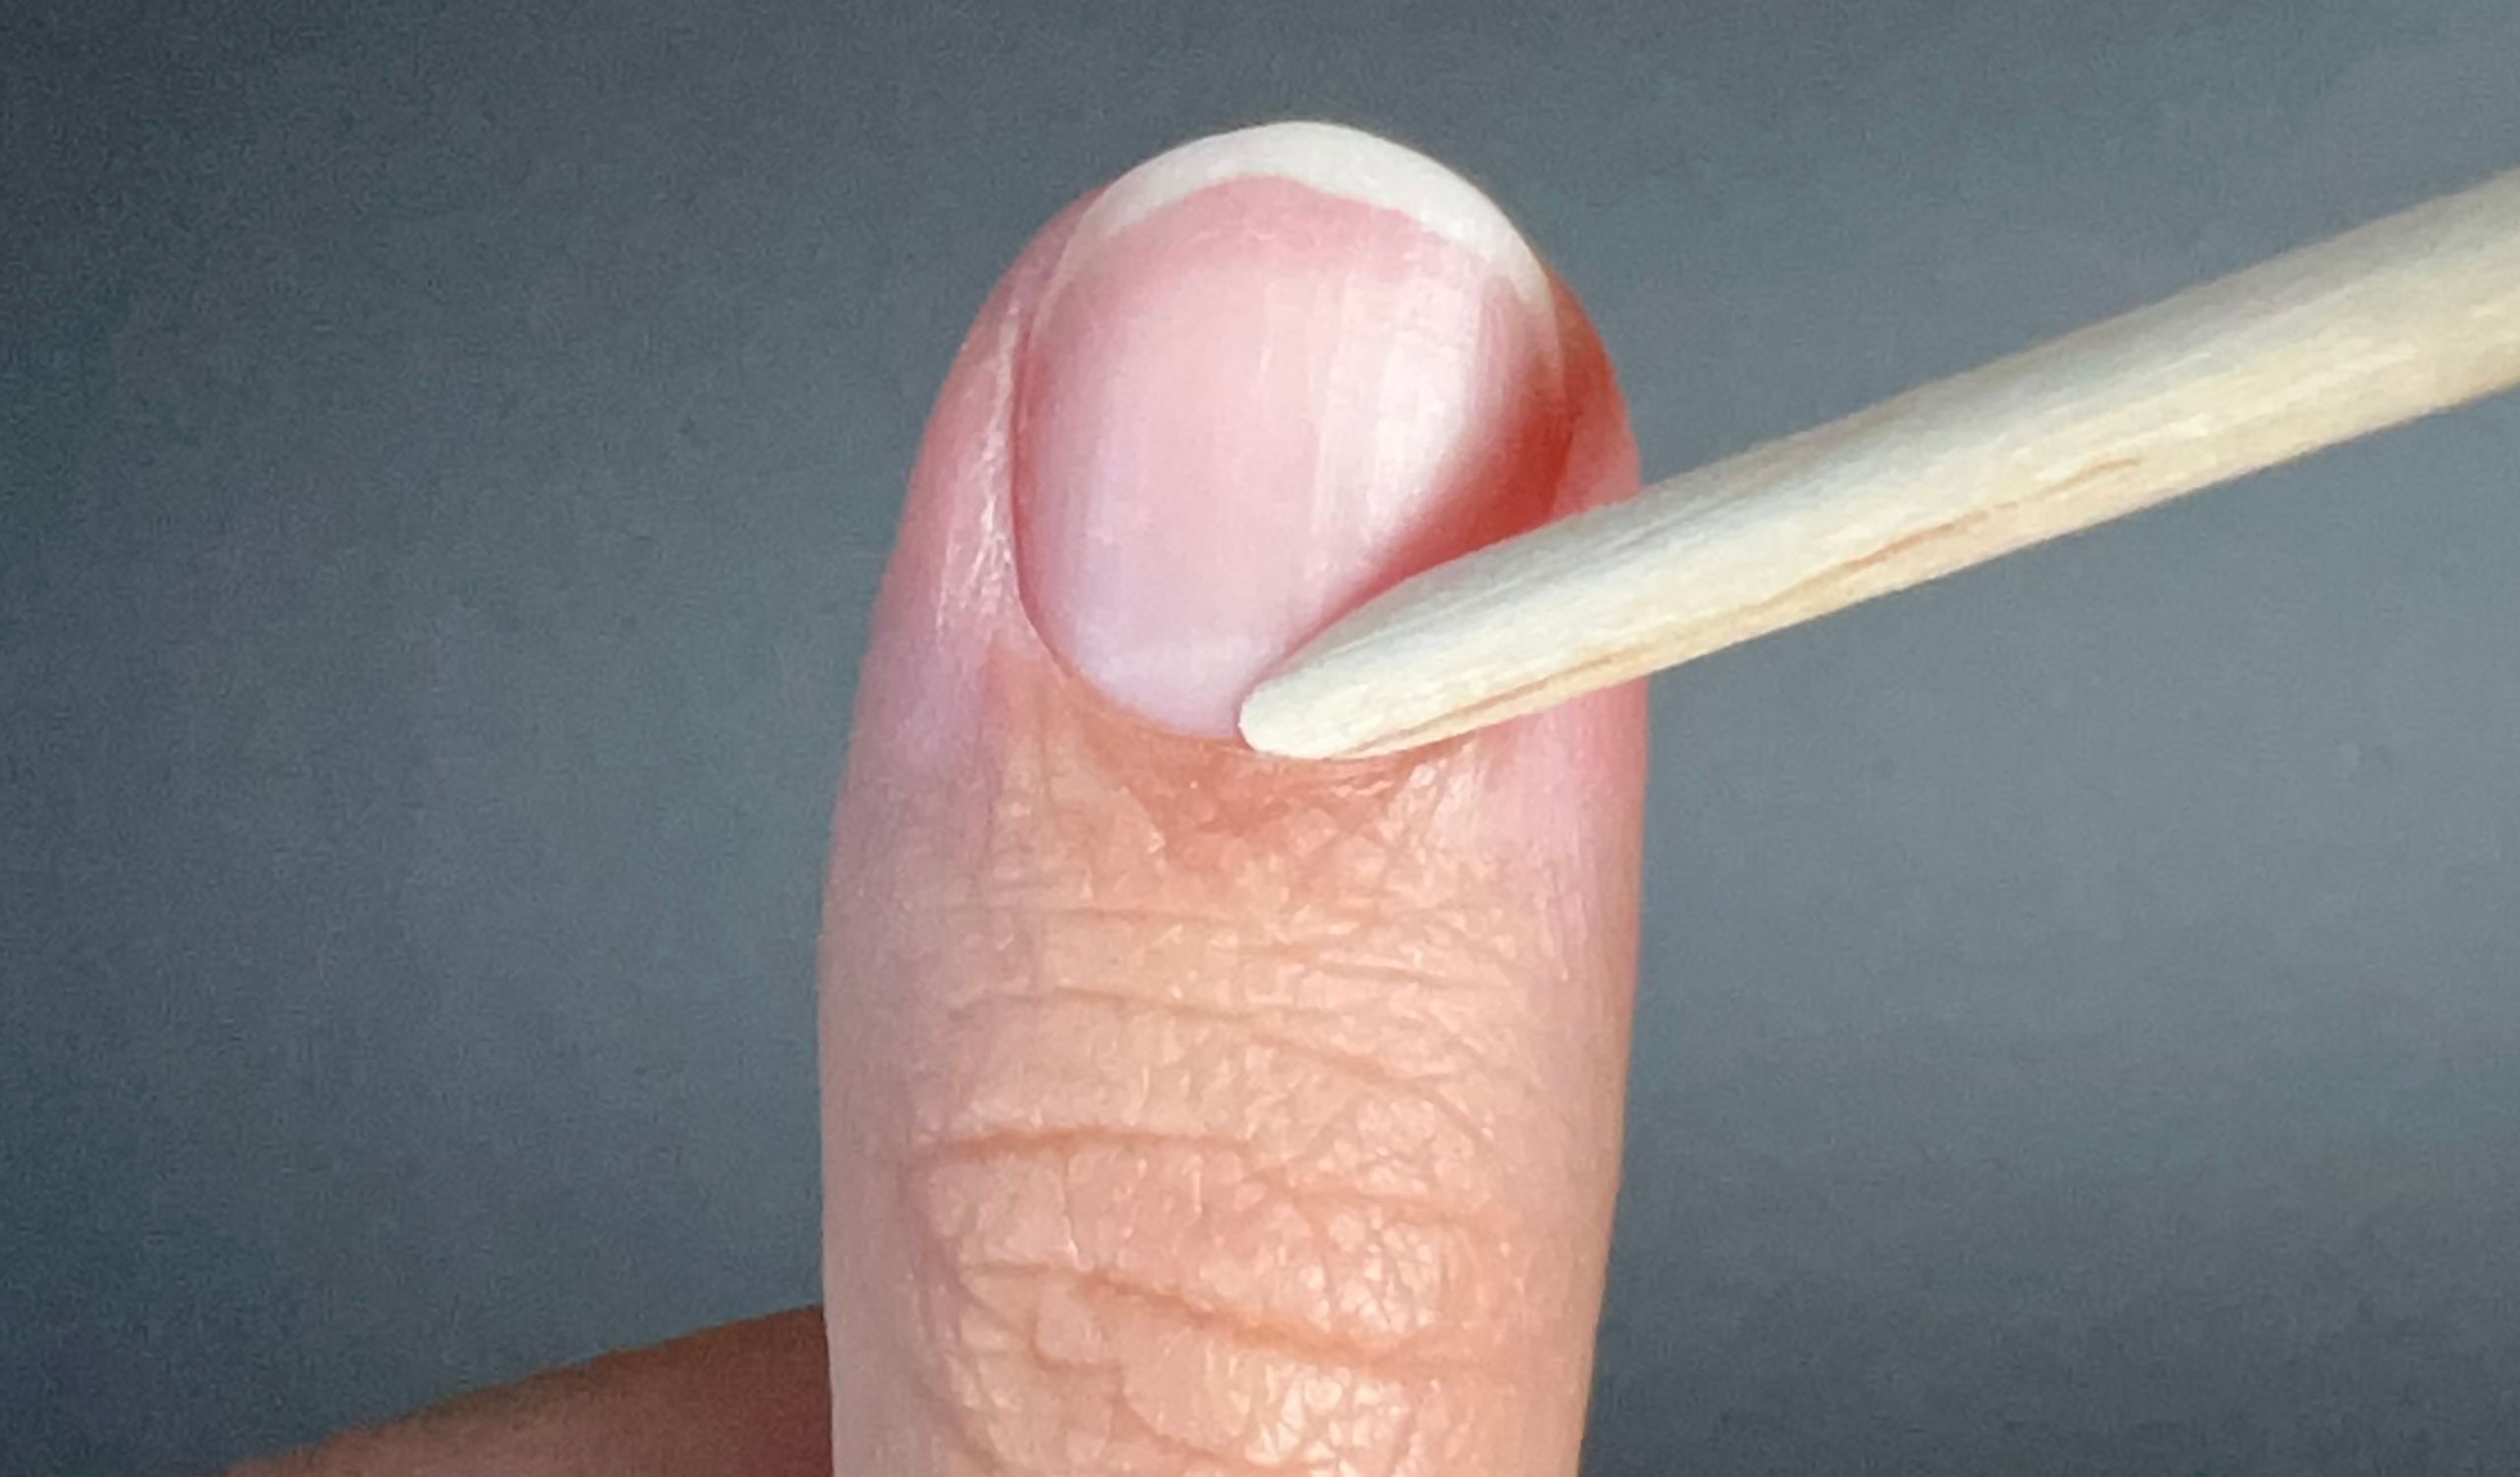
Step 3: Push back your cuticles
Using the flat side of the stick provided in the kit, gently push back your cuticles. The goal is to keep them away and especially to remove them if they are attached to the nail.
-
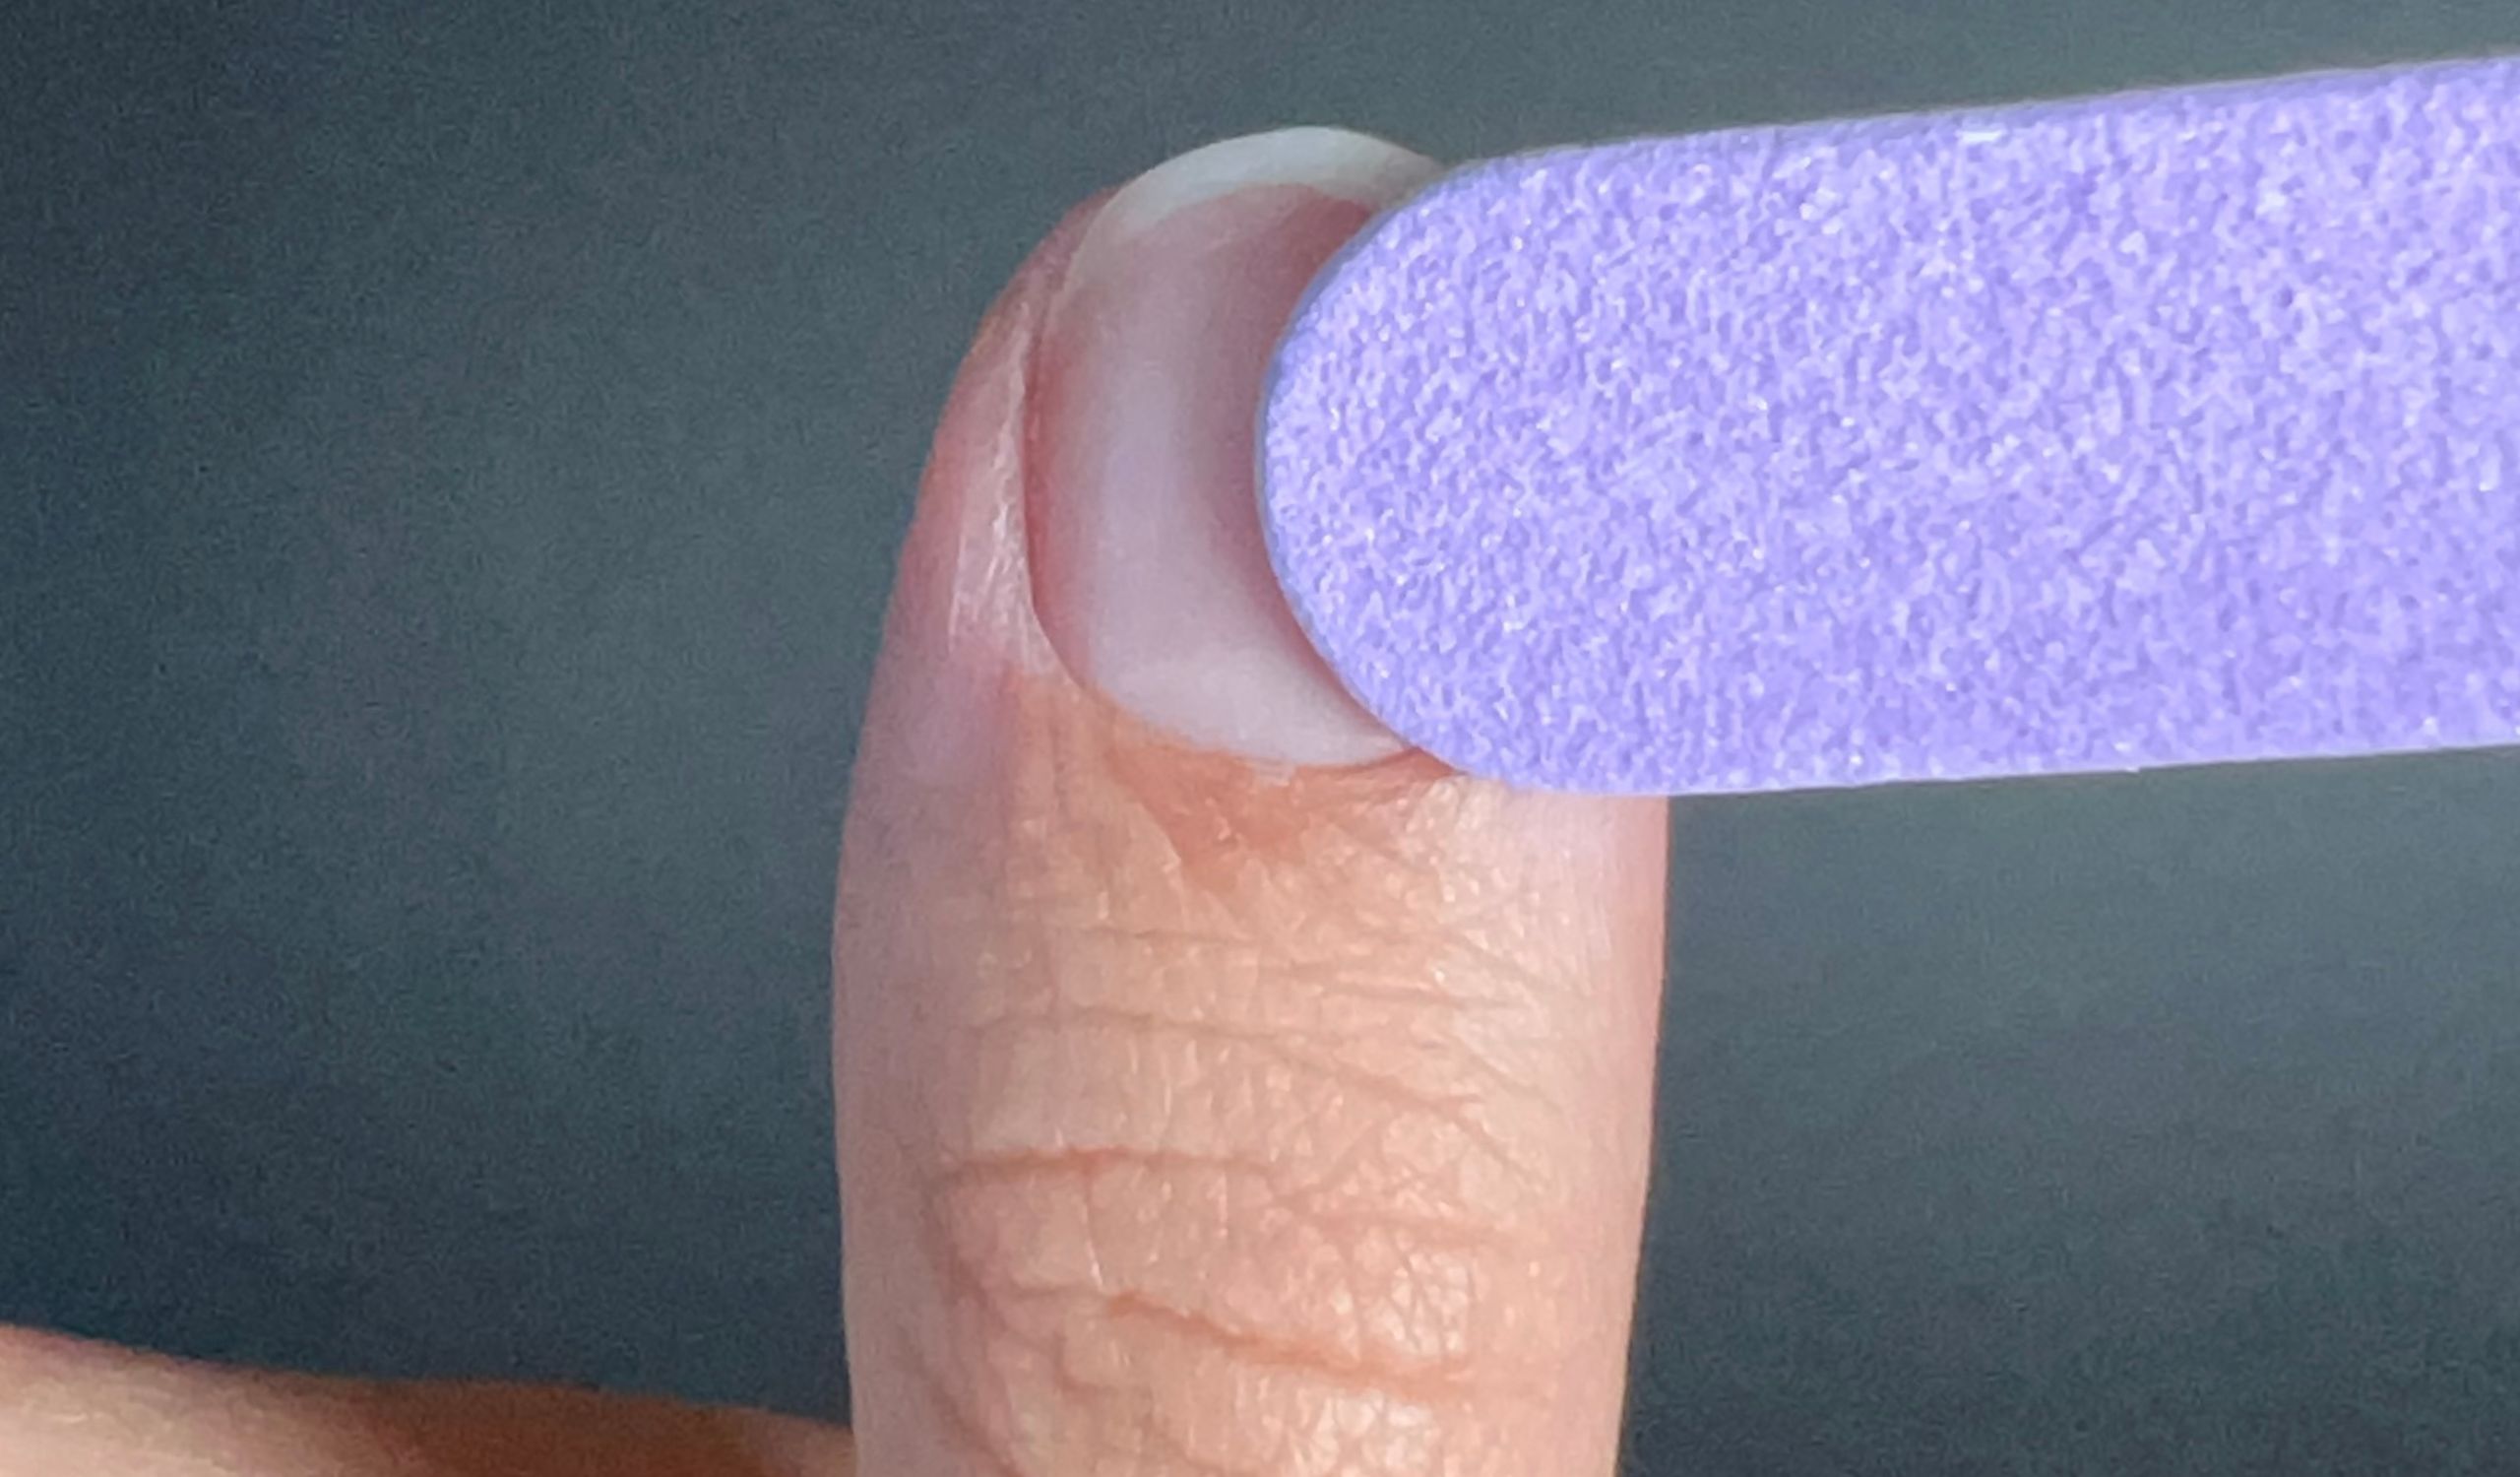
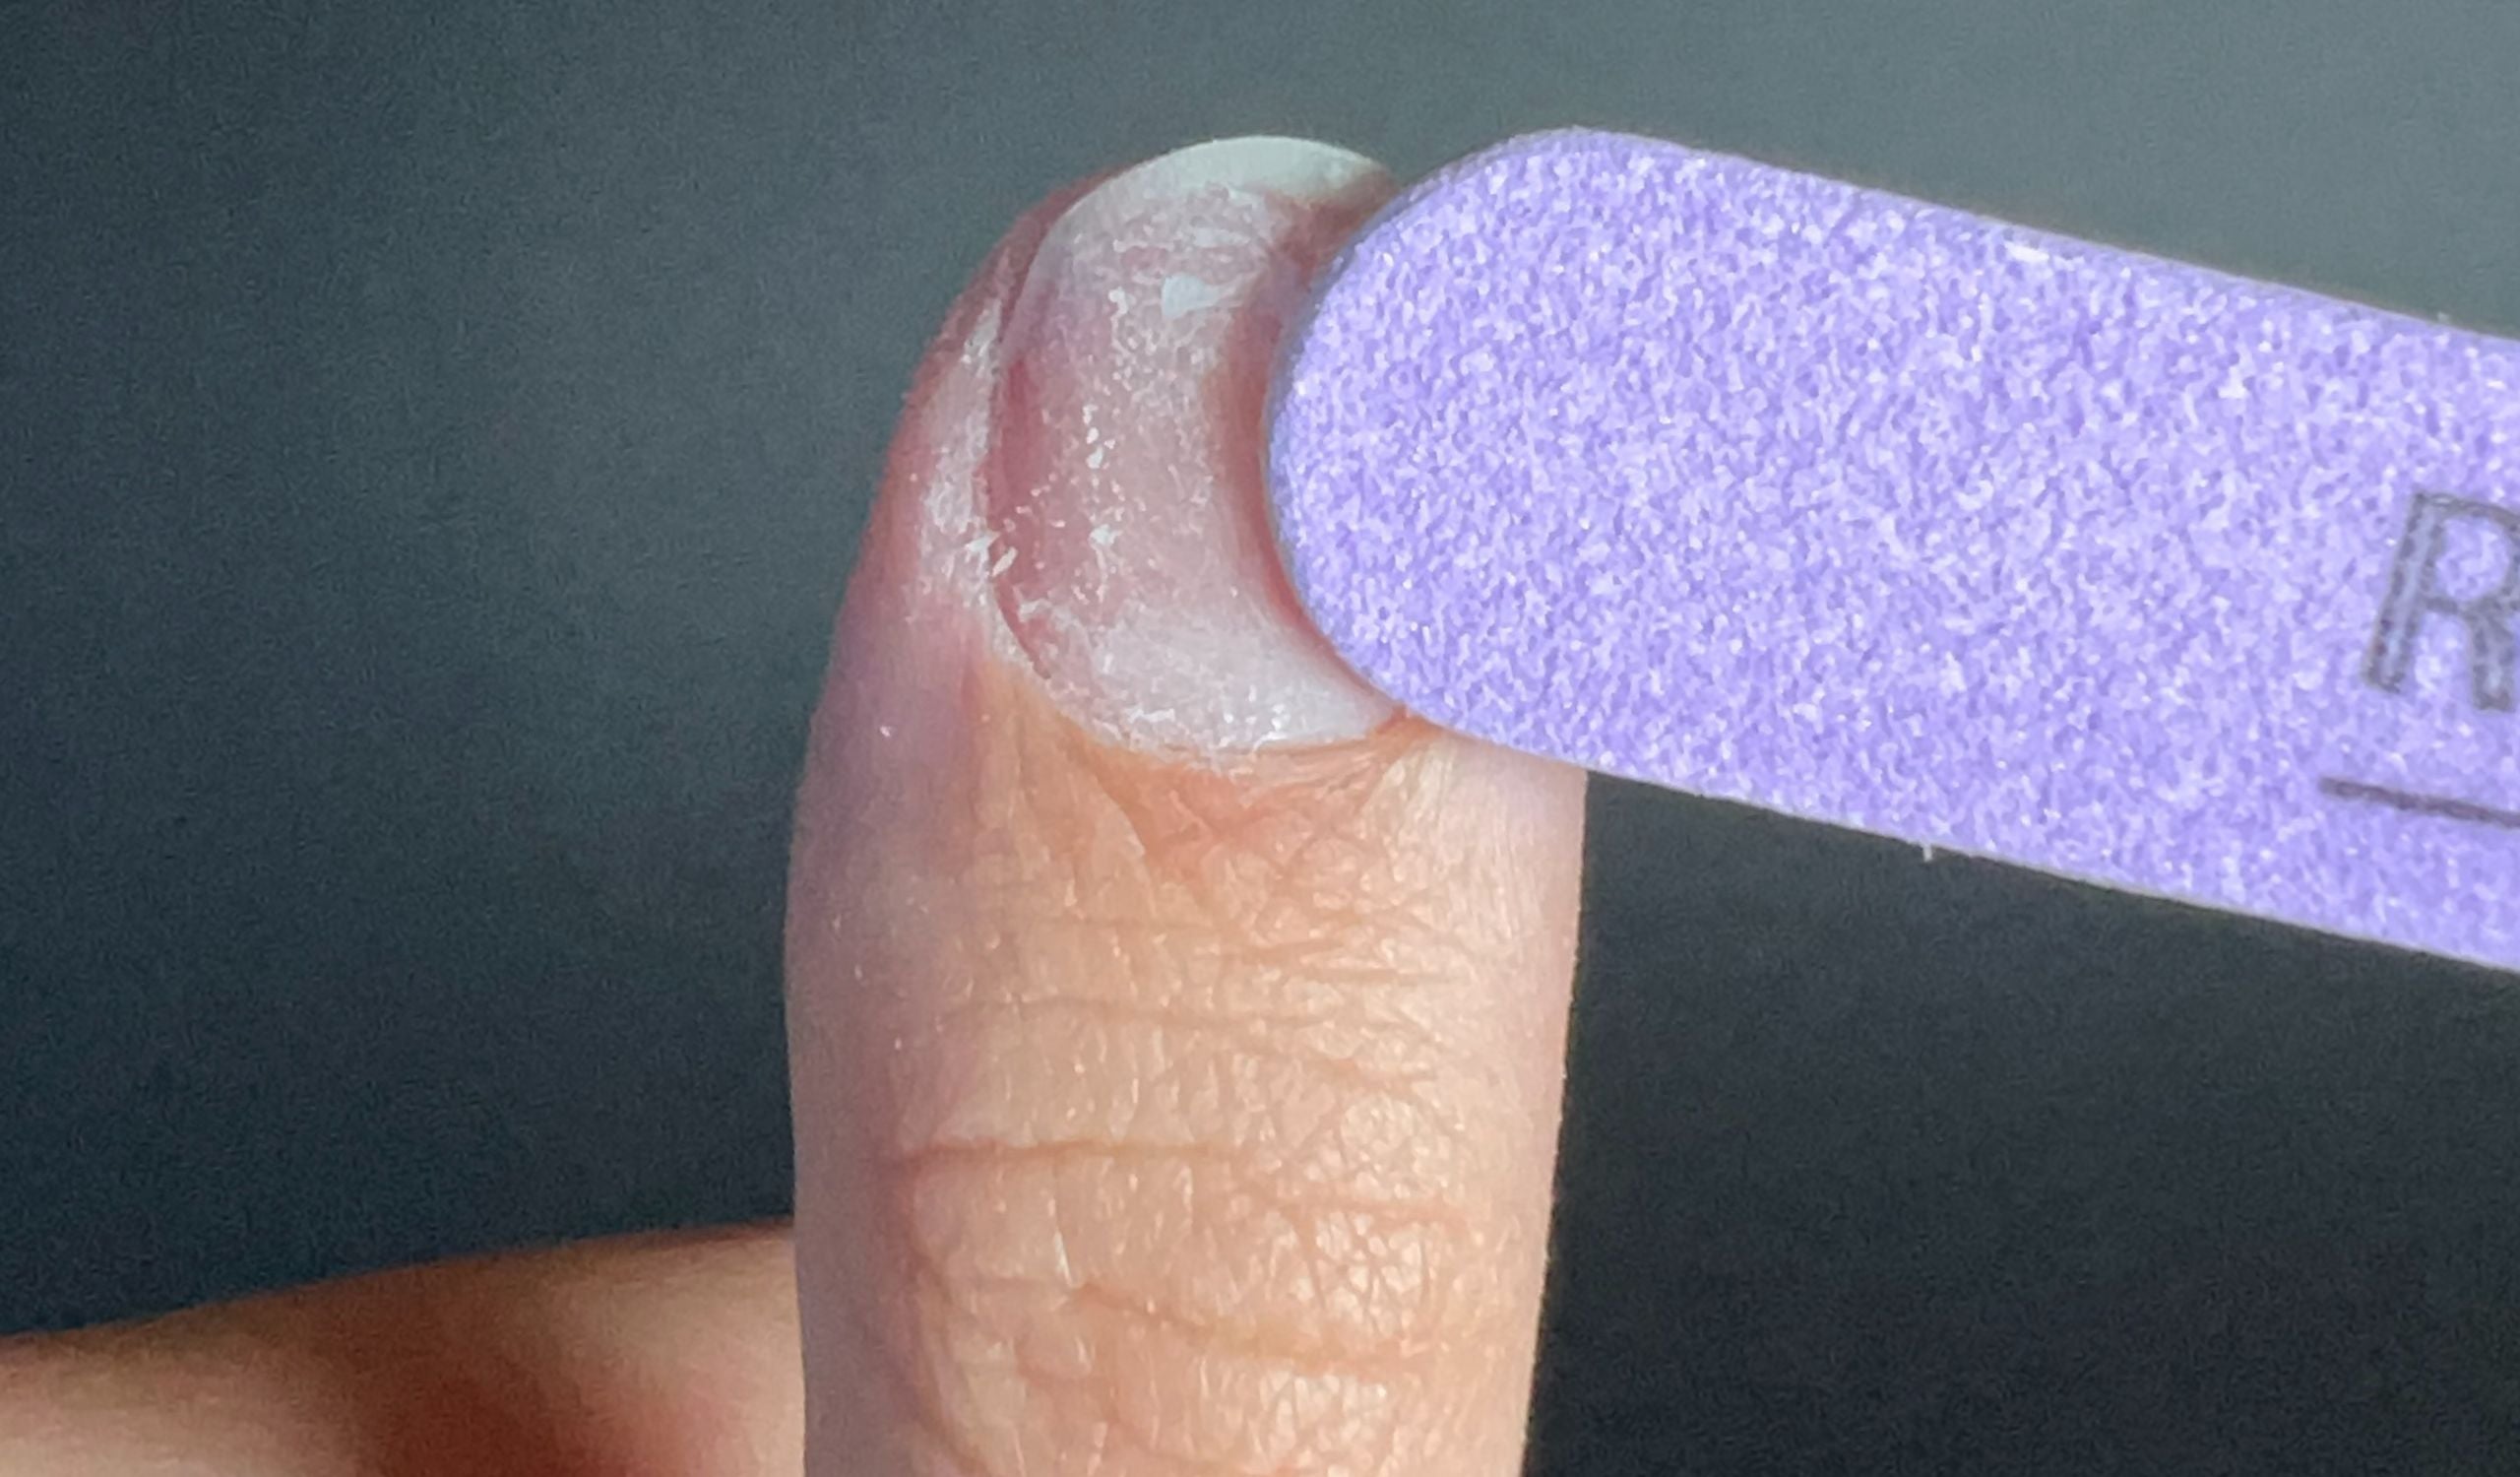
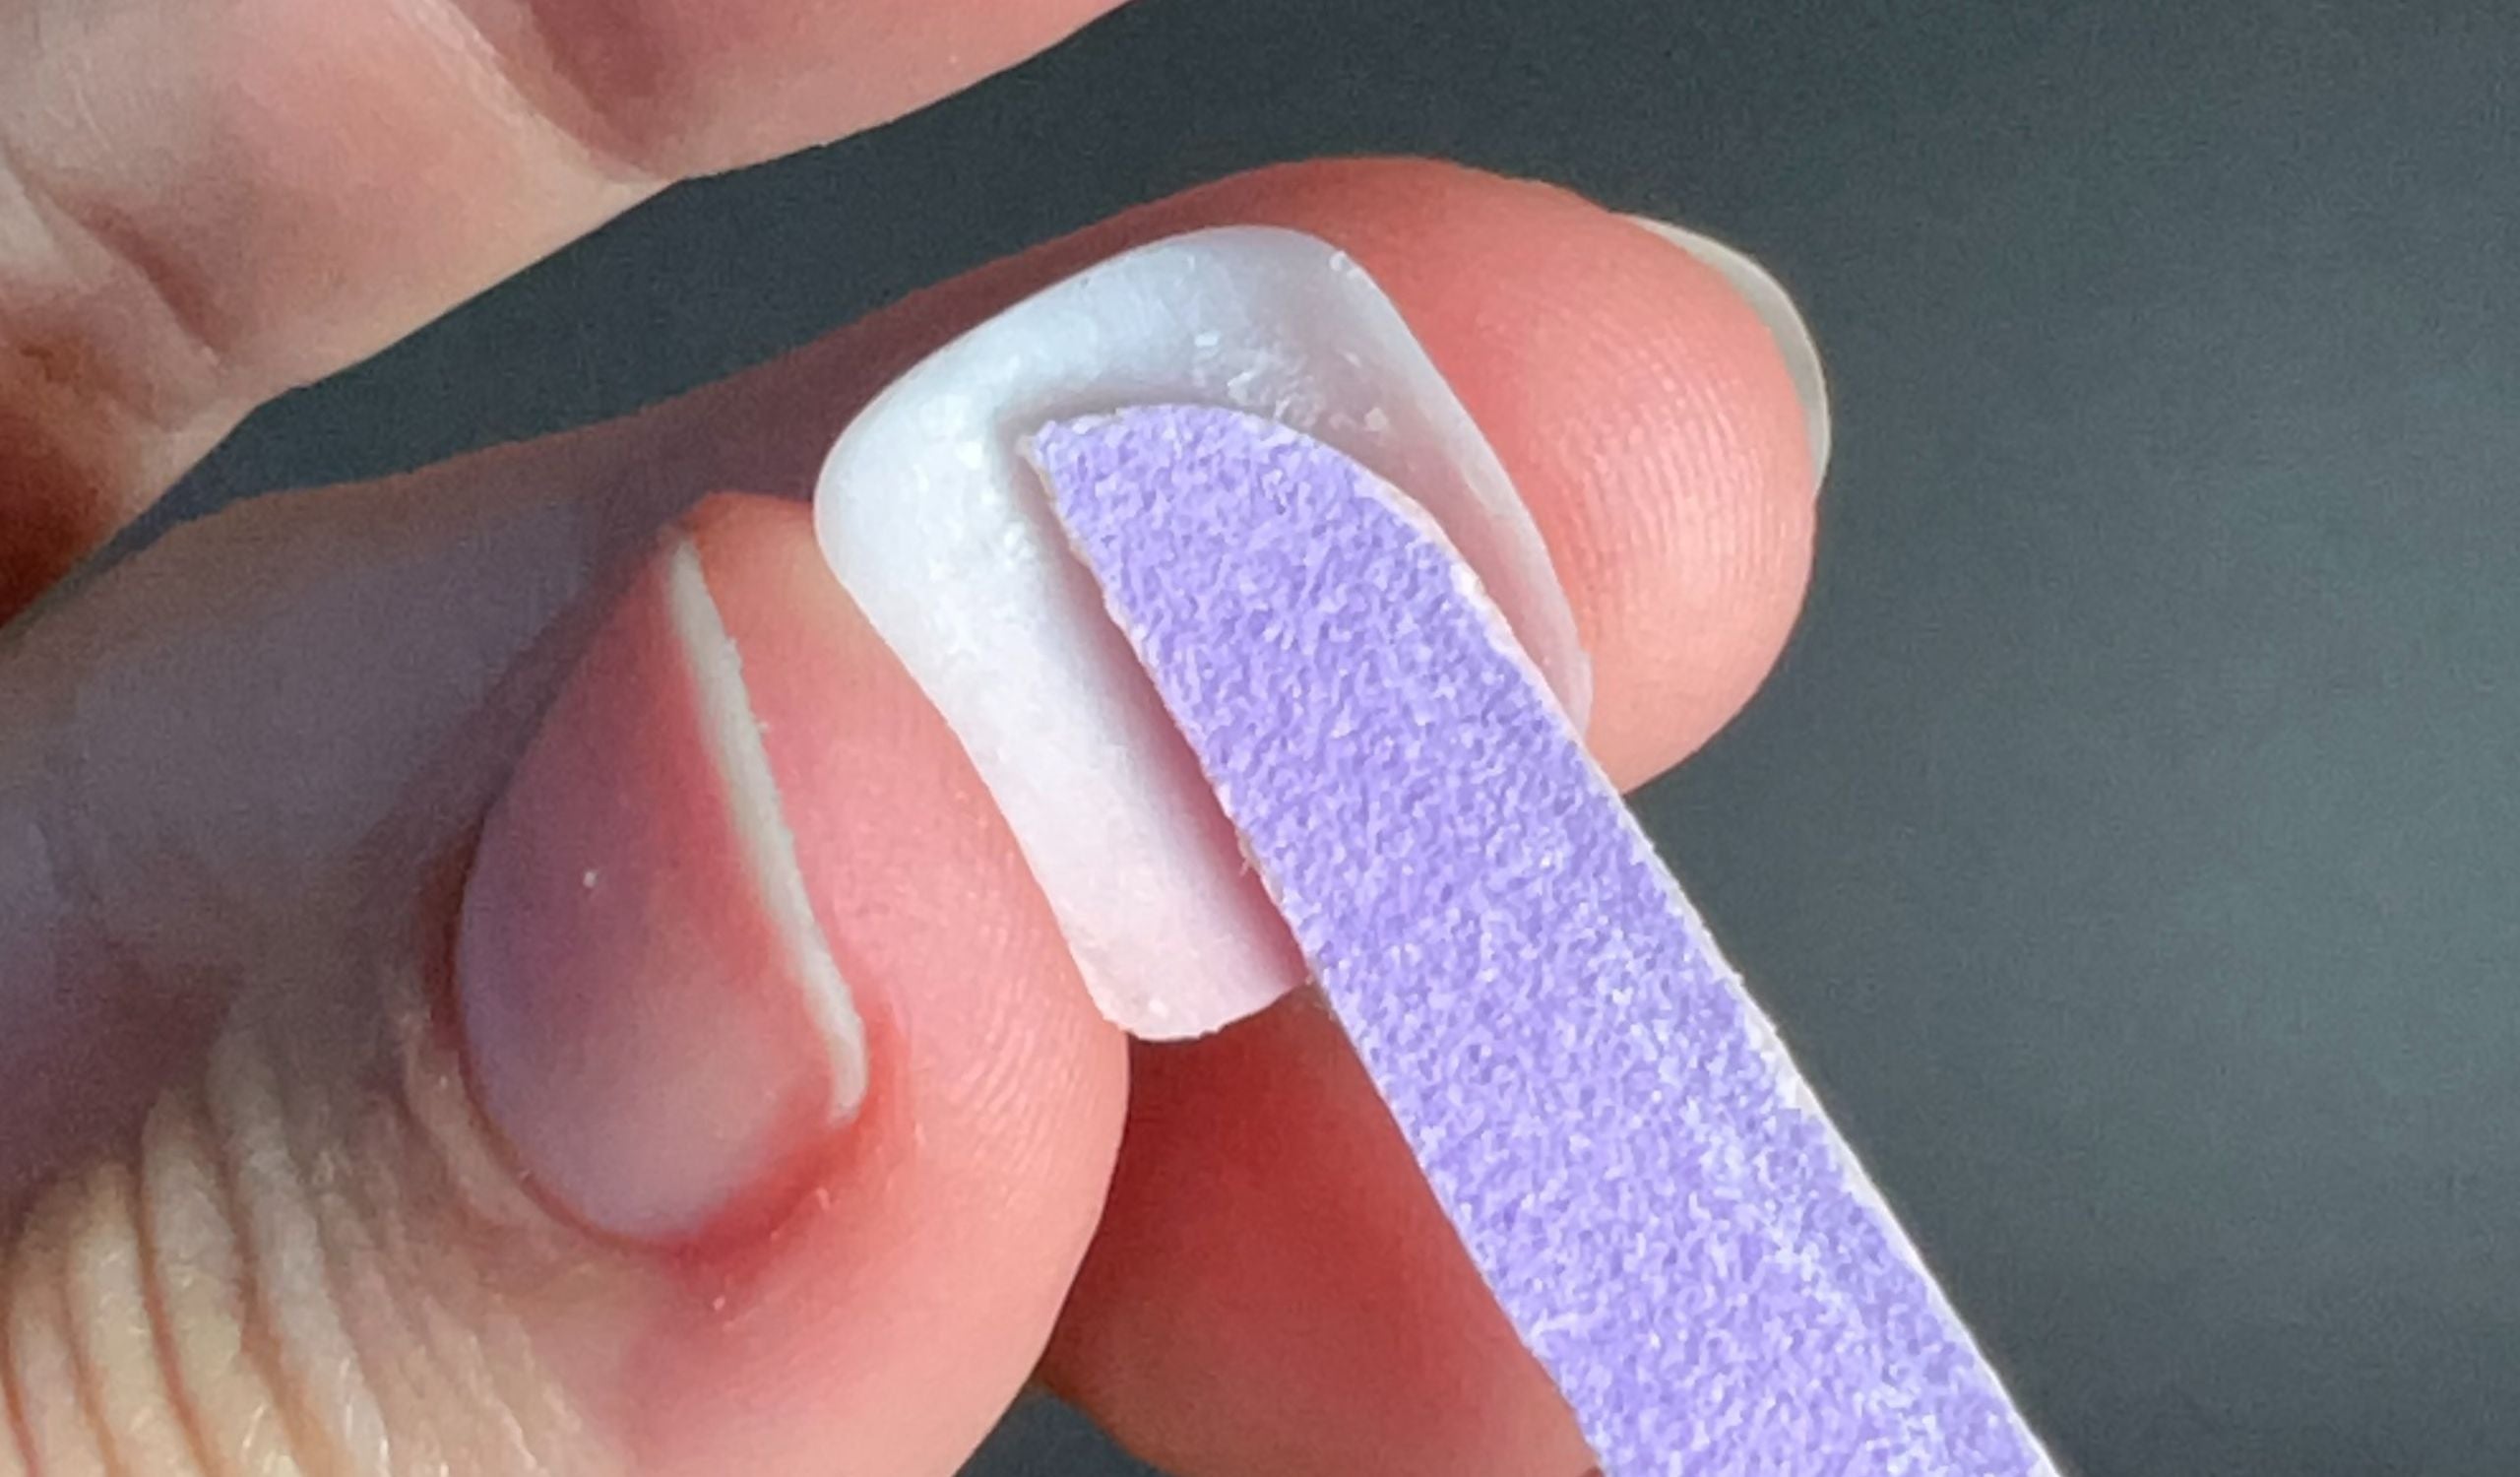
Step 4: Polish your nails
Using the mini file provided in the kit, lightly scratch the surface of your nails. The goal is to create a porous surface to maximize adhesion.
-
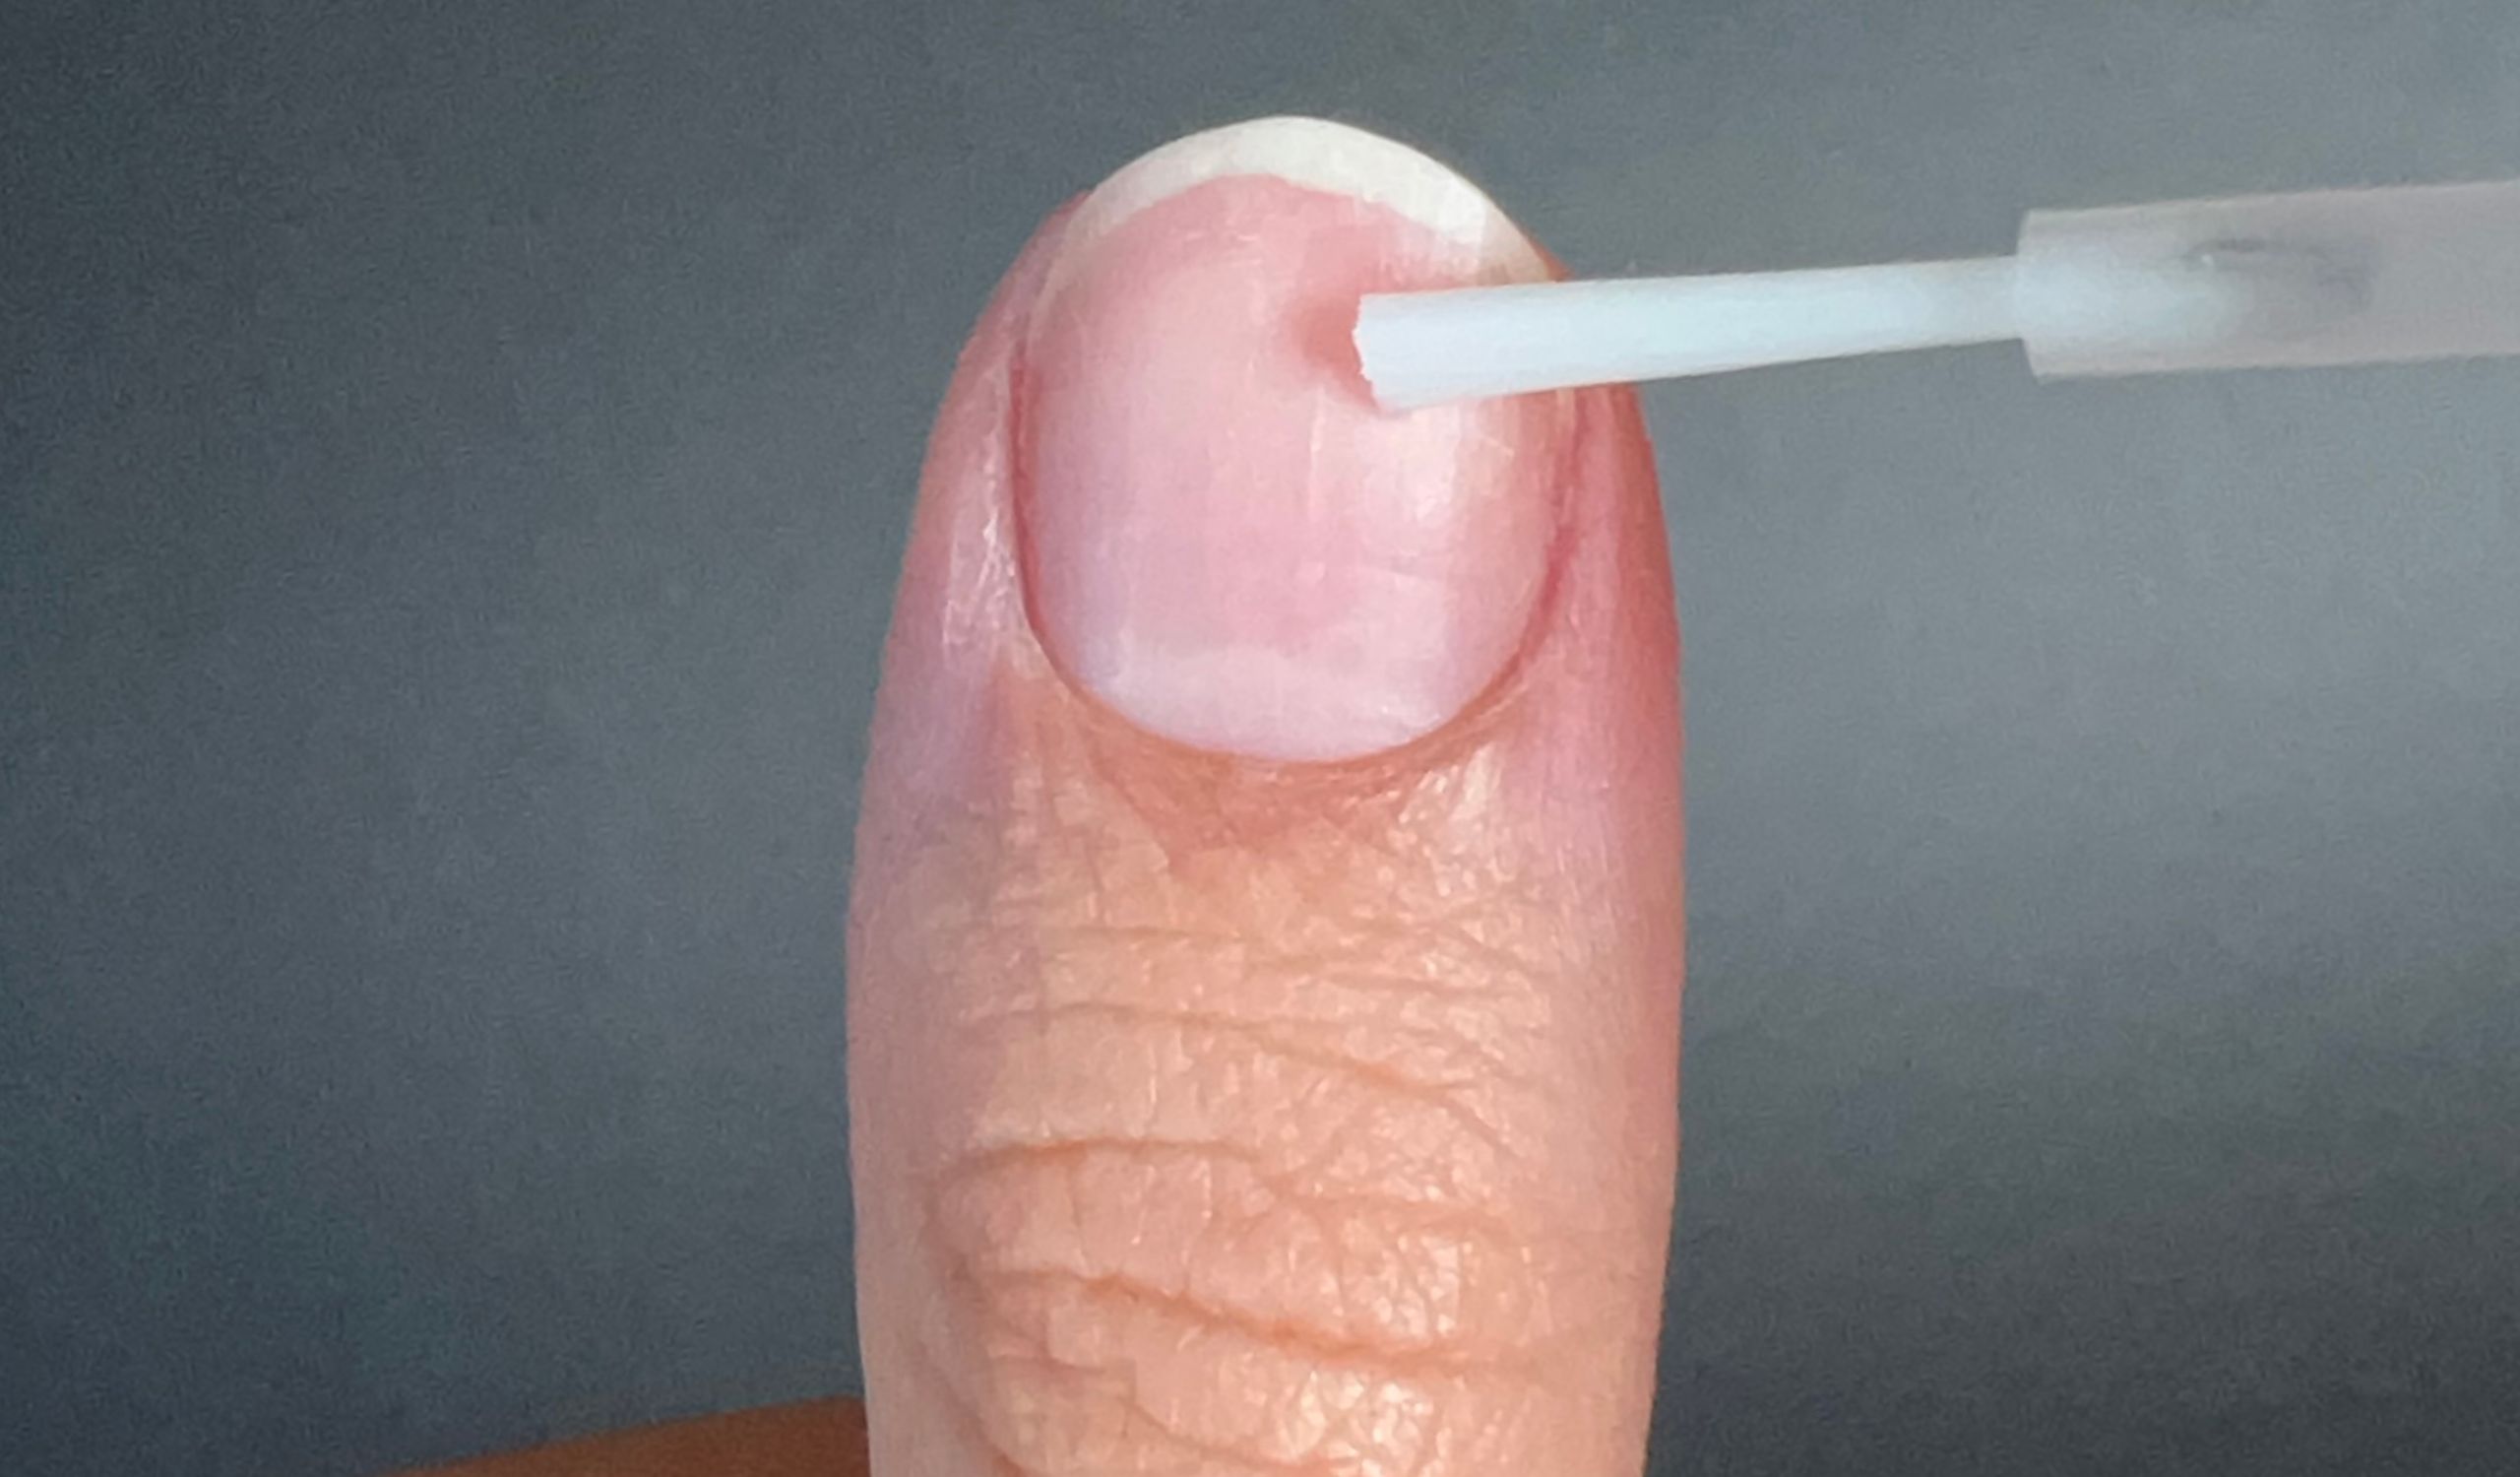
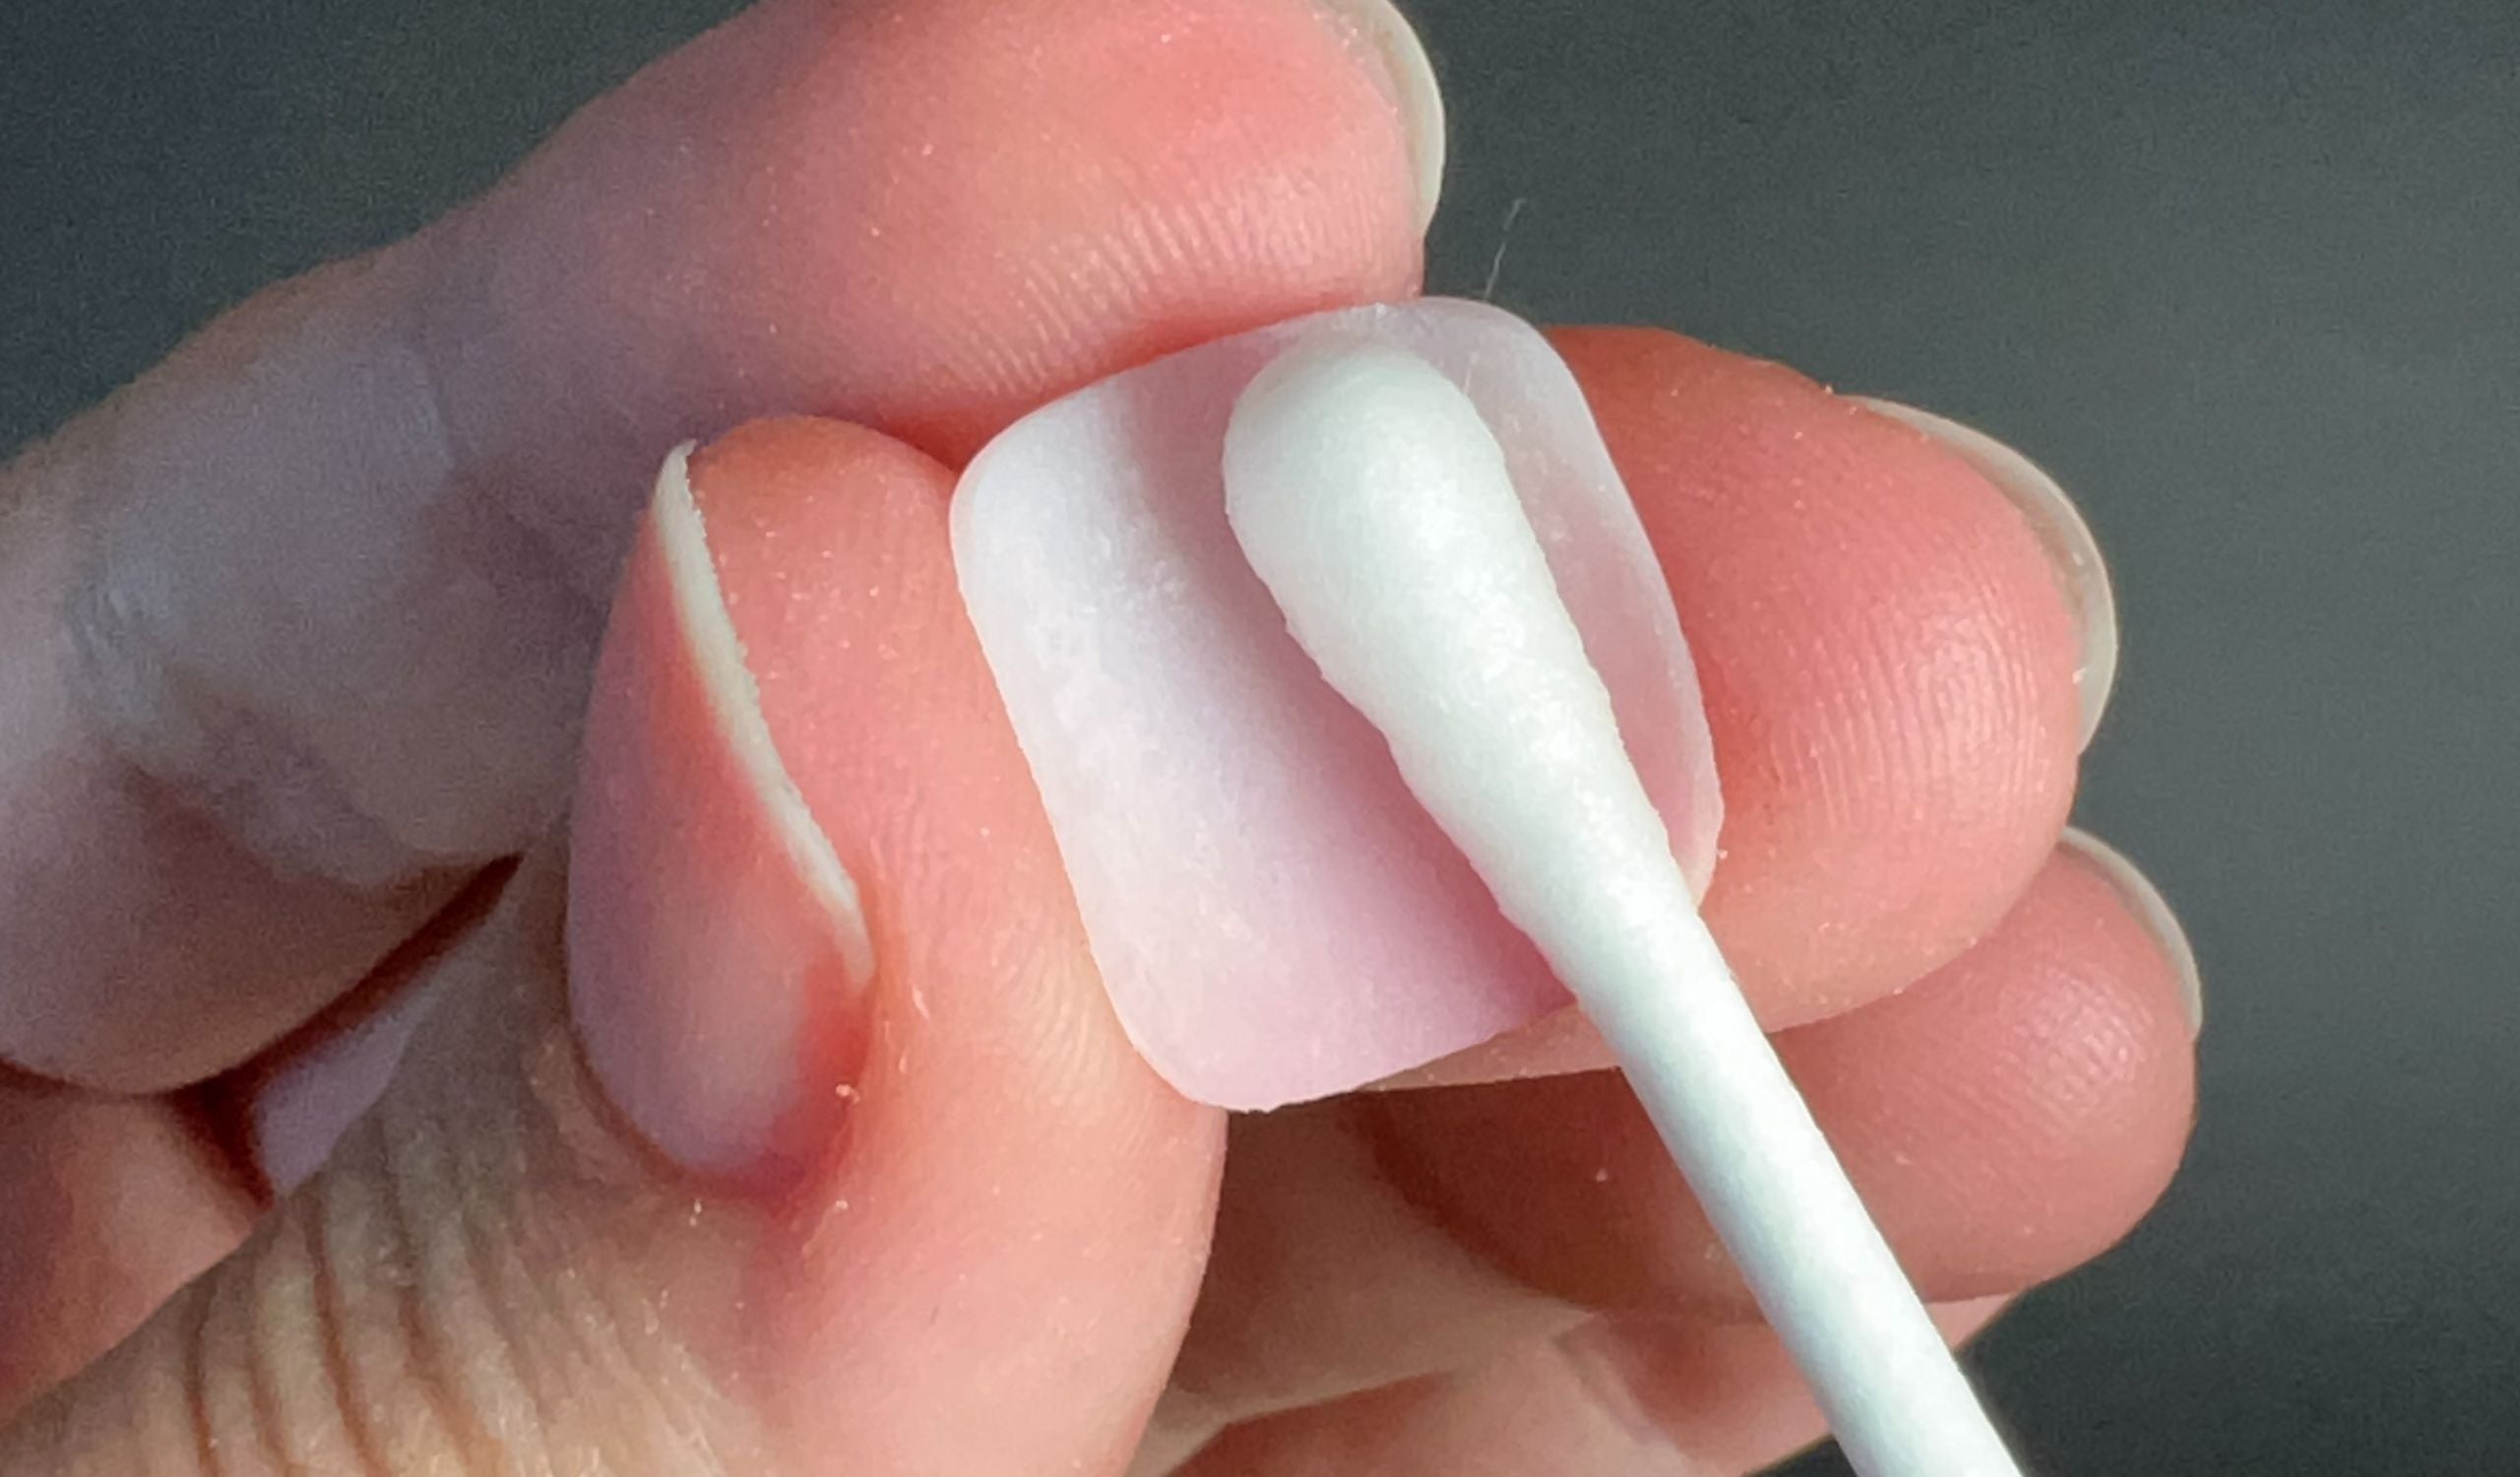
Step 5: Degrease your nails
Pass a cotton pad soaked in alcohol or Nail Prep (not supplied in the kit) over your nails to degrease them. The goal is to create a perfectly dried surface to maximize adhesion.
-
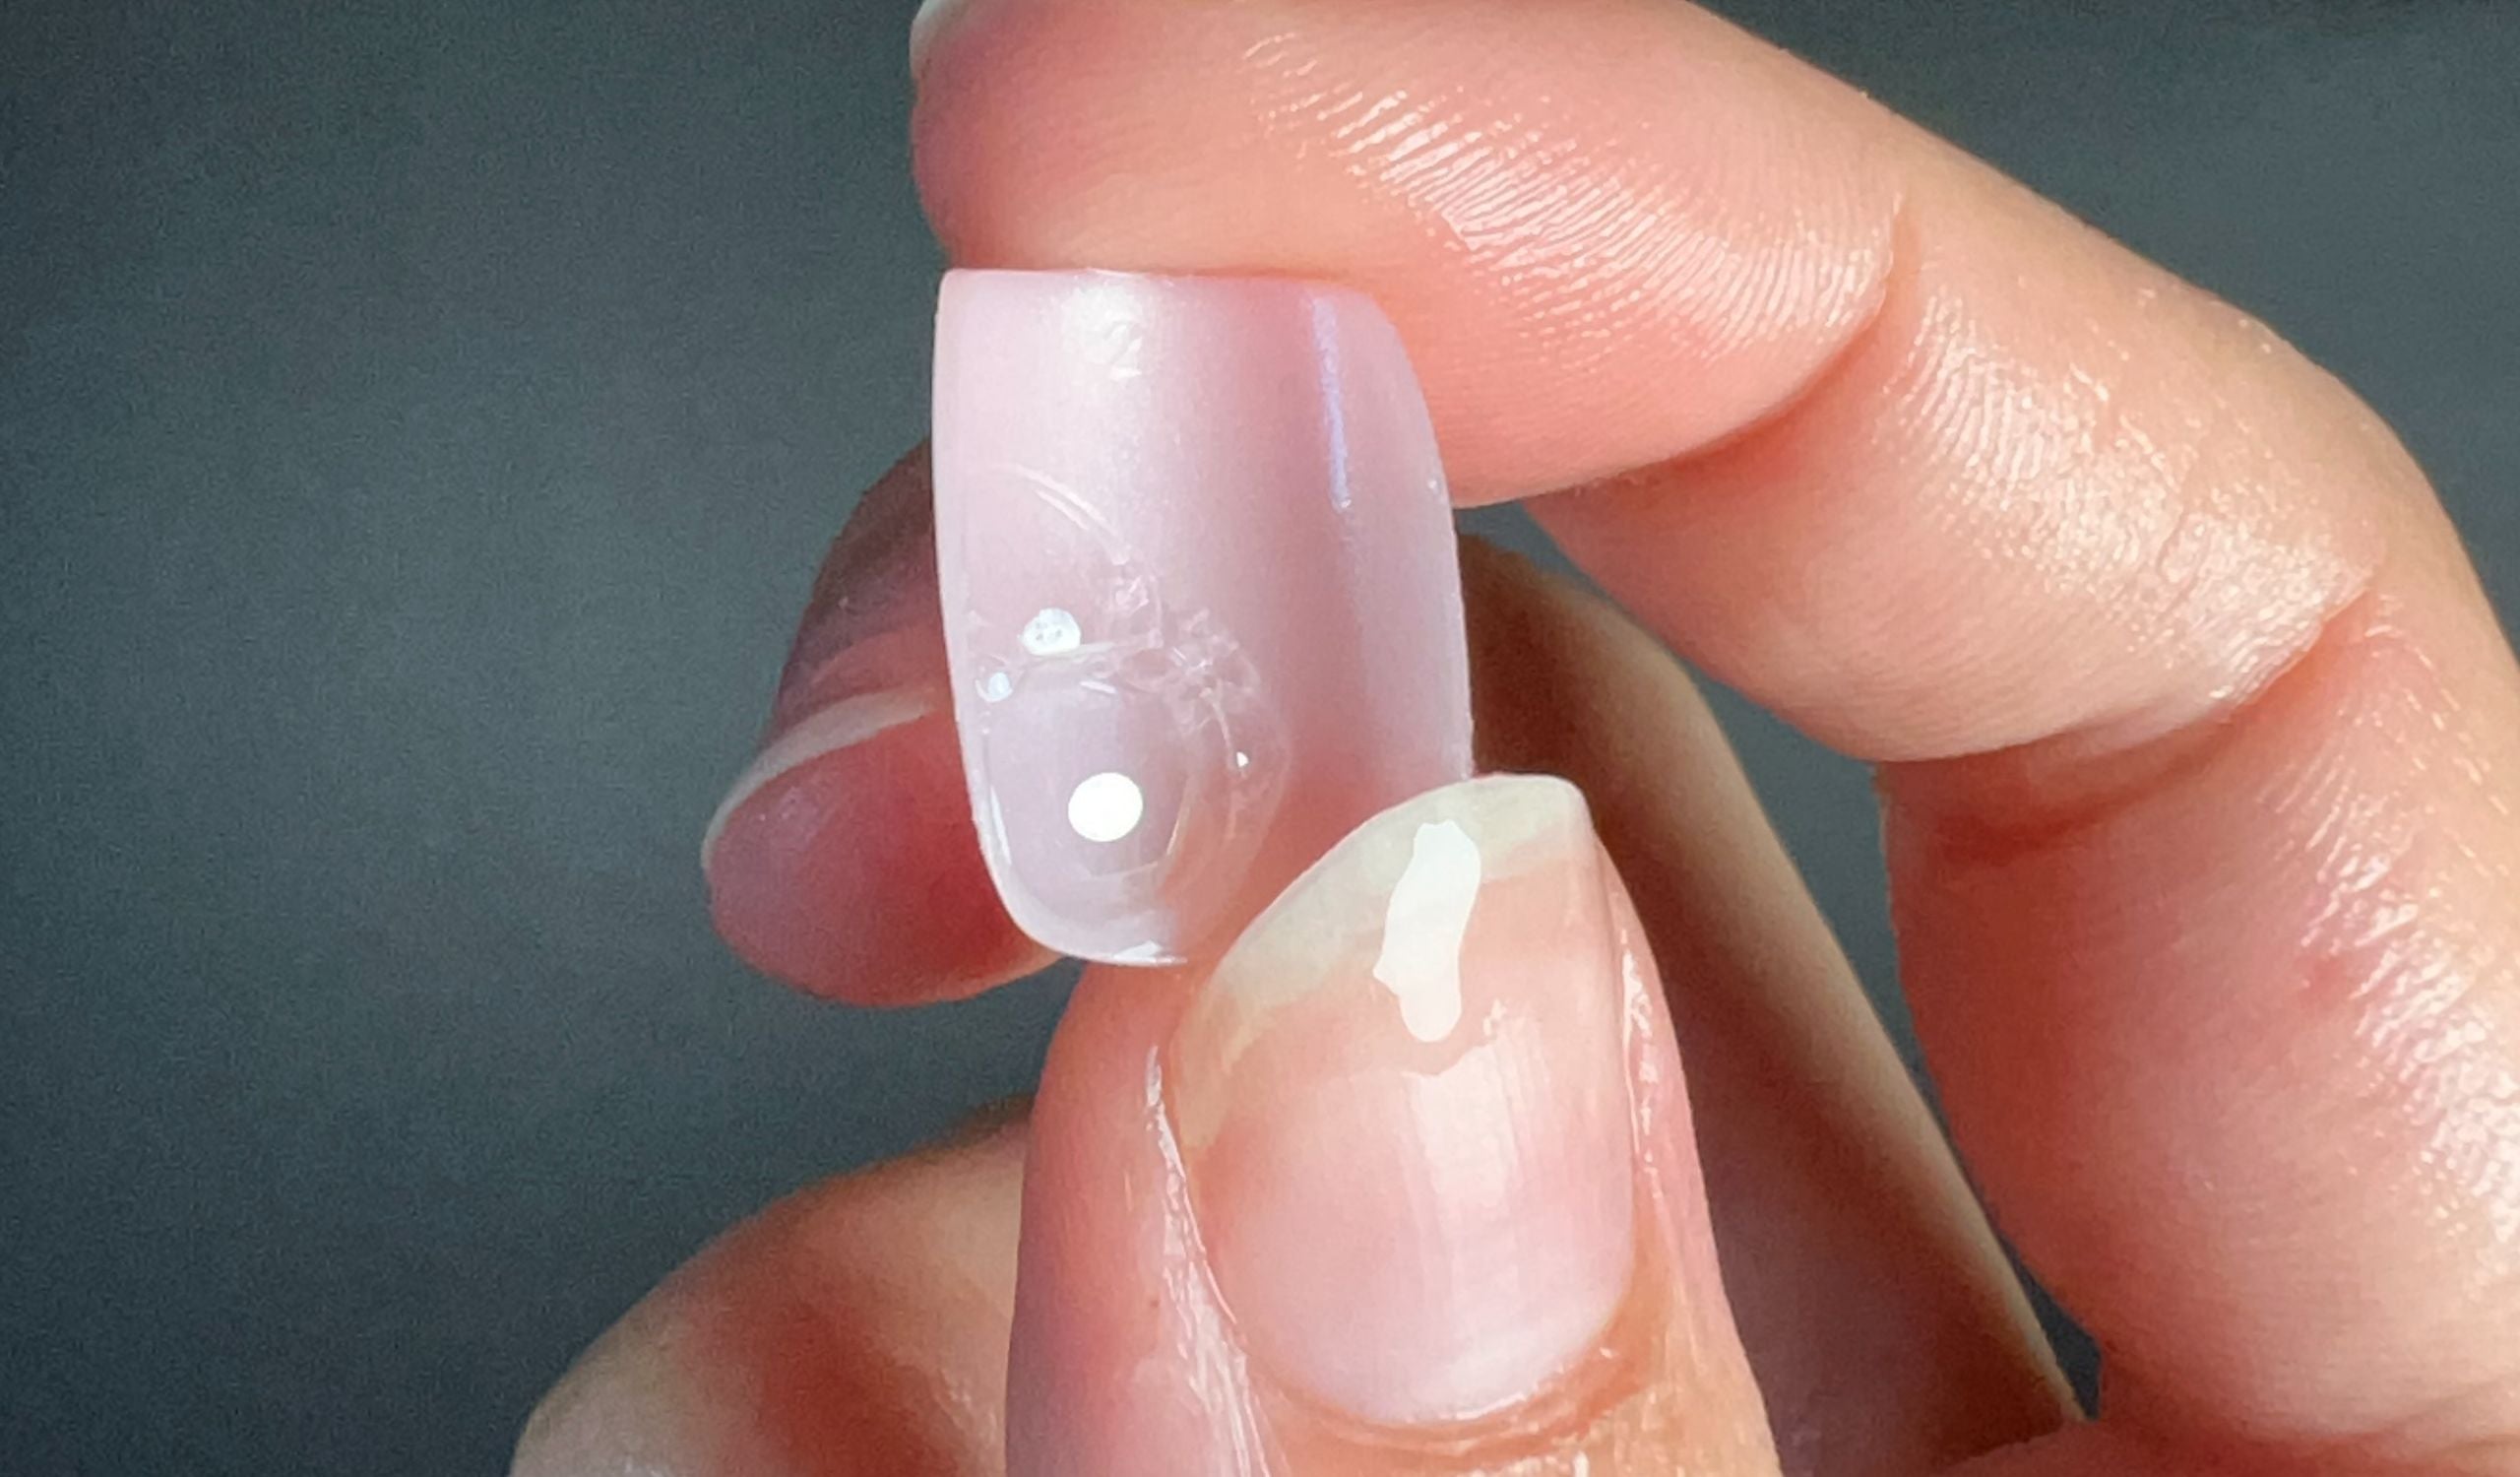
Step 6: Choose the Right Gel Pad
Select a Gel Pad the size of your nail. The wider the gel pad covers your nail, the stronger the application will be.
-
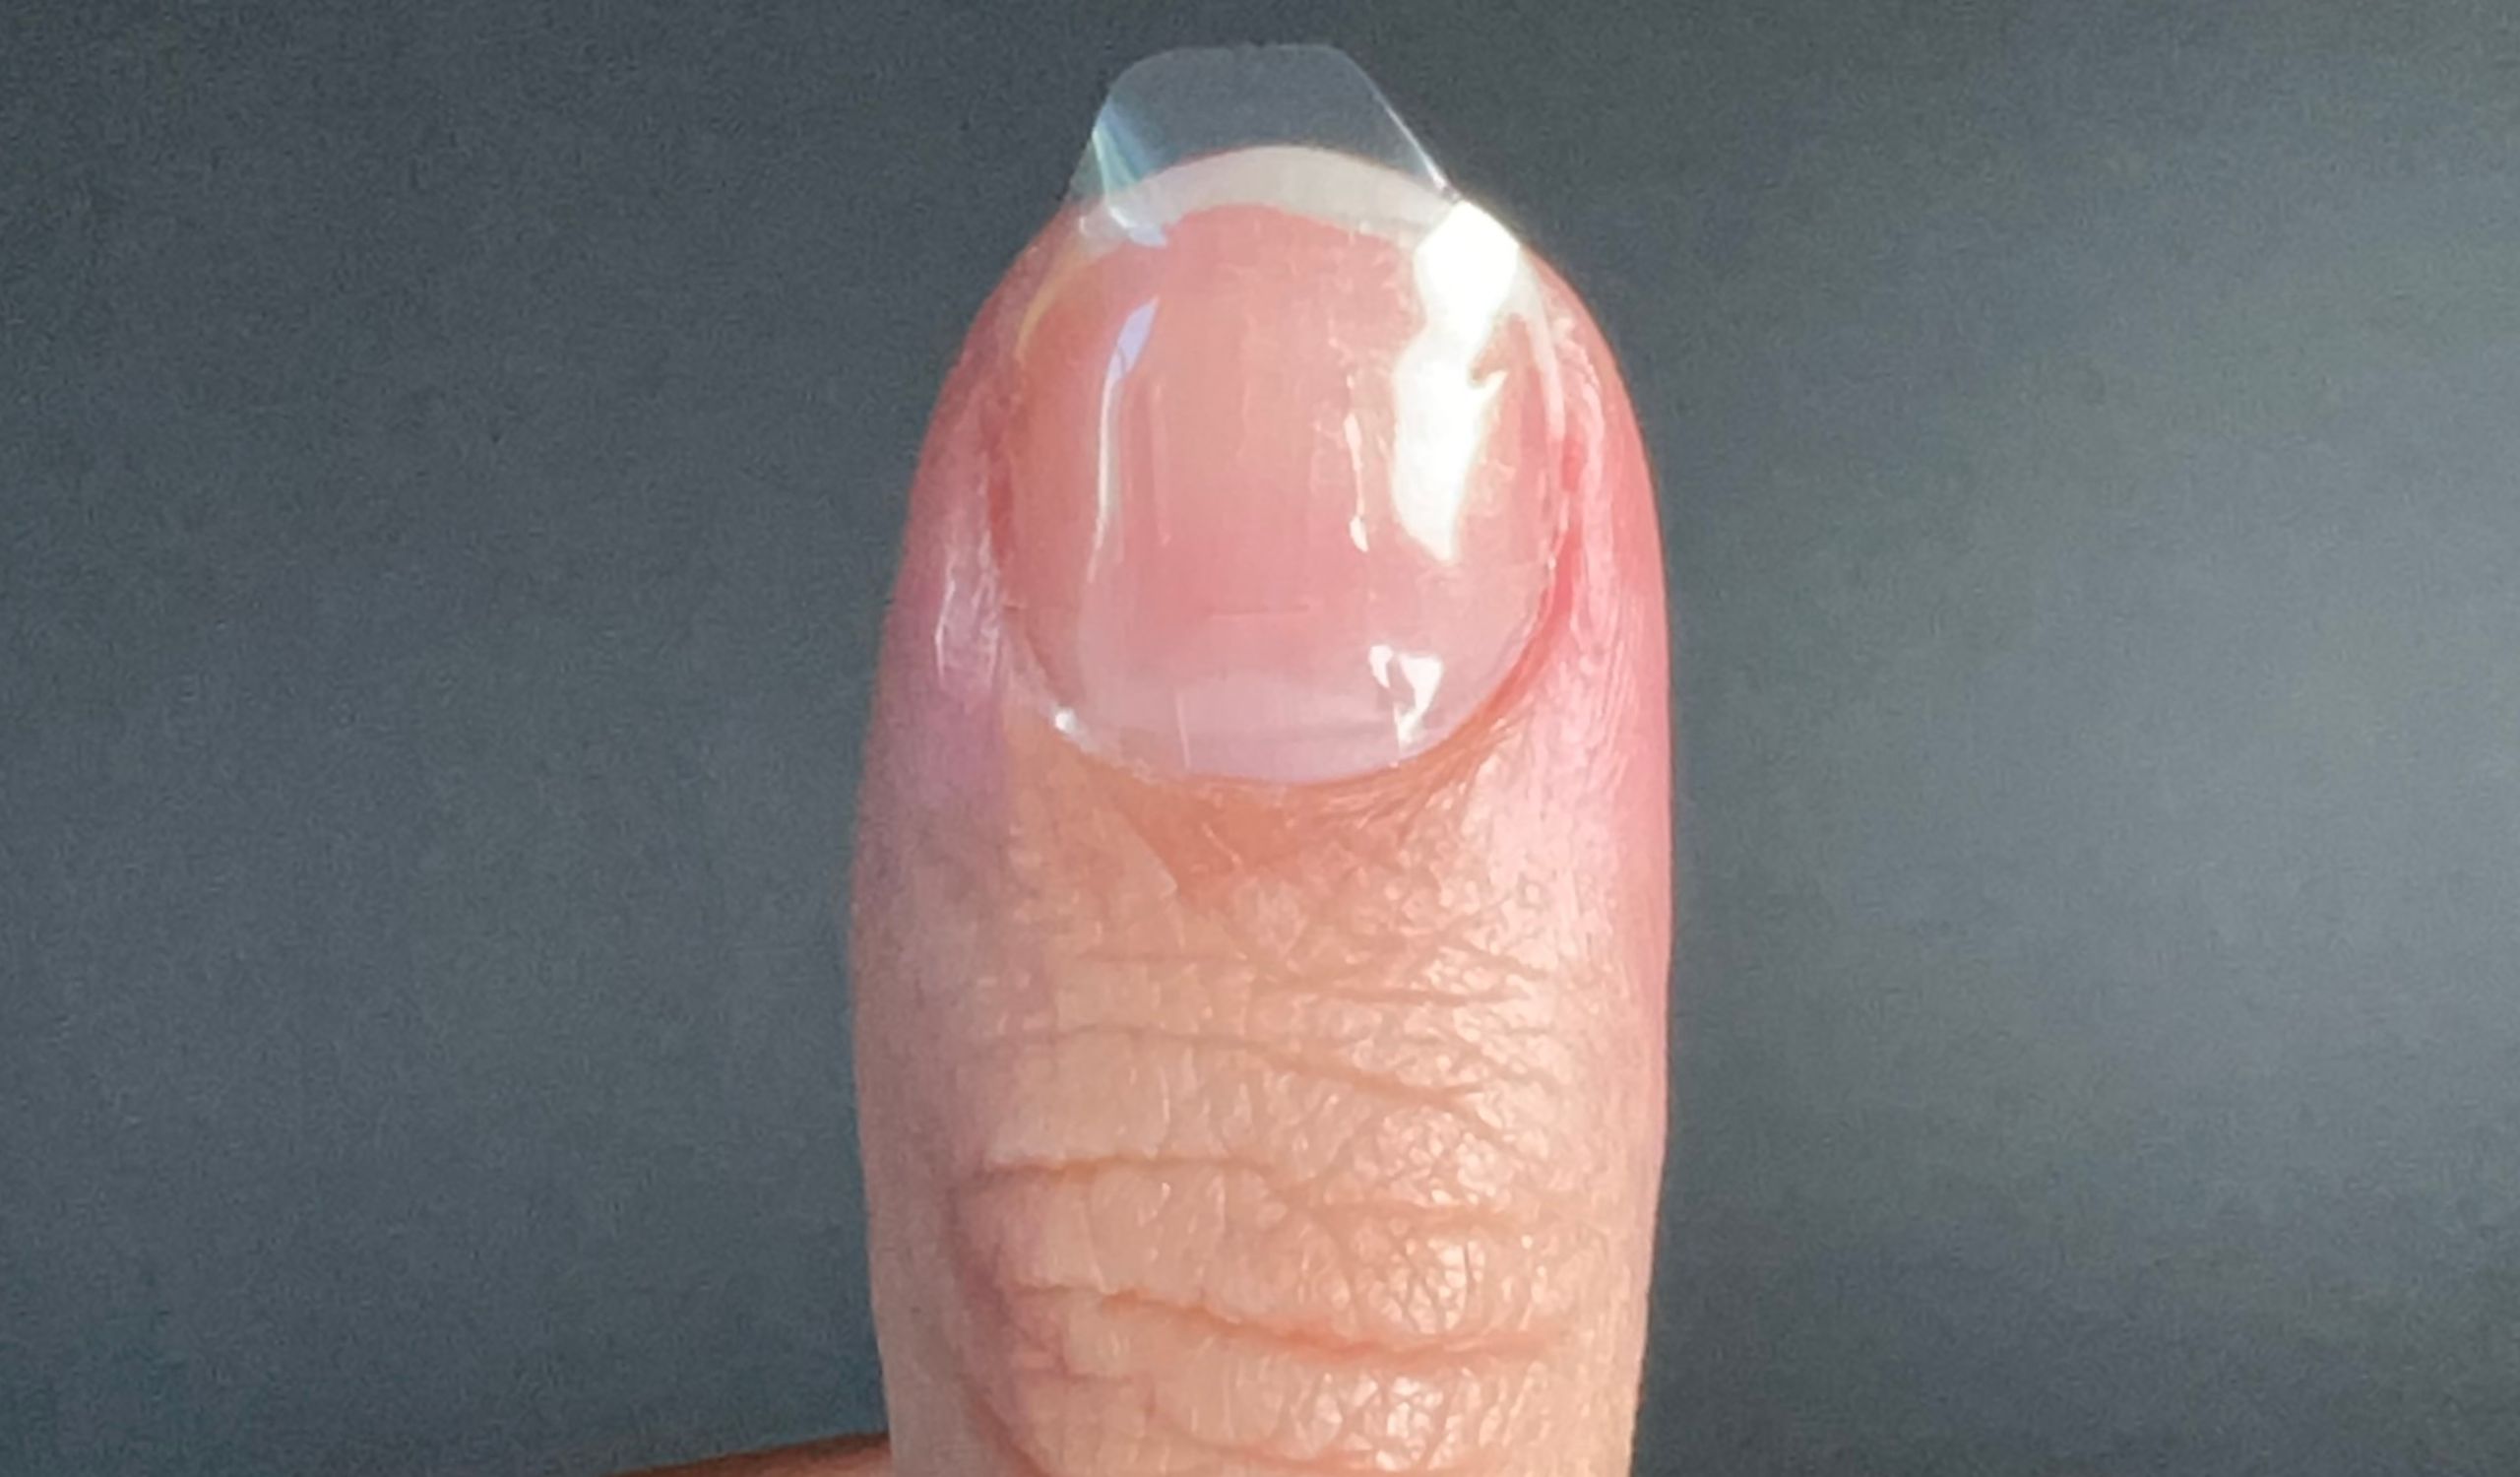
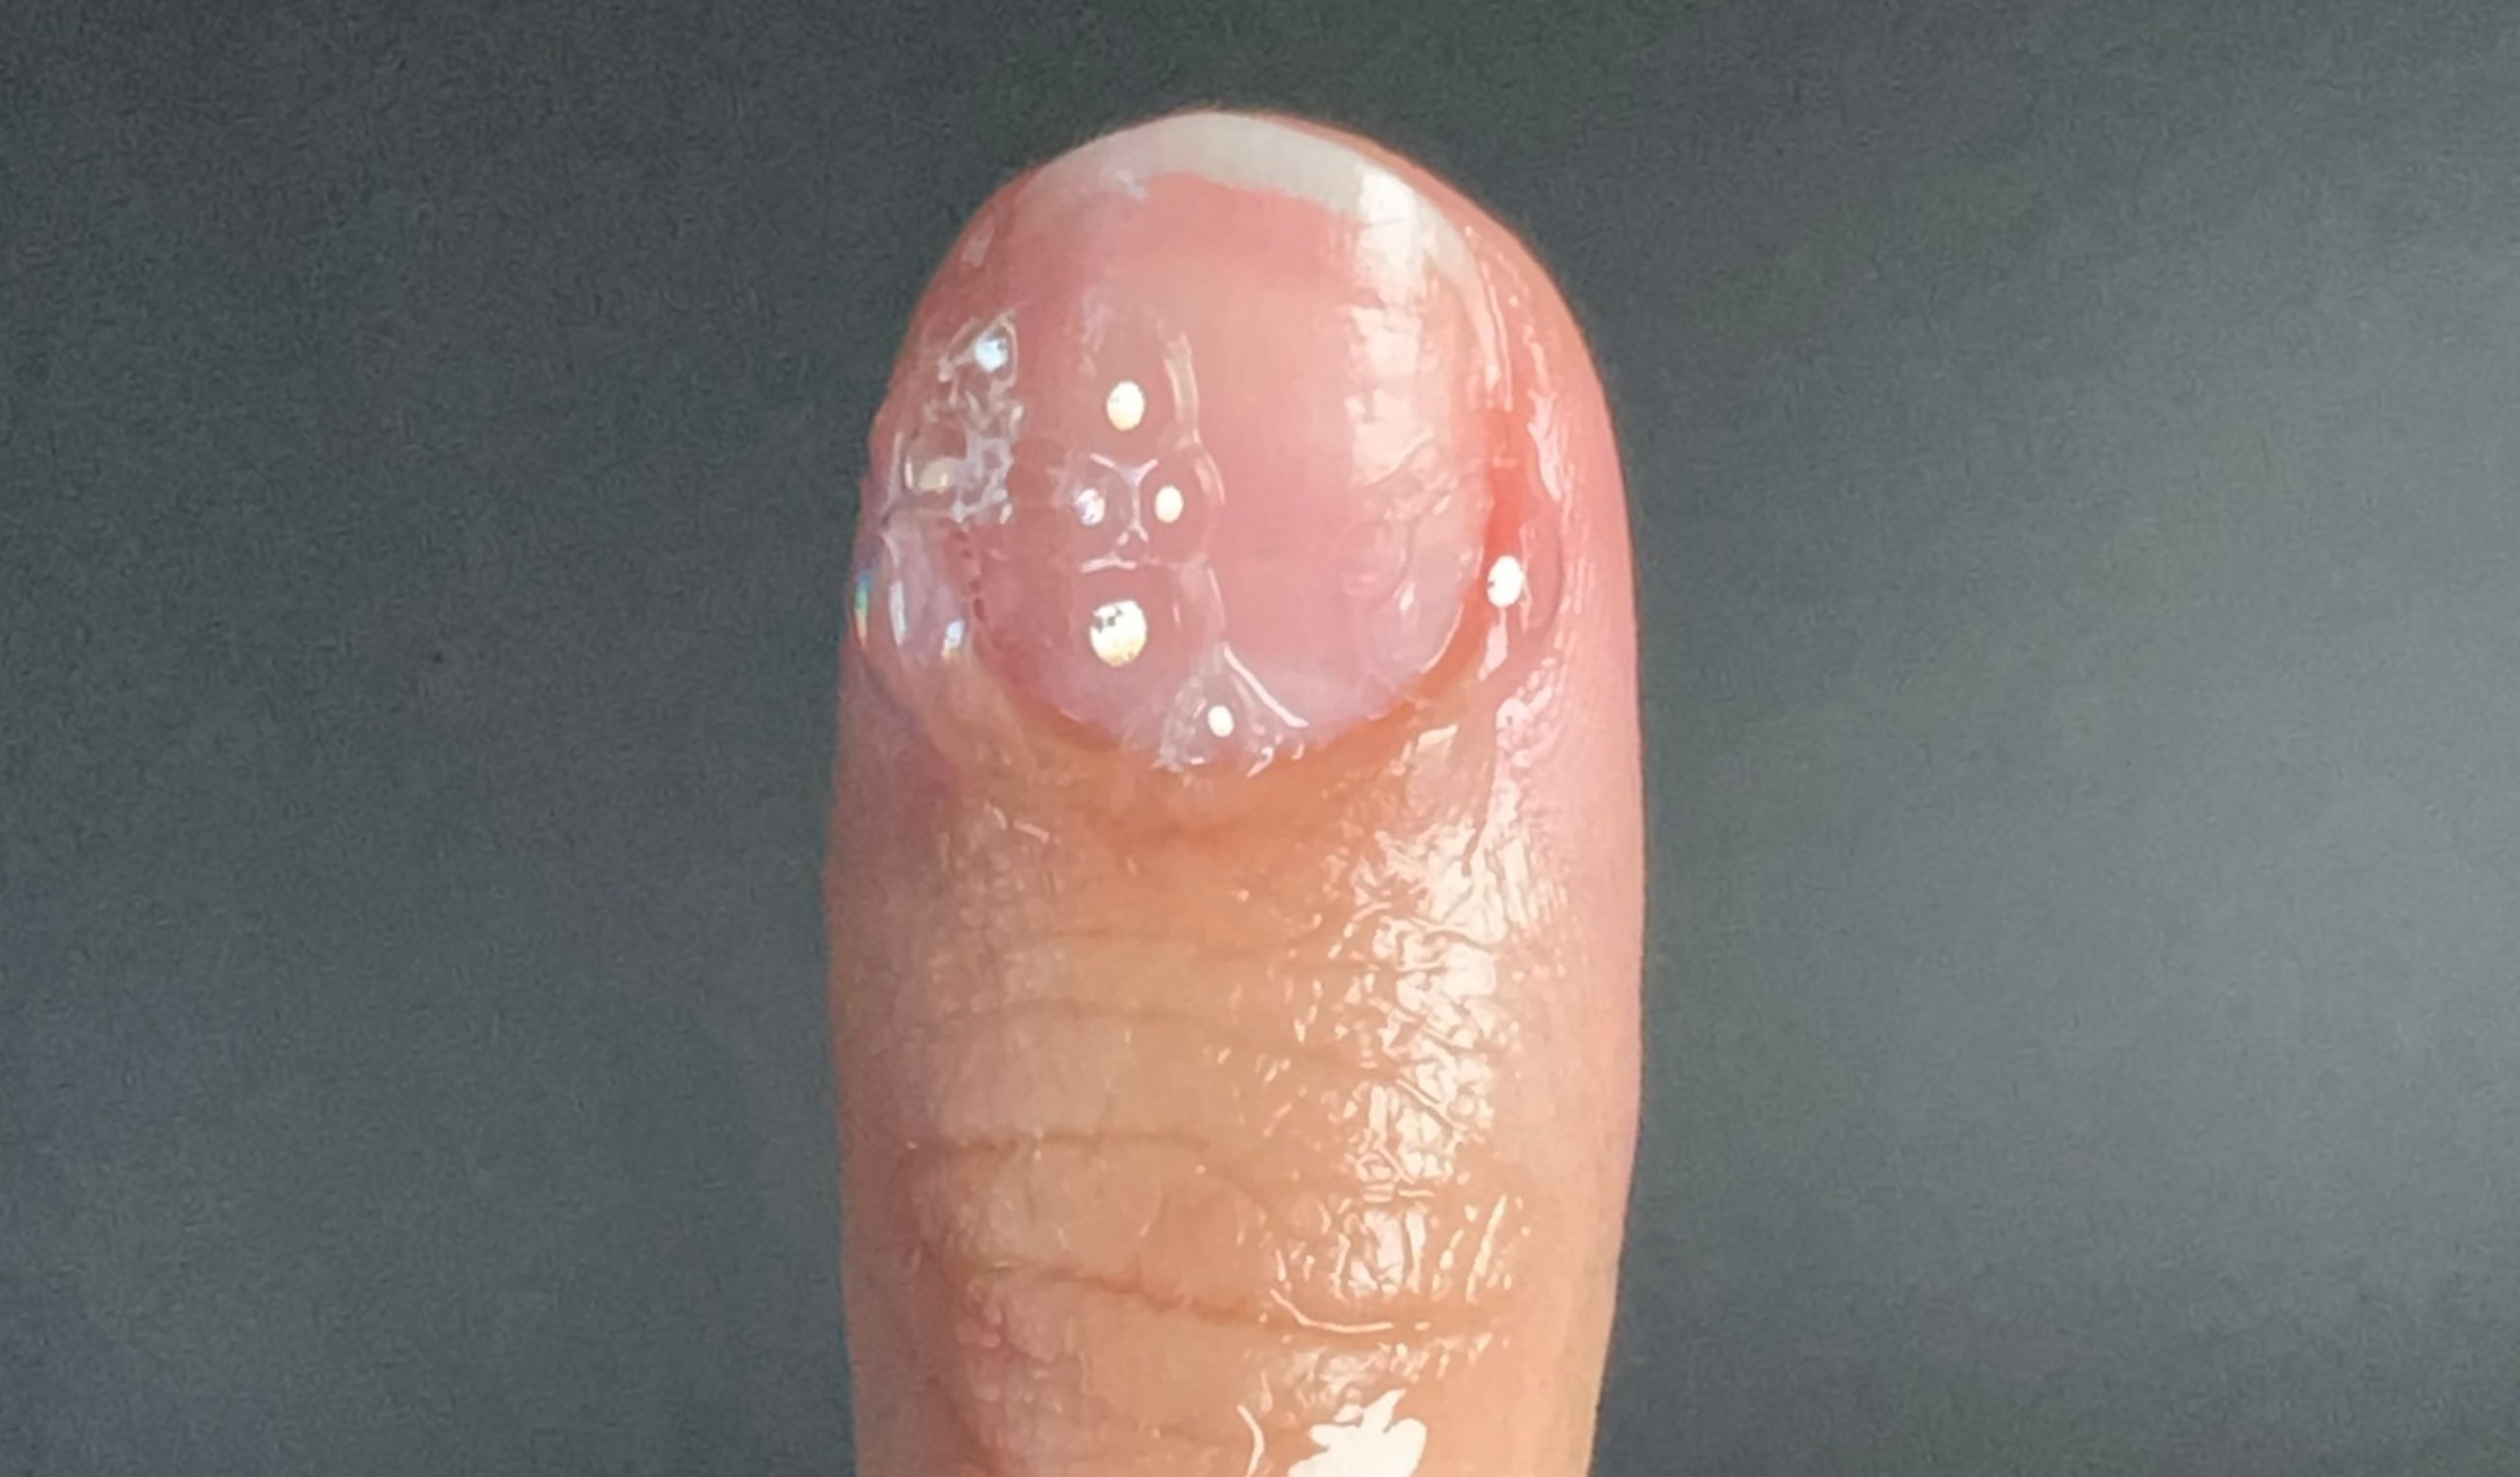
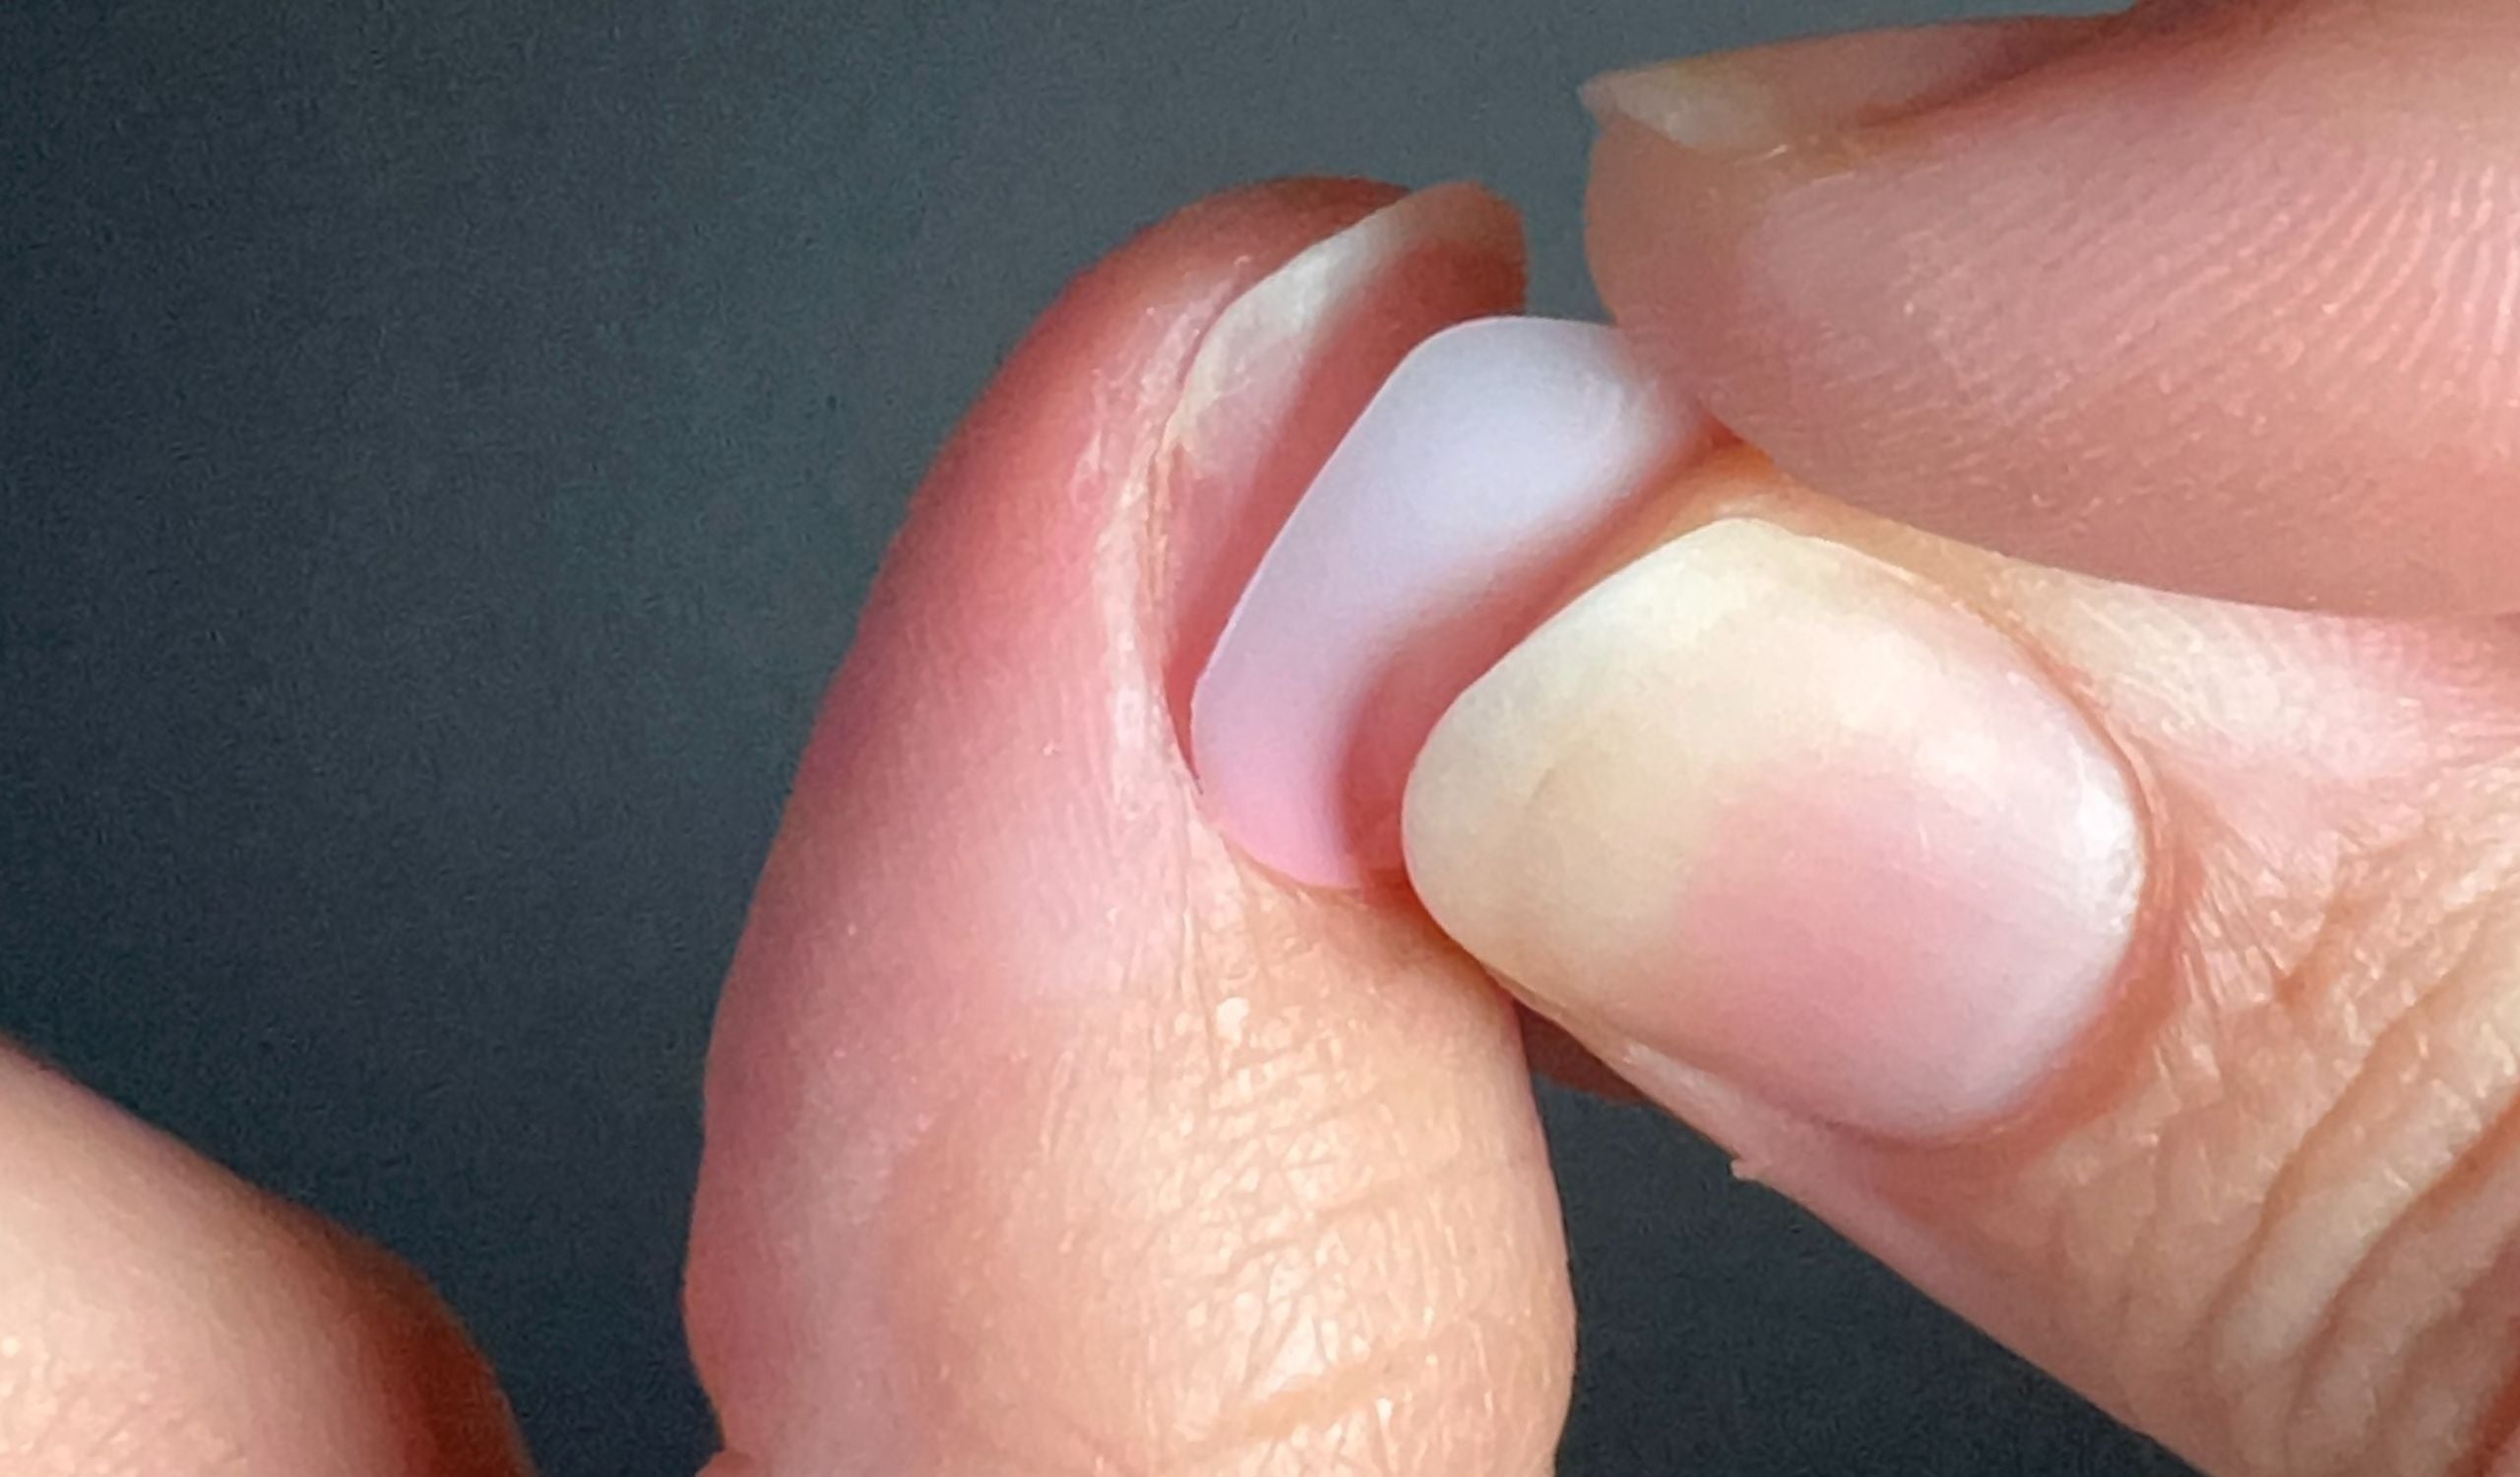
Step 7: Apply the Gel Pad
Detach the Gel Pad using the tab and place it on your nail 1mm from the cuticles. Start by placing it on one edge of your nail then press it down.
-
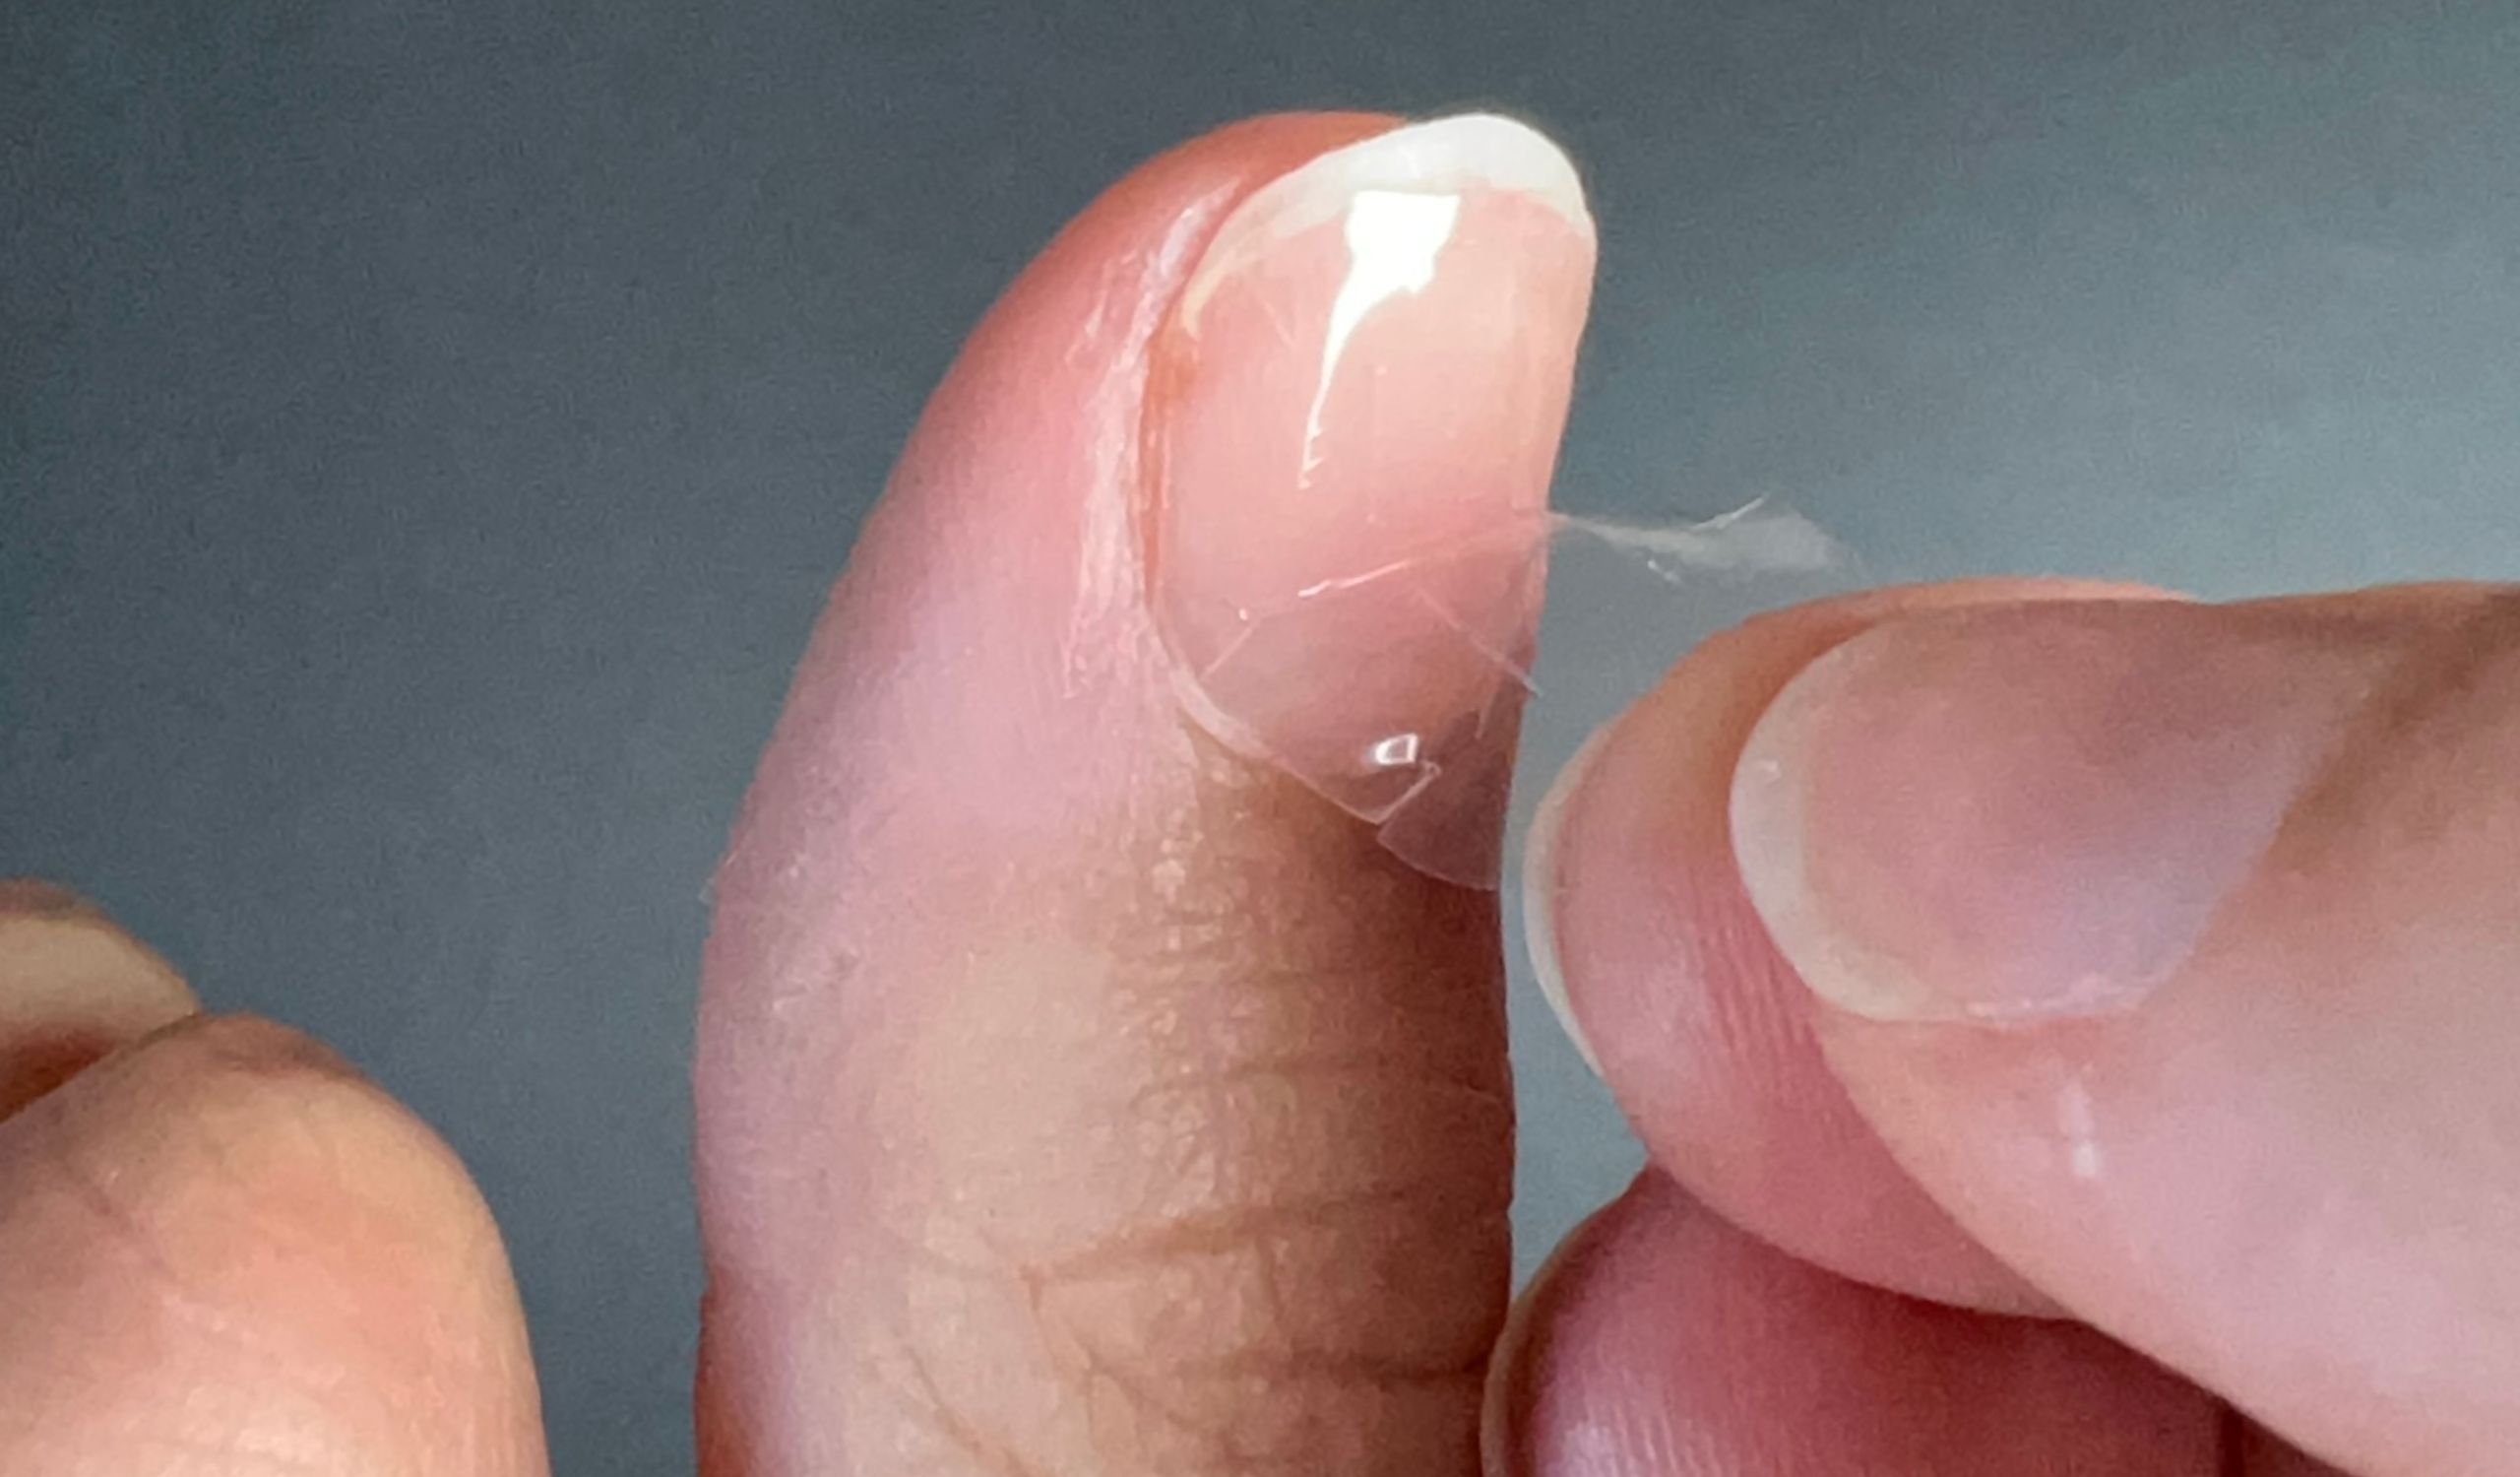
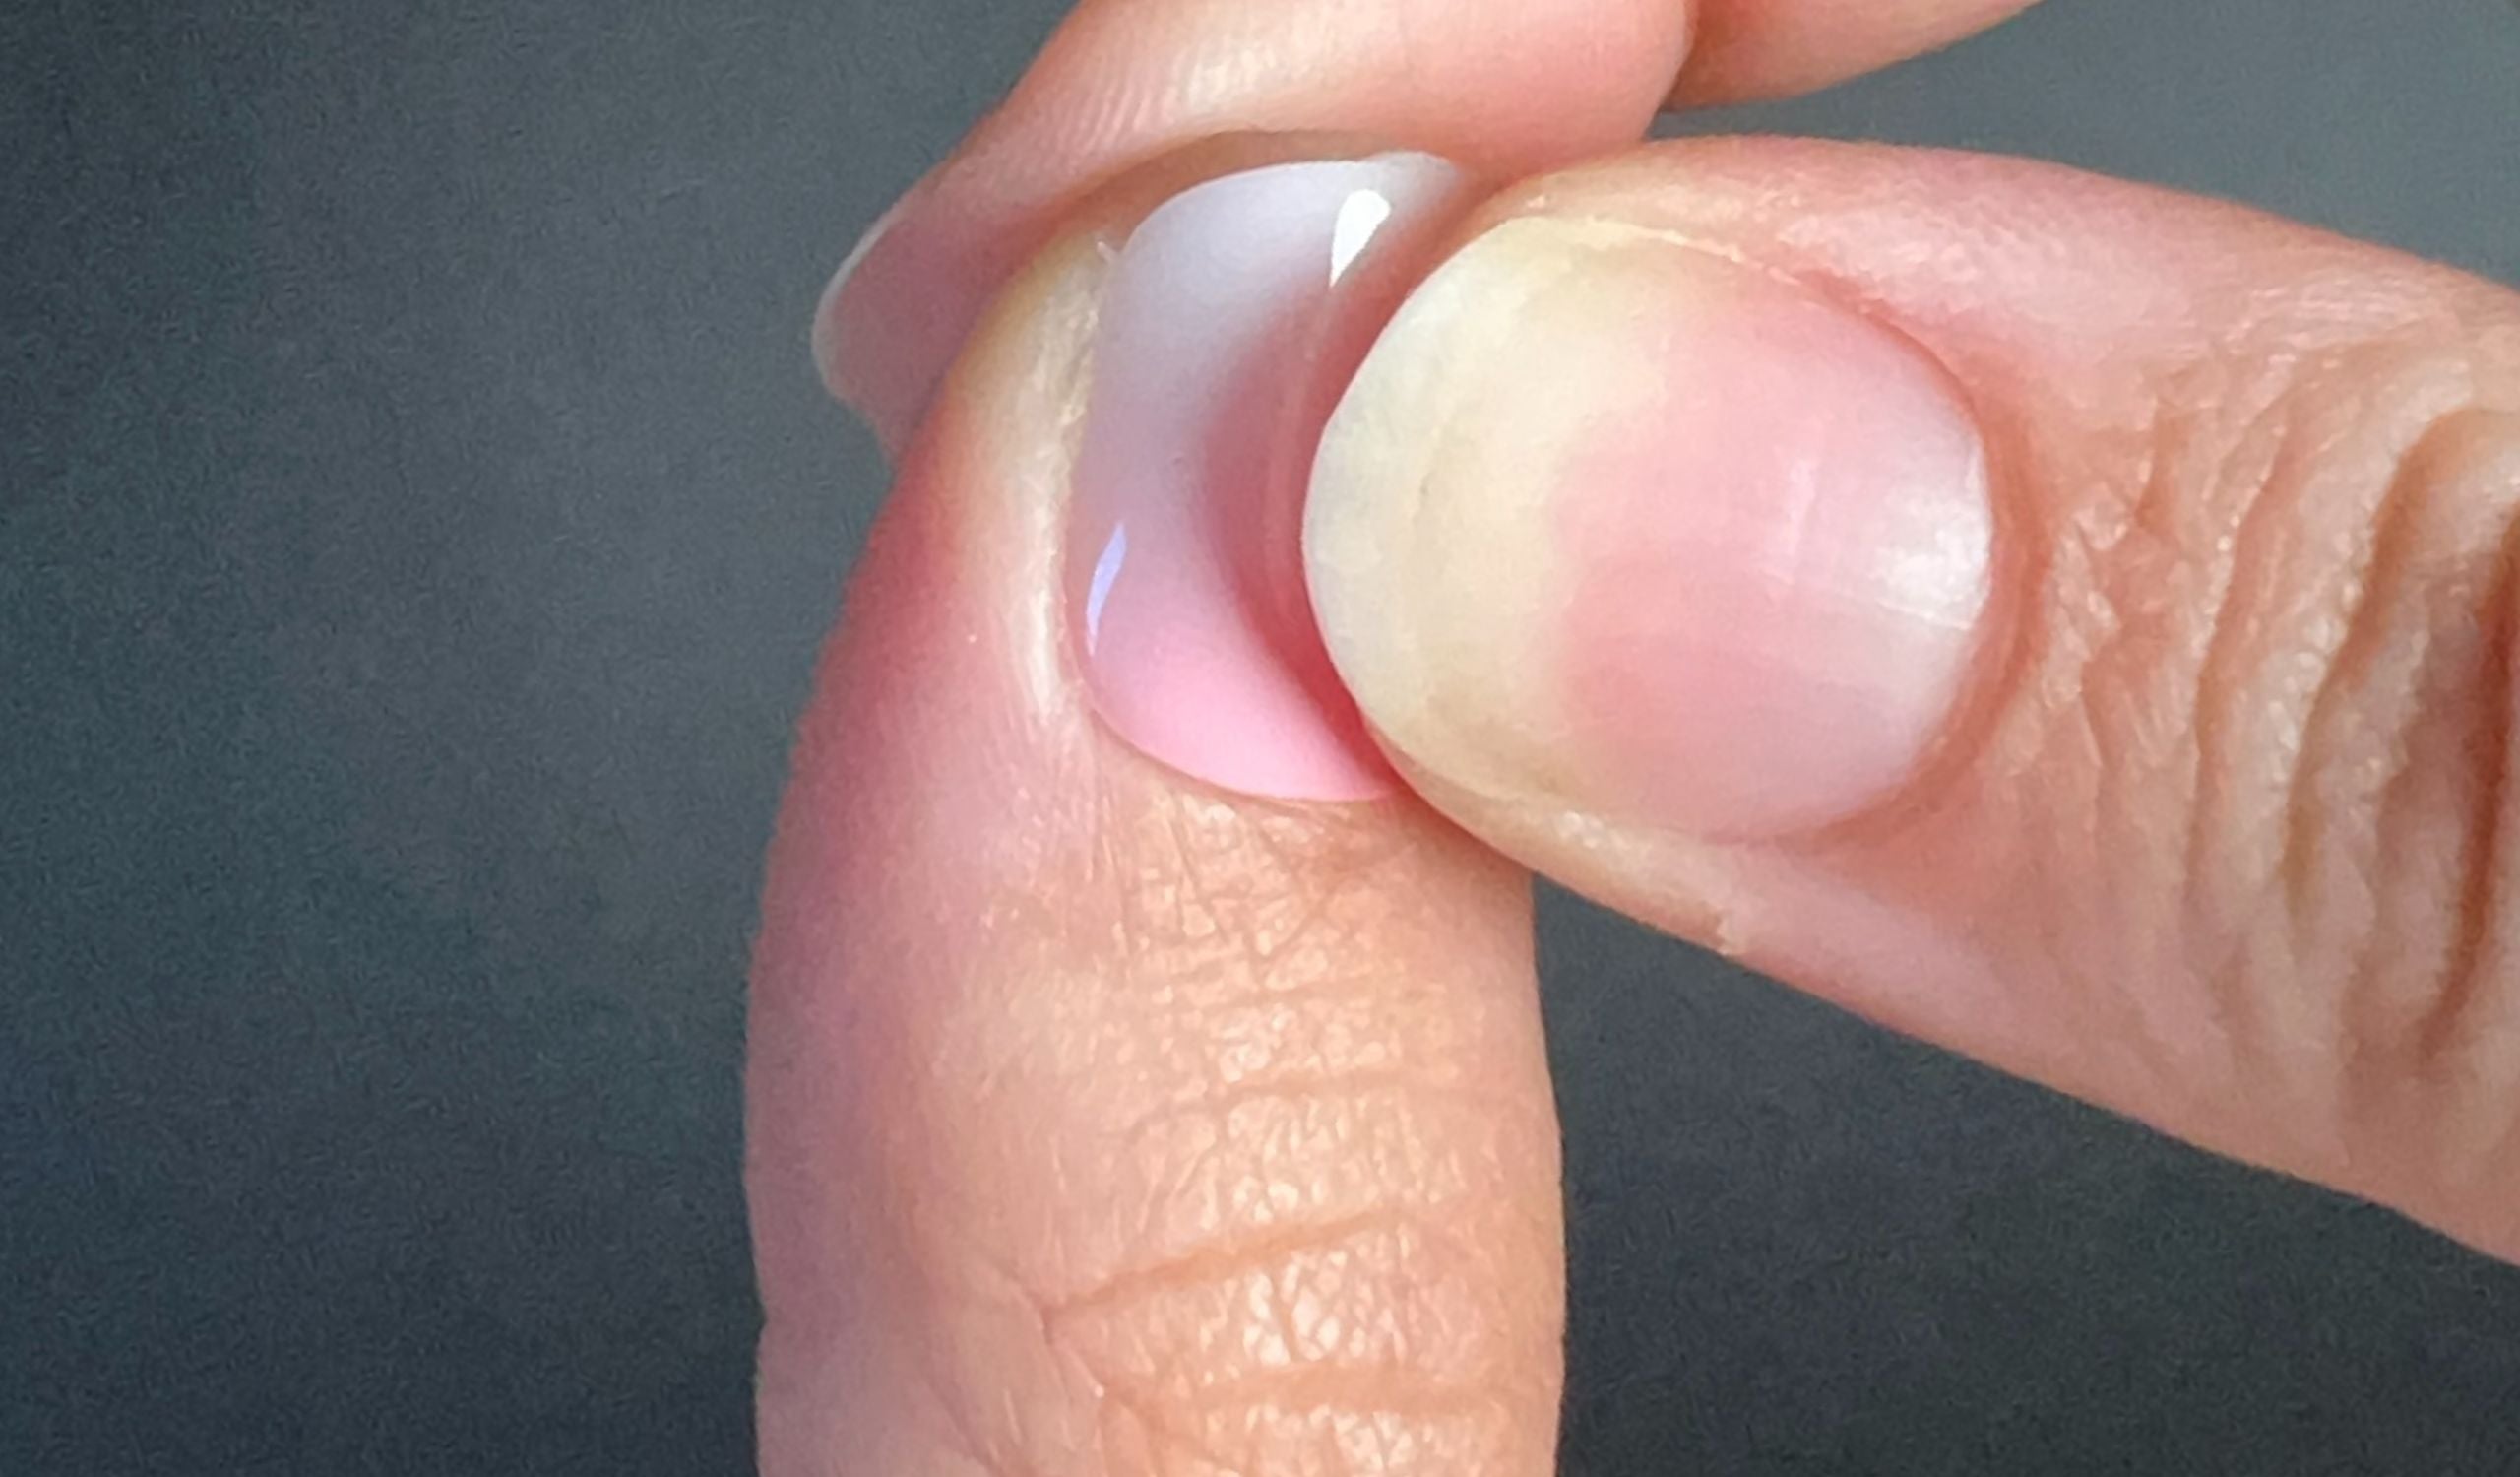
Step 8: Remove Protective Film
Massage the Gel Pad for a few seconds to make it adhere to your nail then remove the plastic film by pulling on the tab. If the Gel Pad protrudes from your nail, scrape it off before pulling the tab.
-
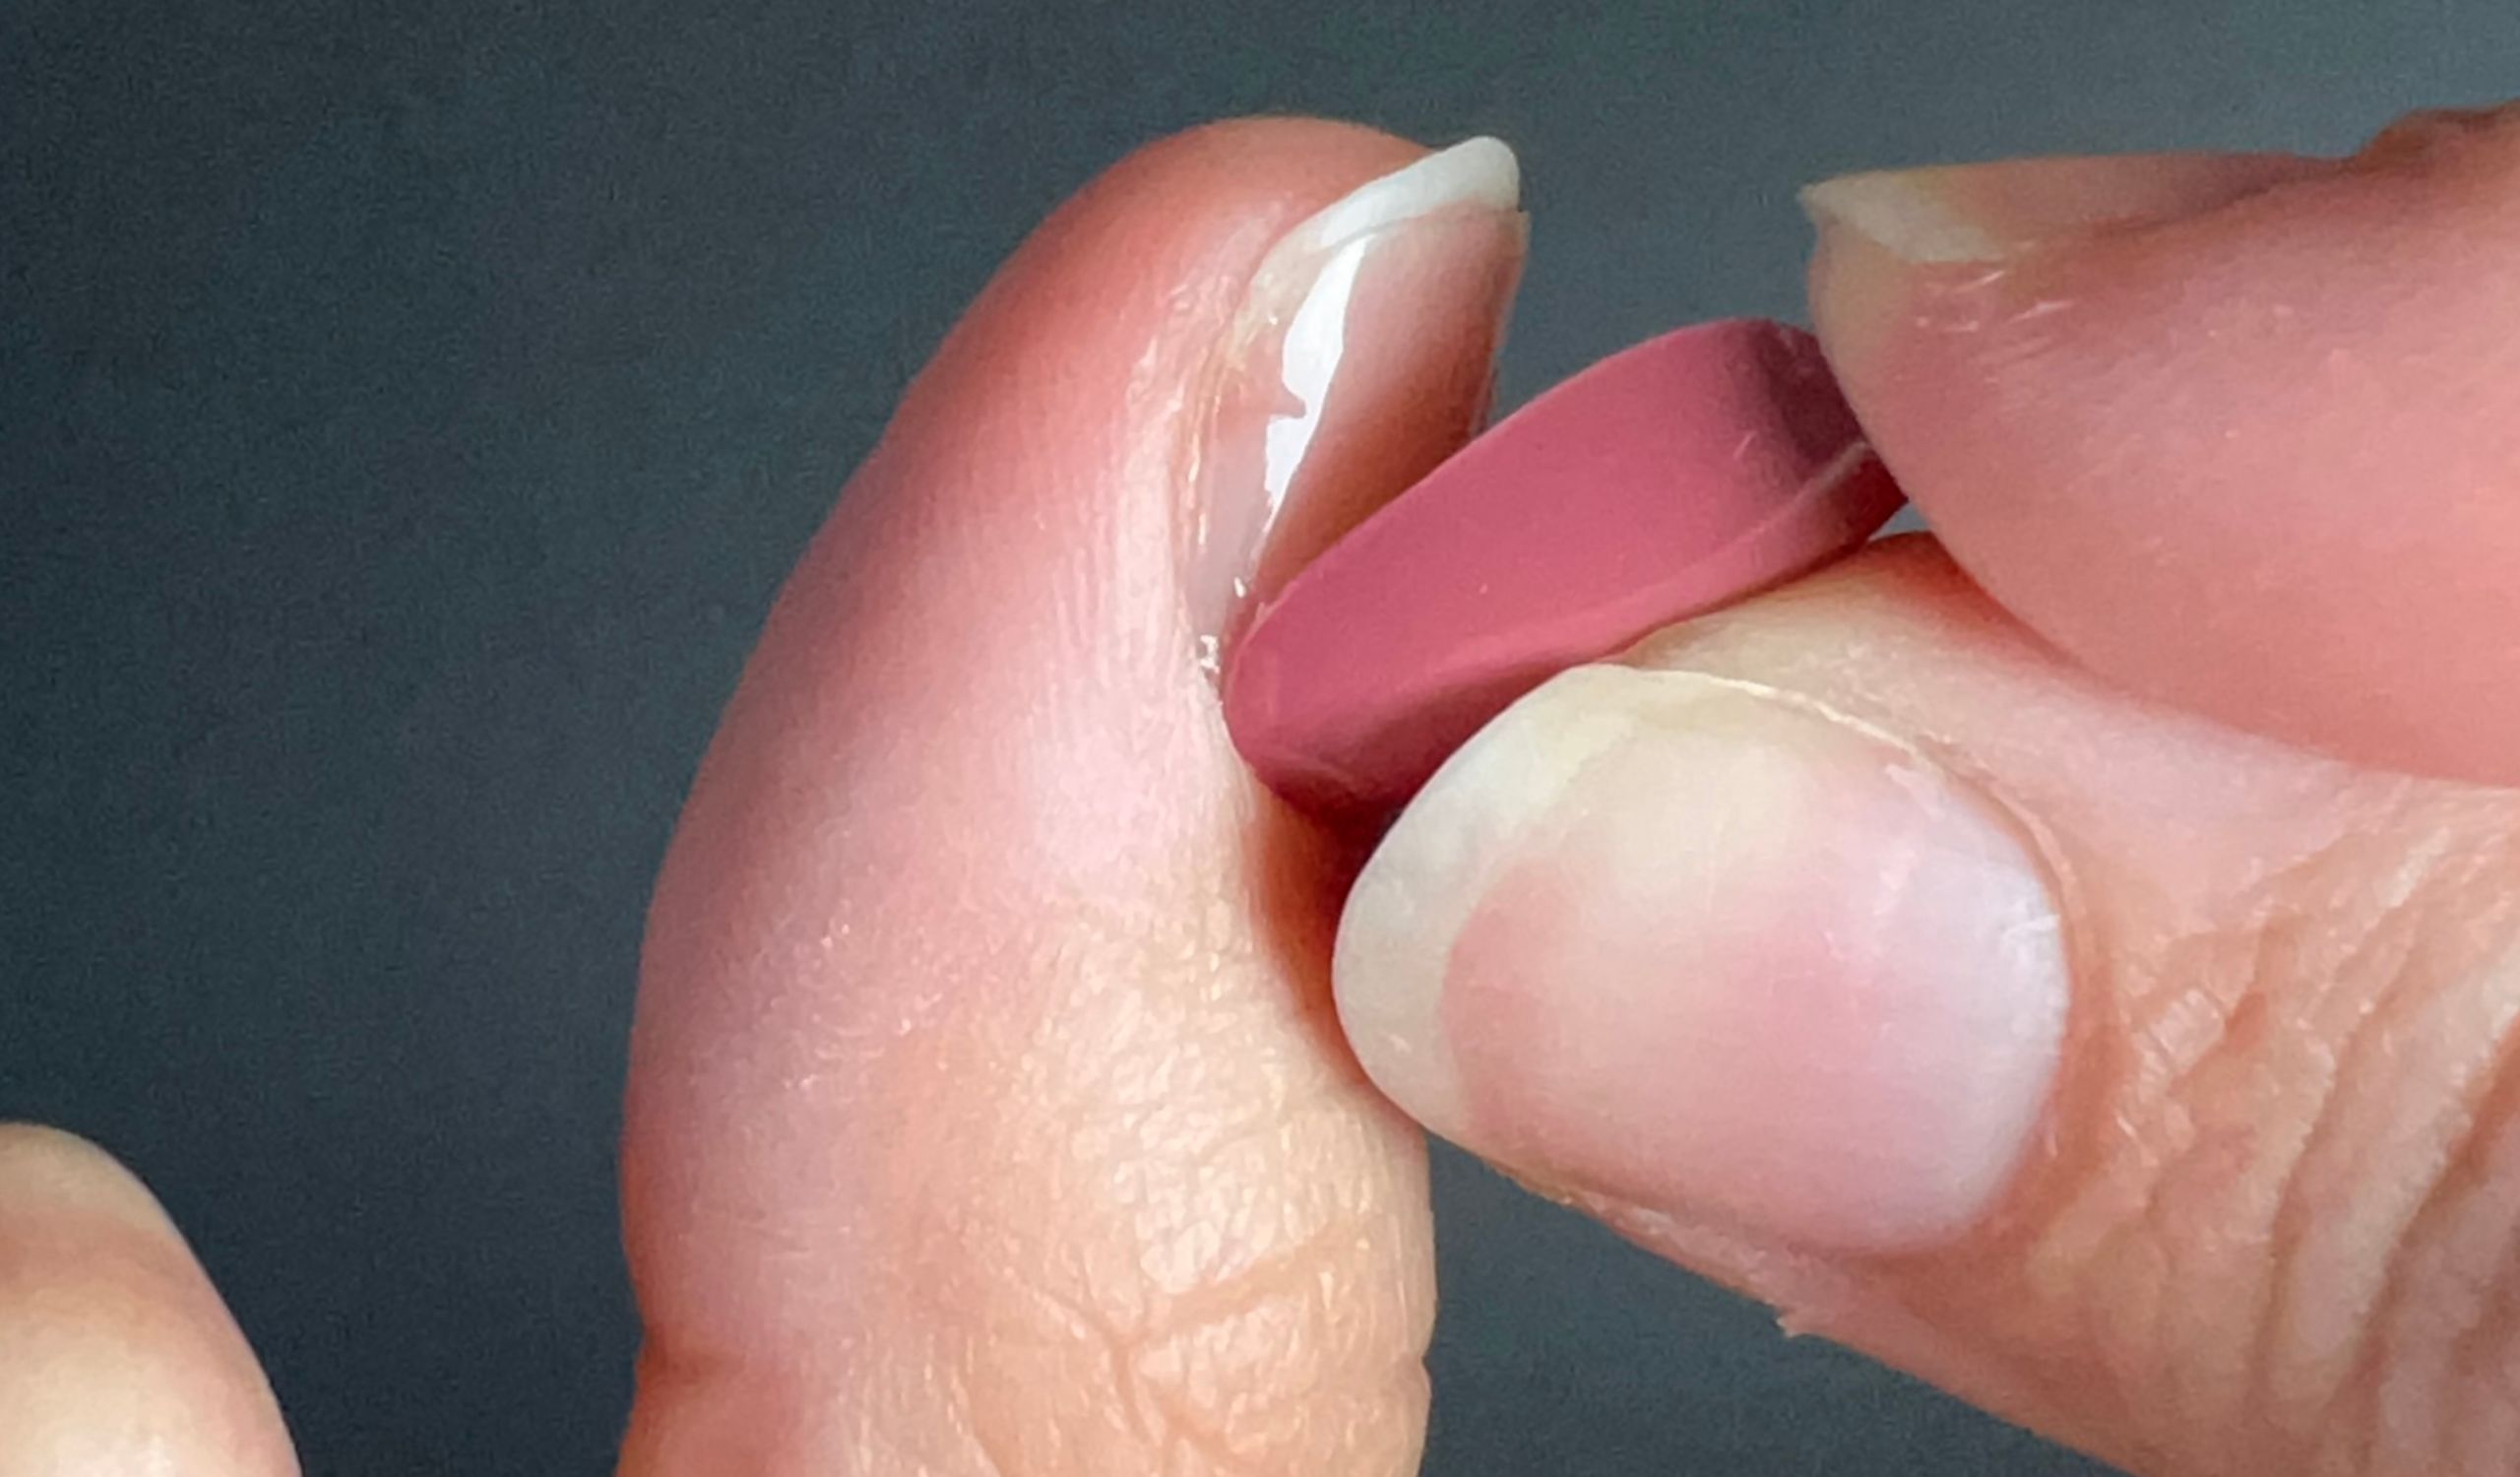
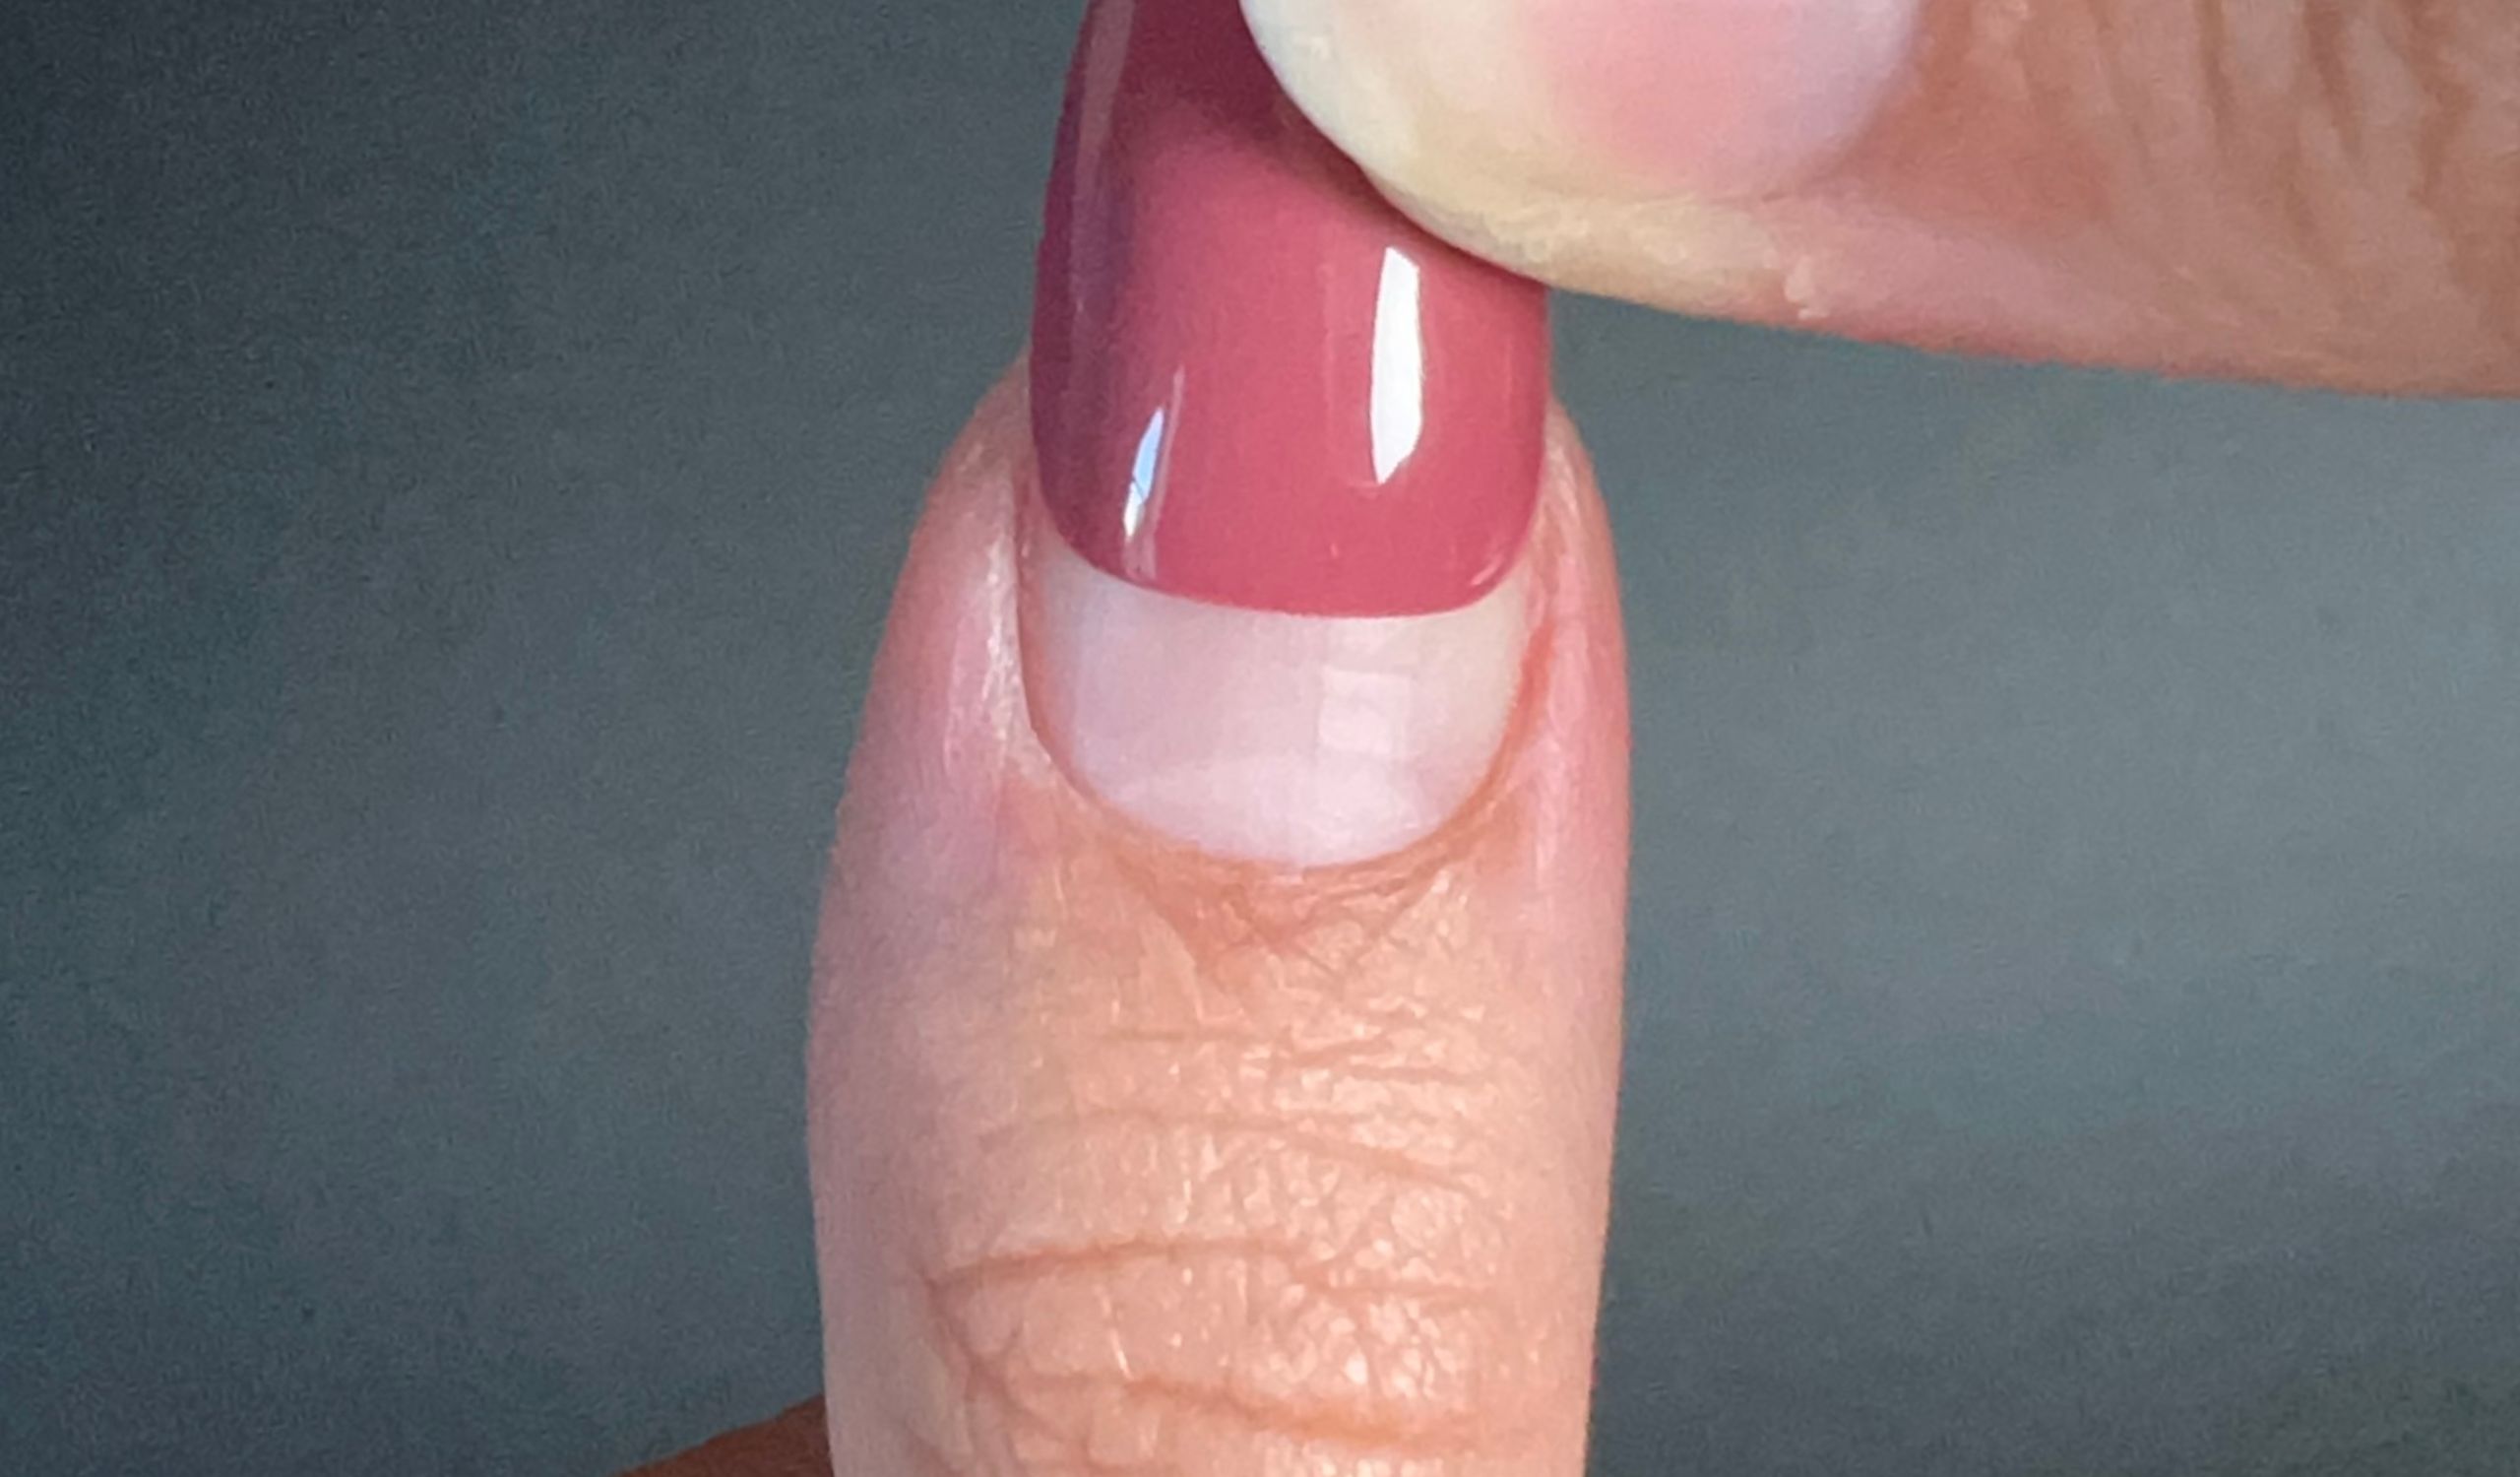
Step 9: Place the capsule
Place the capsule slightly under your cuticles then press it onto your nail slowly from bottom to top, pressing firmly.
-
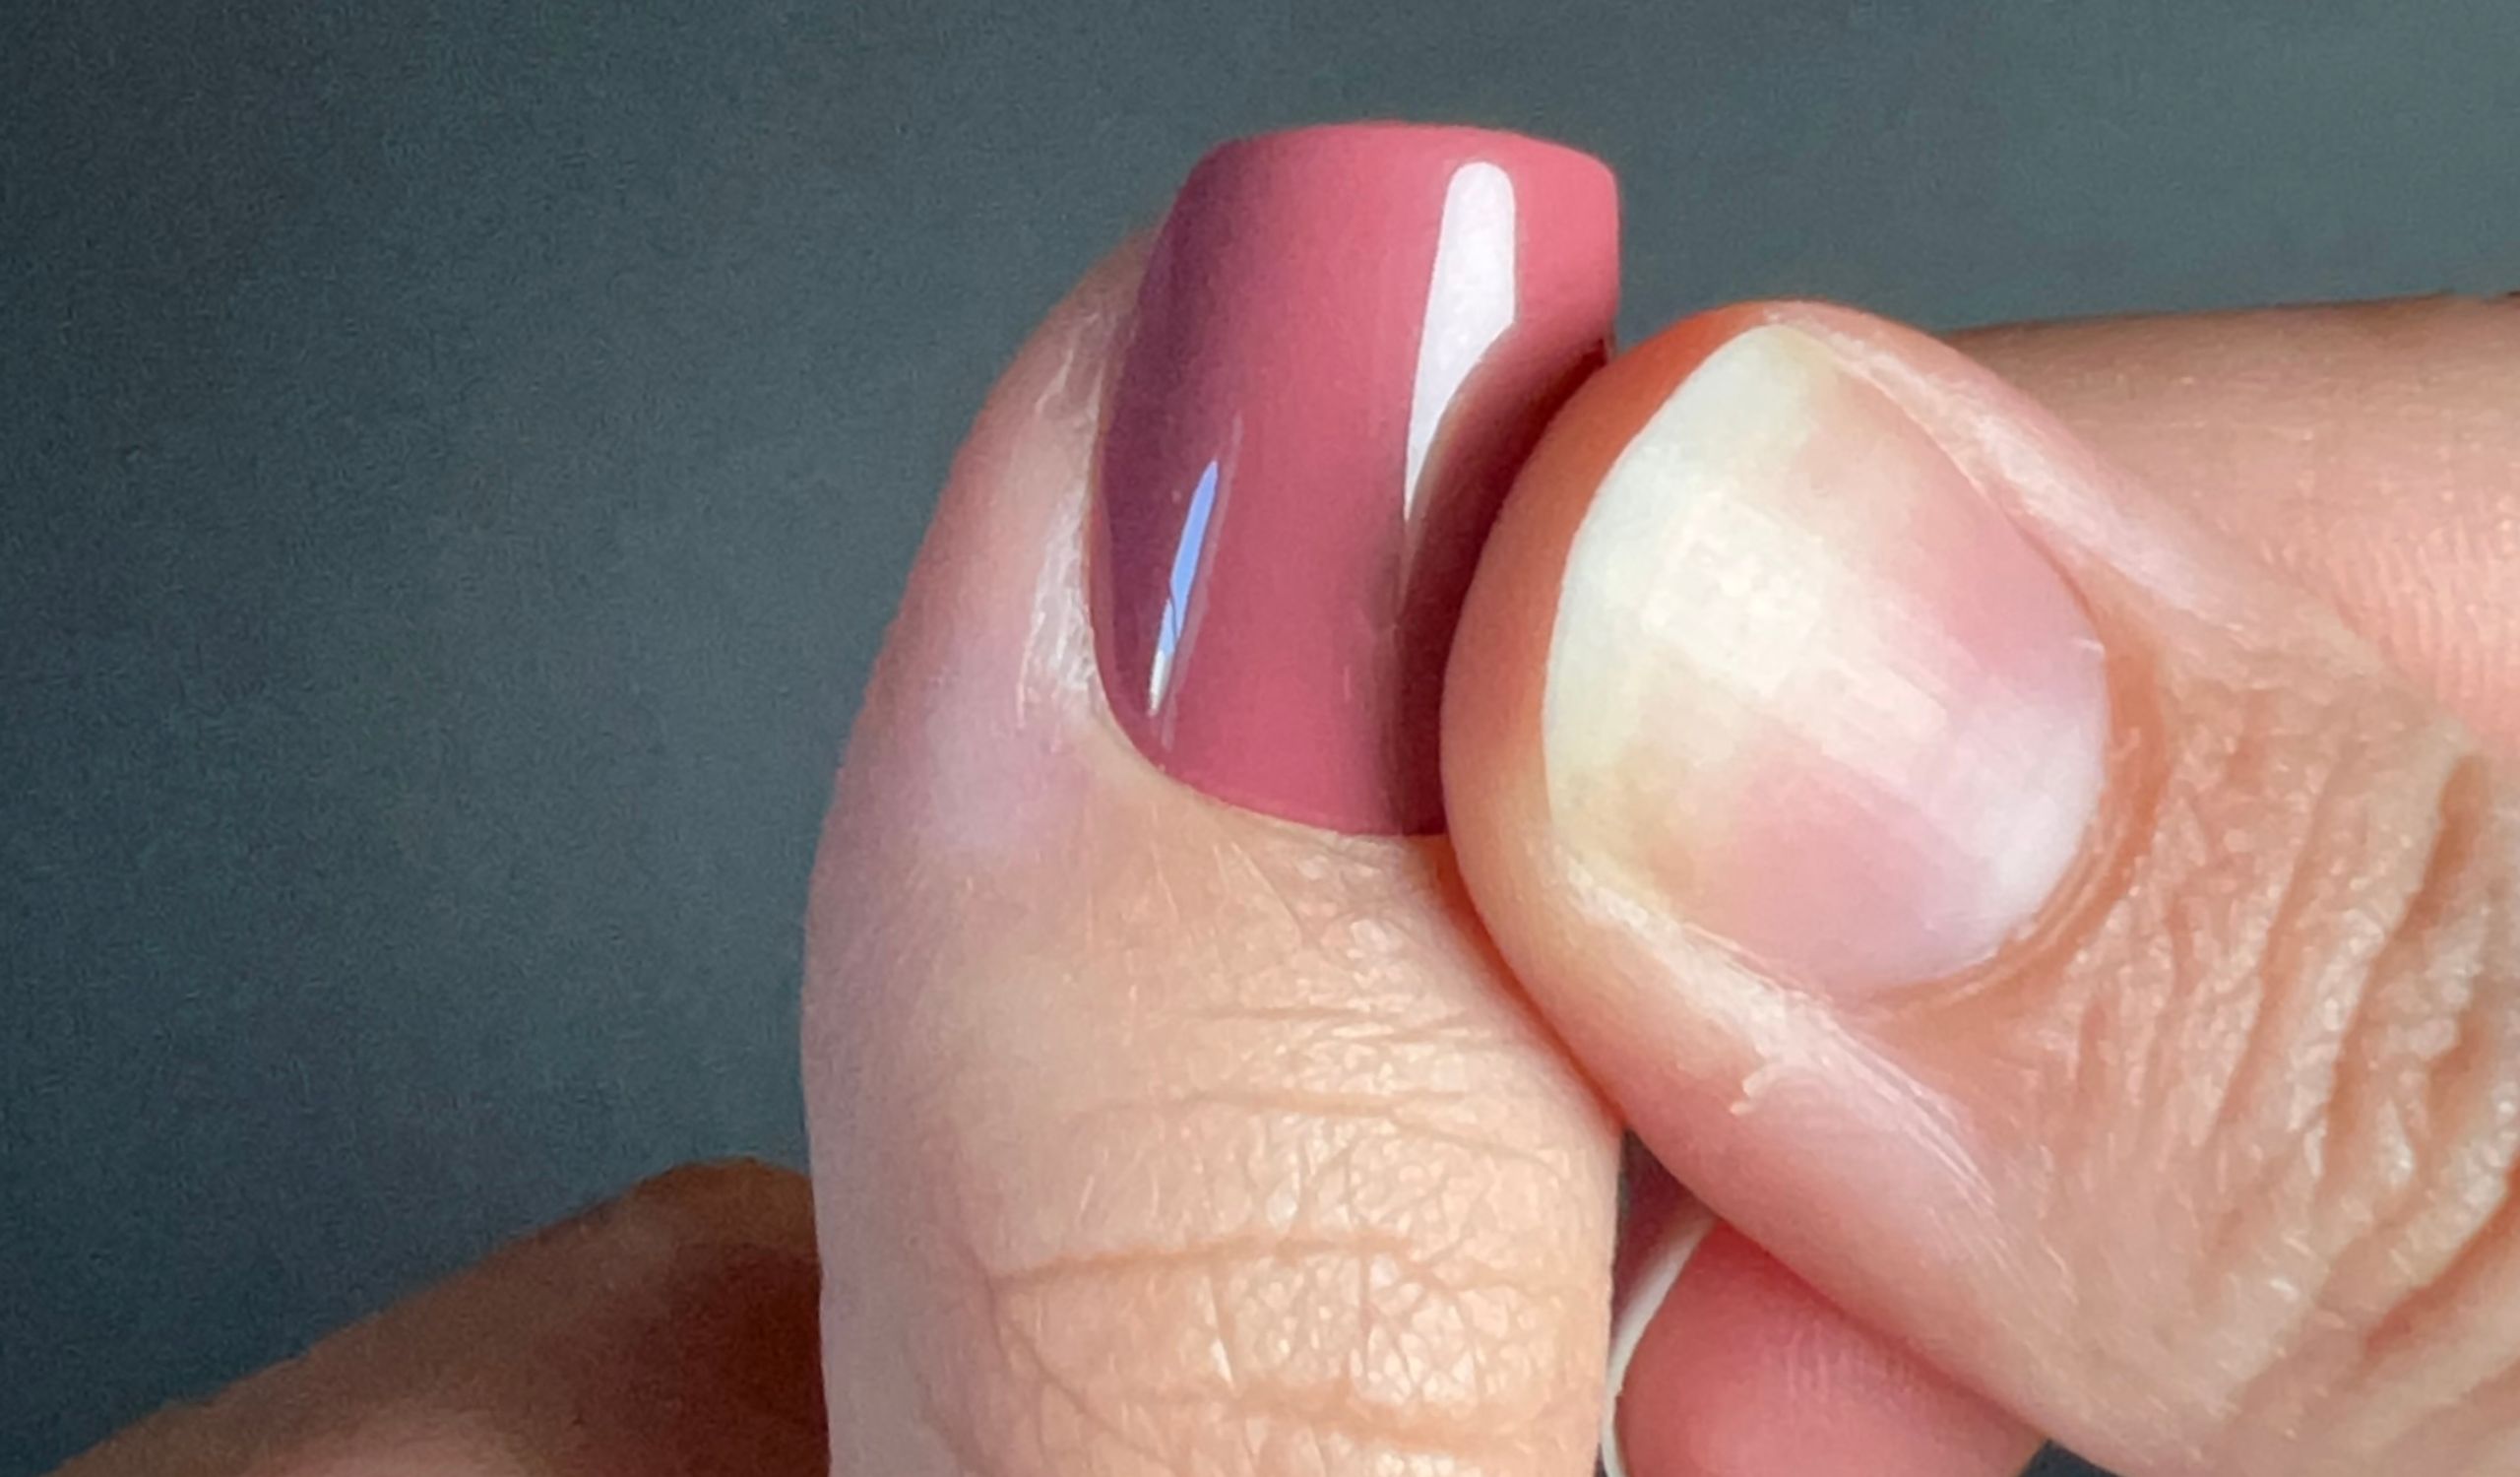
Step 10: Massage the capsule
Then massage the nail from top to bottom, pressing firmly to make the capsule adhere and remove any air bubbles.


Removal with Gel Pads
Video tutorial

Step details
-
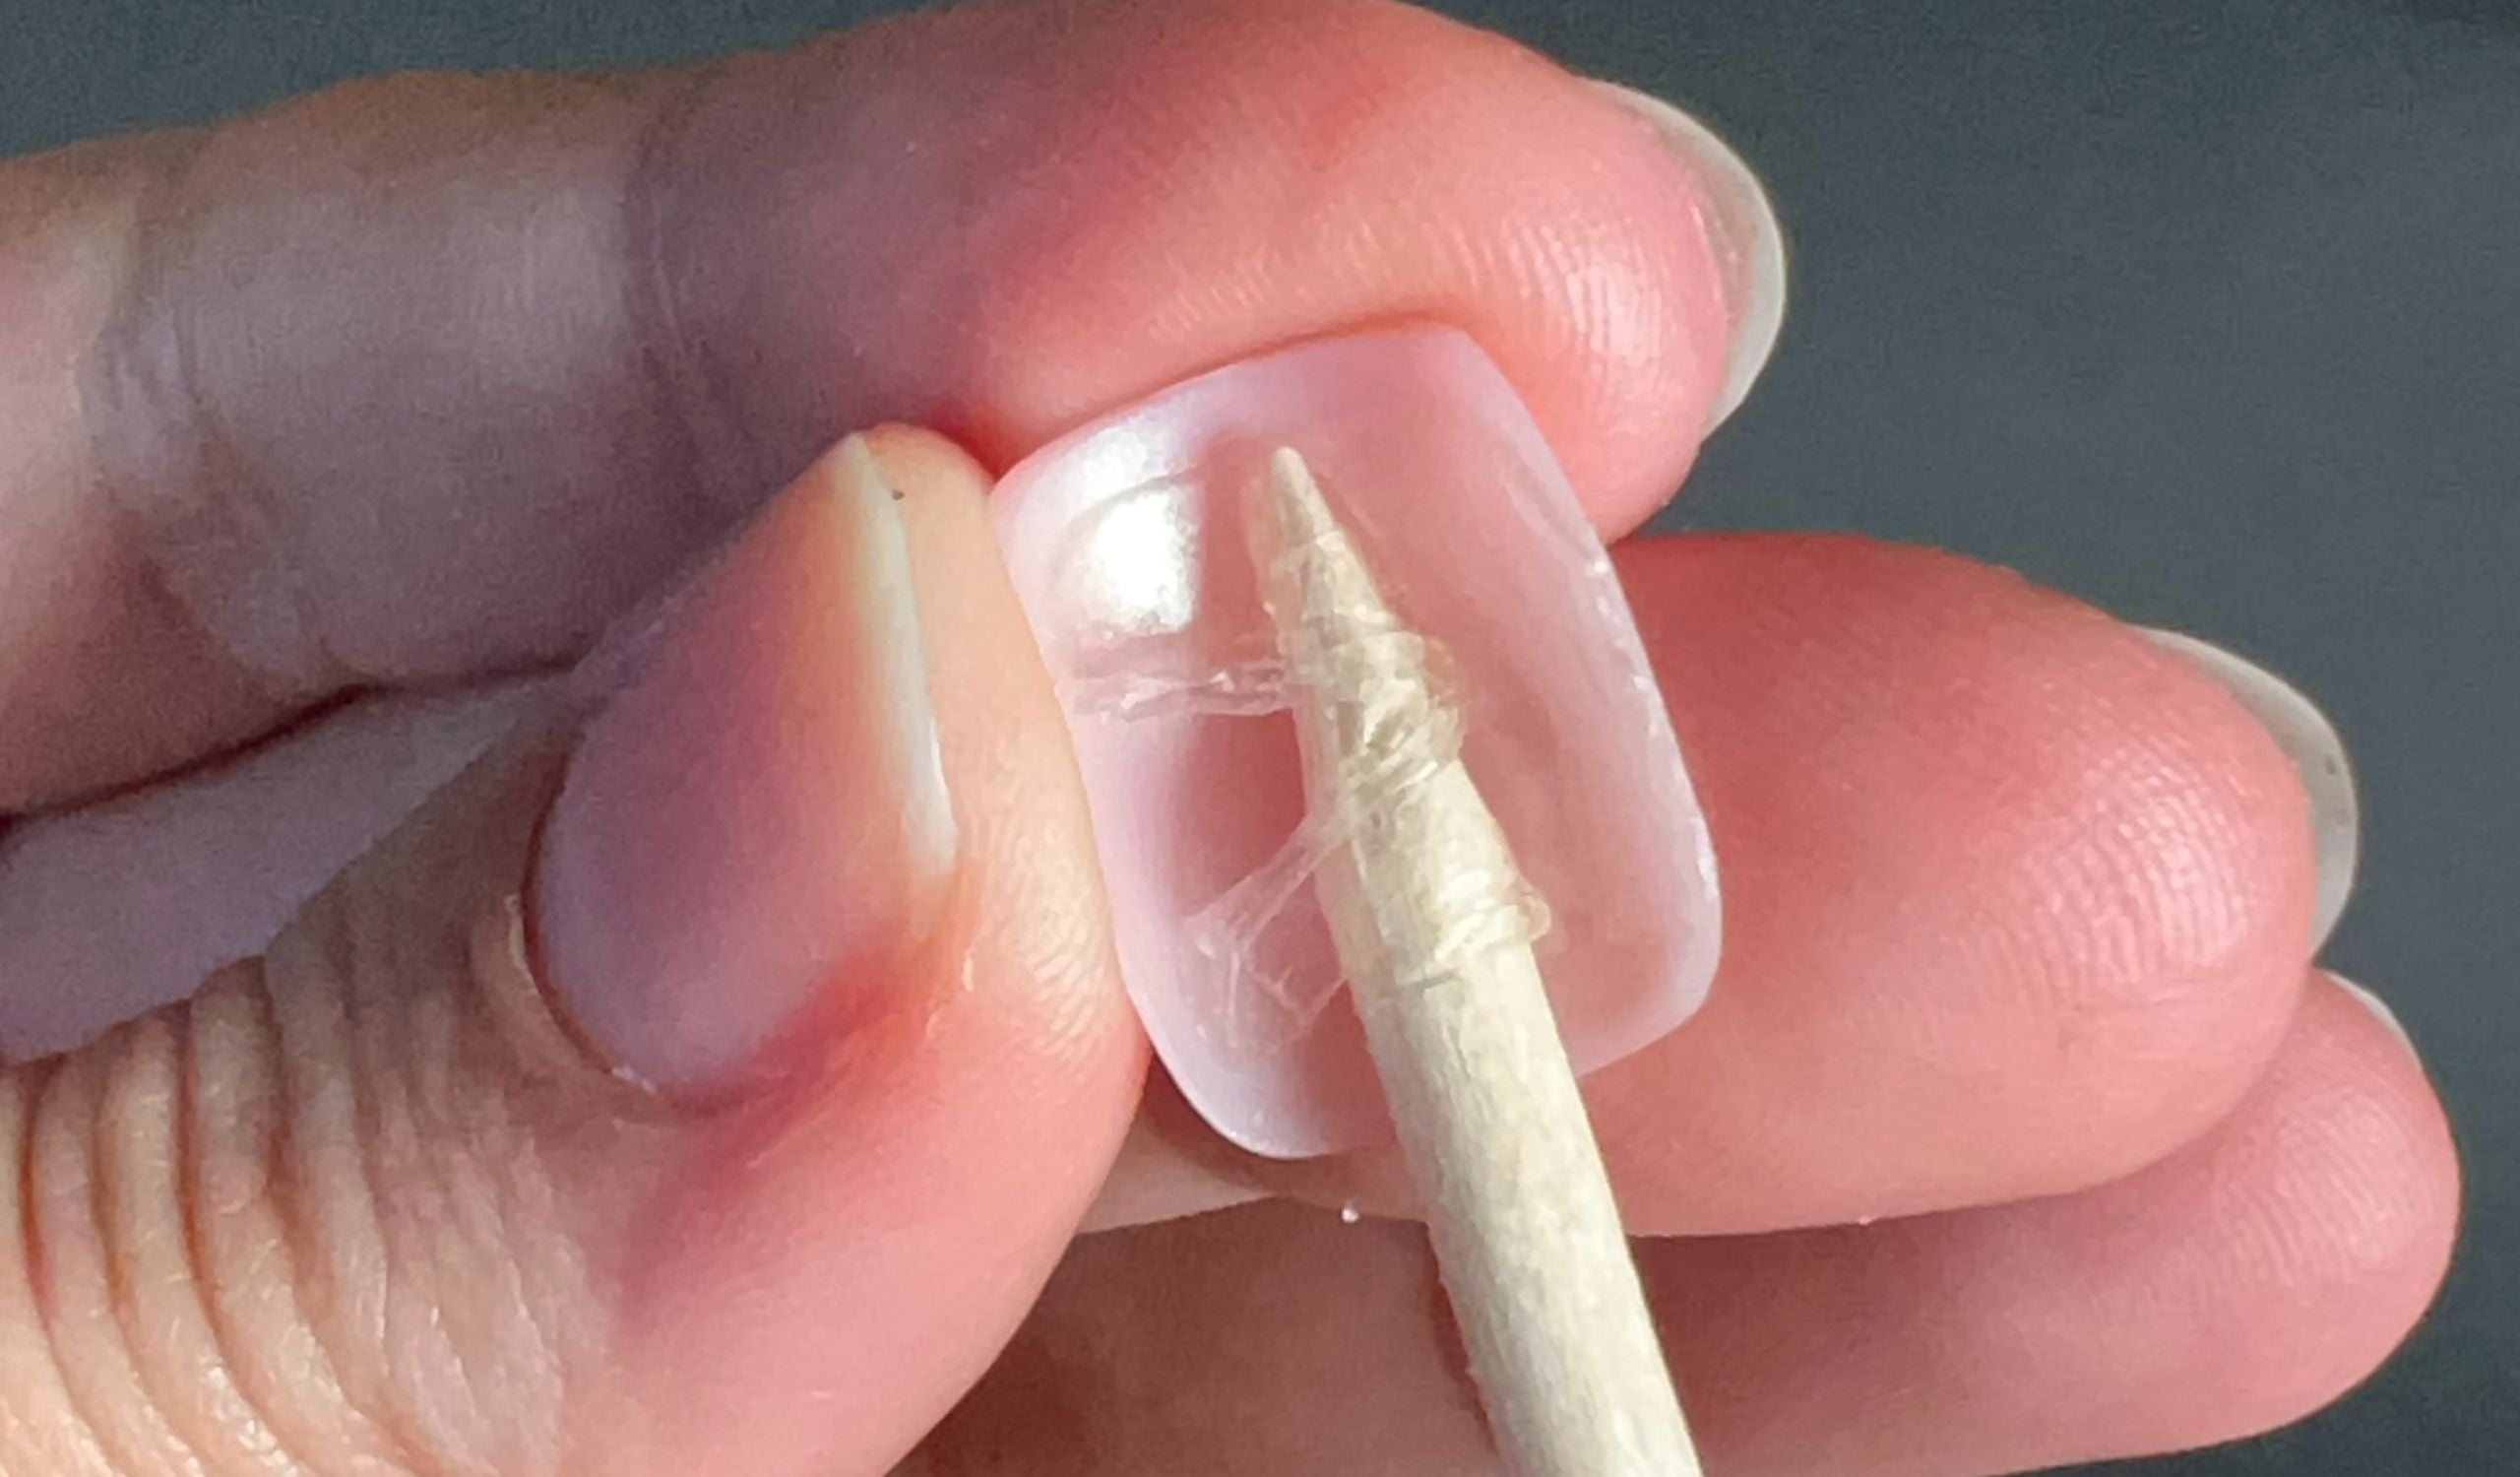
Step 1: Remove the capsule with the flat side of the stick
Gently slide the stick under the capsule to push the Gel Pad. Start on one side, then the other if the capsule doesn't come off. Be careful not to use leverage with the stick as this could damage the capsule.
-
Step 2: Remove the Gel Pads with the pointed side of the stick
To remove the Gel Pads from your nails and/or the capsules, insert the tip of the stick into the Gel Pad then turn it while pressing.
-
Step 3: Wash the capsules with soap
If the removed capsules are dirty or greasy, wash them with soap and rinse them well, taking care not to block your sink! Then dry them one by one with a clean towel.
-
Step 4: Store the capsules in the box
And there you have it, your false nails are ready to be used again! Store the capsules in their box for next time.


Installation with Liquid Glue
Step details
-
Step 1: Prepare your nails
The different stages of nail preparation are exactly the same as for applying Gel Pads. Reproduce steps 1 to 5 of the “Installation with Gel Pads” section above.
-
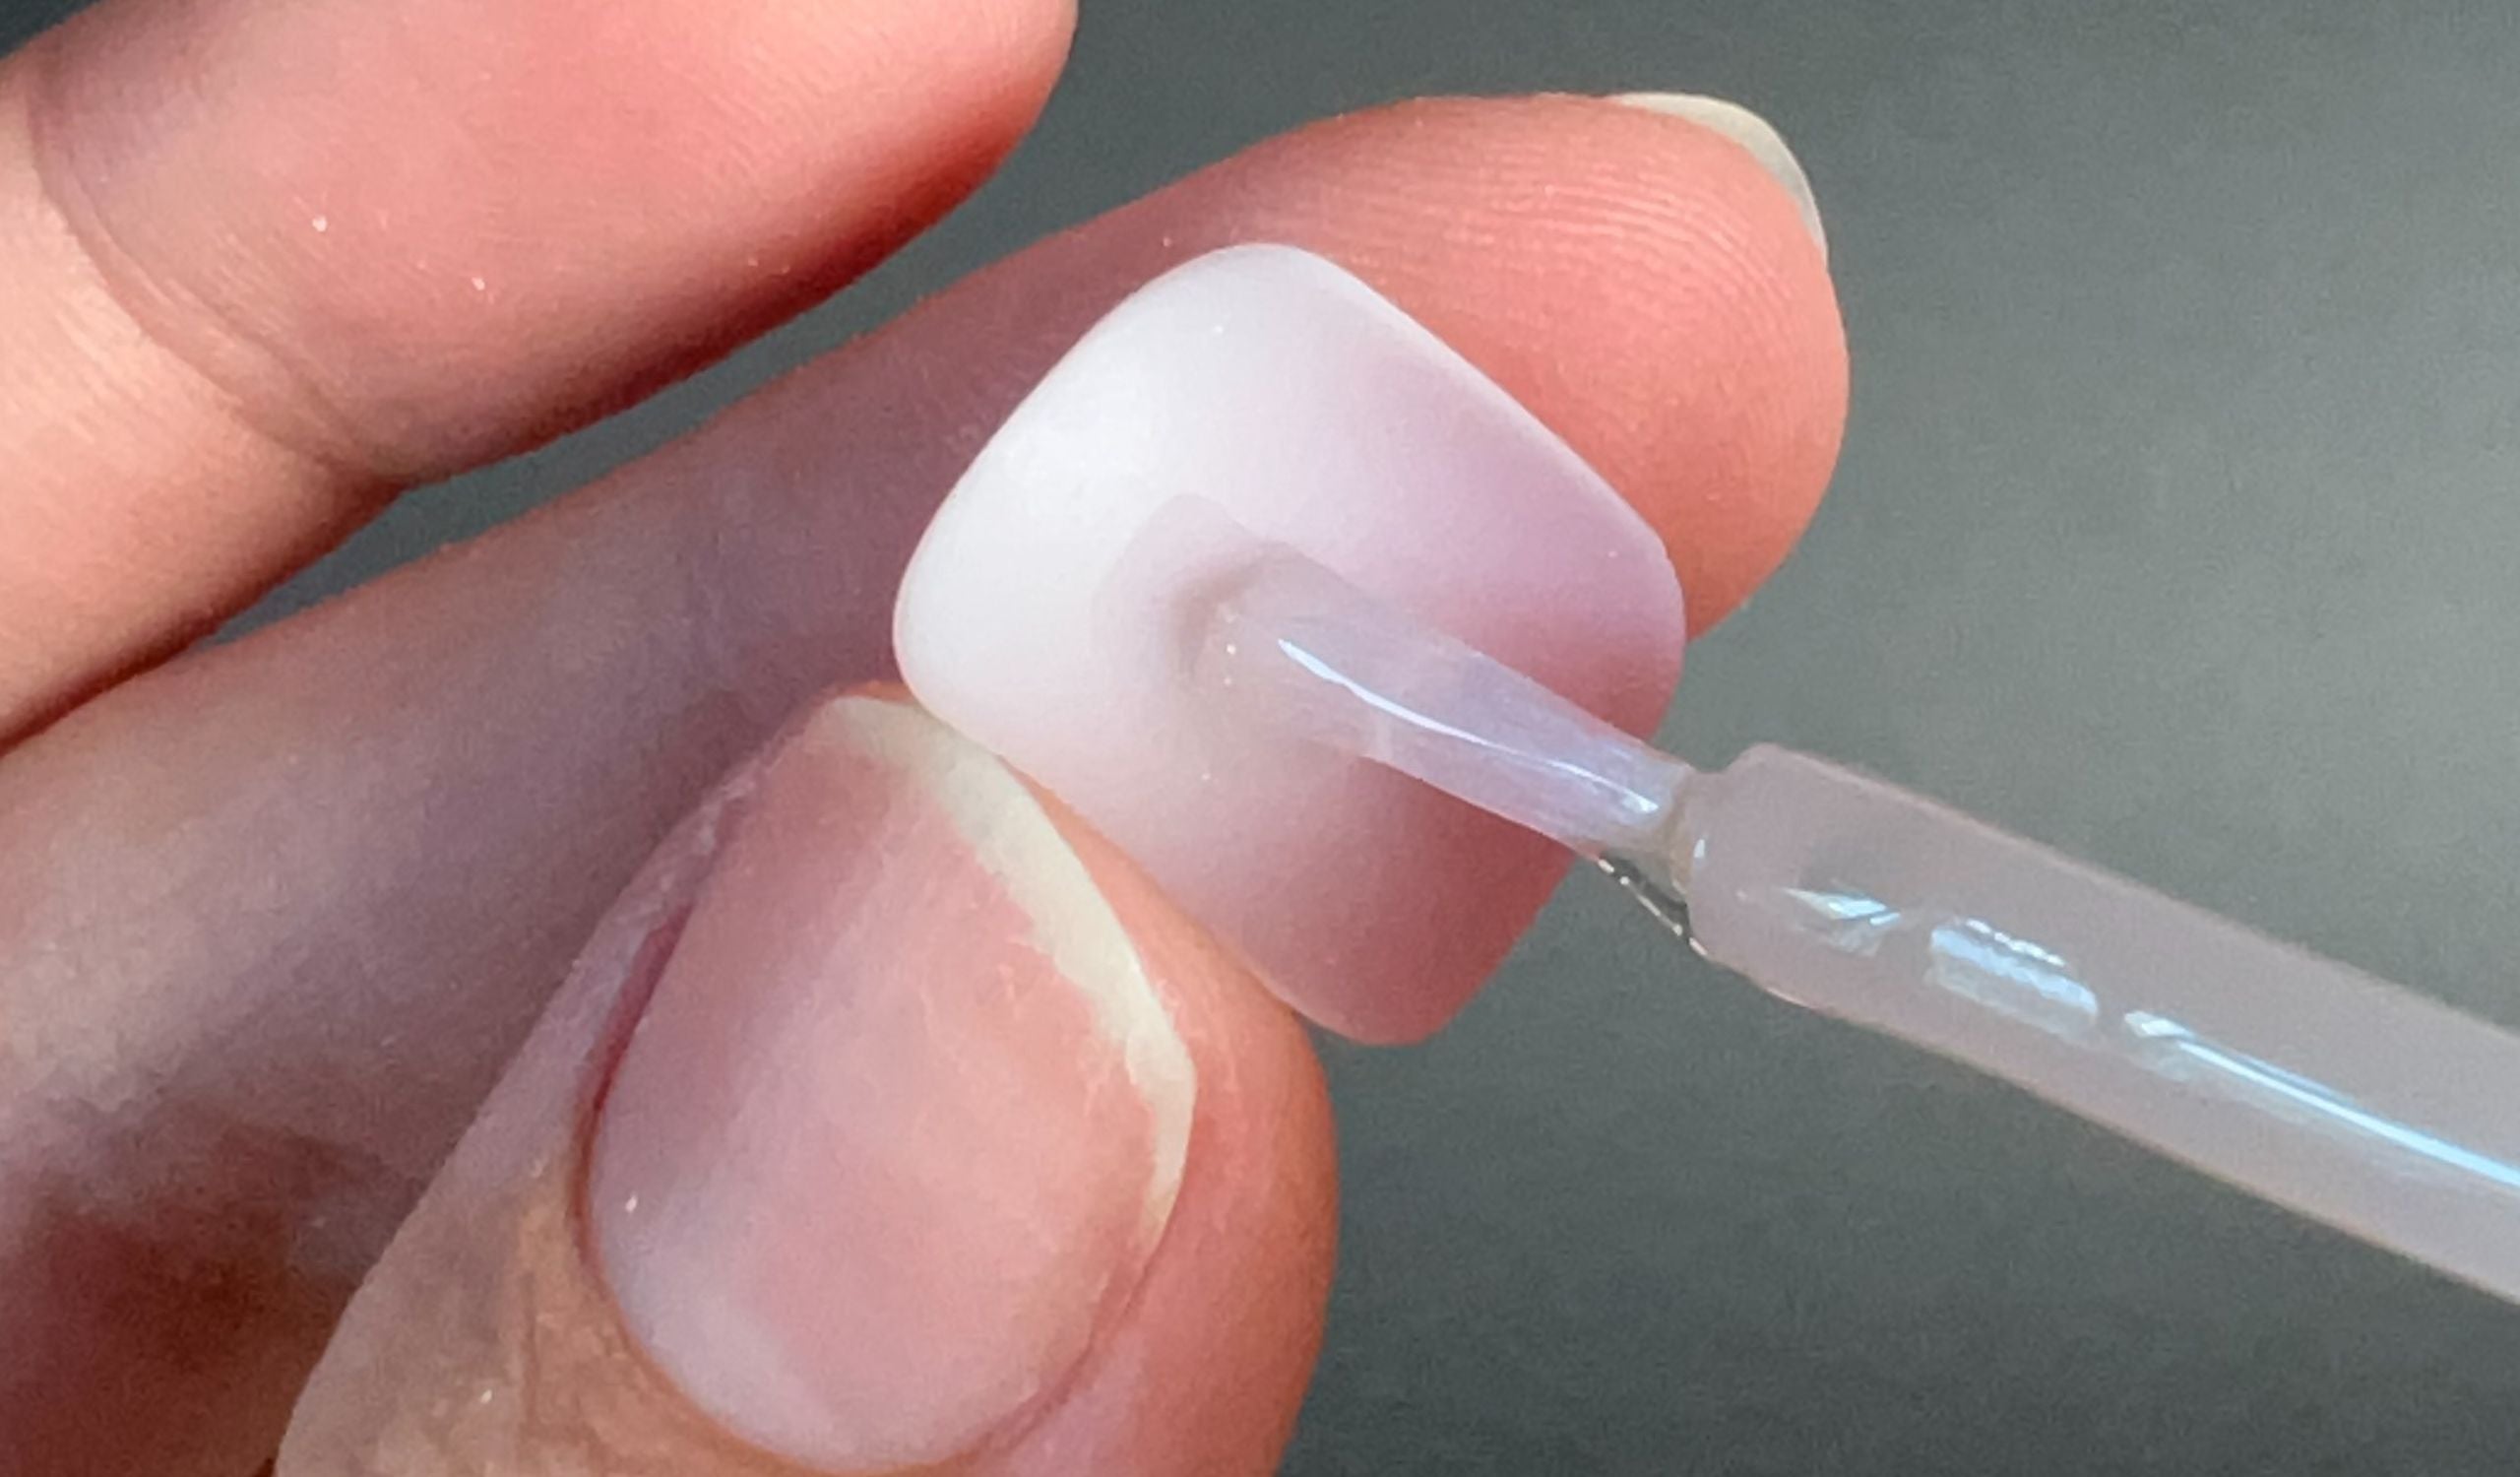
Step 2: Apply Glue to the Capsule
Using the applicator brush of your Brush-on Nail Glue, apply a generous amount of glue to the part of the capsule that you will stick to your nail. Optional: for an even stronger hold, apply a little glue to your natural nail.
-
Step 3: Place the capsule
Place the capsule slightly under your cuticles then press it onto your nail slowly from bottom to top. Once completely placed on your nail, hold it in this position.
-
Step 4: Hold the capsule for 20 seconds
While the glue dries and the capsule sticks, hold it for about 20 seconds then gently release it.


Removal with Liquid Glue
Step details
-
Step 1: Dip your hands in warm water
In a container, pour hot water (bath temperature), soap and sunflower oil. Let your hands soak in it for 10-15 minutes.
-

Step 2: Little by little insert the stick under the capsule
Gently slide the flat side of the wooden stick under one side of the capsule to gradually peel it off. Repeat on the other side. To avoid damaging your nails, this step must be done delicately and without haste. Re-apply a little oil if removal is too difficult.
-
Step 3: Buff away glue residue from your nails
Using the mini file, buff away any dried glue residue on your natural nails. The affected surfaces are easily identified because they are smoother and shiny than the natural nail.
-
Step 4: Polish off glue residue from under the capsules
Still using the mini-file - which you can cut in half lengthwise if necessary - polish off the dried glue residue under the capsules so that you can reuse them.
-
Step 5: Apply a little nail polish remover under the capsules
To make the surface smooth and remove the last layers of glue, run a cotton swab dipped in nail polish remover under the capsules in areas where glue remains. The acetone present in the nail polish remover will melt these last residues.
-
Step 6: Store the capsules in the box
And there you have it, your false nails are ready to be used again! Store the capsules in their box for next time.


